Hello Crafty Friends and welcome! I have four cards for you today, all using Spellbinders Stitched Card Front, Border and Flower Die set. This is a die set I got when I joined the Large Die of the Month Club through Spellbinders. This unique die set comes with everything you need to create gorgeous embroidered card fronts!
Tuesday, April 30, 2024
Four Cards using Spellbinders Stitched Card Front, Border and Flower Die
Monday, April 22, 2024
Sending Sunshine Birthday Card
Hello Crafty Friends and welcome!! My card for you today was created using Karen Burniston's Spinner Square Pop-Up. I made this card for Craft Roulette. Here were the parameters for this weeks card:
- Project - Good Tidings
- Color - Summer Colors
- Element - Mechanics/Mechanical
- Random - Tie Closed
- Spinner Square Pop-Up
- Safari Animals
- Beach Elements
- Tropical Scene
- Beach Charms
- Sea Animals
- Beach Boarders
- Word Set 6 - Summer
- Word Set 14 - Hugs
- Beach Bar Tiny House Add-On
- Palm Tree Pop-Up
- Lineco Neutral pH Glue
- Fine Tip Bottle

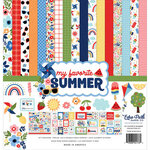
Echo Park - My Favorite Summer Collection - 12 x 12 Collection Kit

Scrapbook.com - Clear Double Sided Adhesive Roll - 1/4 Inch x 81 Feet - Permanent - 1 Roll

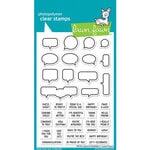
Lawn Fawn - Clear Photopolymer Stamps - All The Speech Bubbles
Monday, April 15, 2024
You're the G.O.A.T - Fathers Day Card using Lawn Fawn's You Goat This
Hello Crafty Friends and welcome. My card for you today was created for Craft Roulette. This week was a bit challenging, but I finally did come up with an idea. For this card, I used Lawn Fawn's You Goat This die set, along with Lawn Fawn's Magic Iris Camera Add-On and Magic Spring Messages.
The parameters this week were:
- Project: Include Action
- Color: Northern Lights
- Element: Blackboard(s)
- Random: Oval
Friday, April 12, 2024
Mothers Day Hydrangea Cards - Honey Bee Stamps Lovely Layers Dies
Hello Crafty Friends and Welcome! I have two cards for you today, as well as a how to video! I used Honey Bee Stamps Lovely Layers - Hydrangea die set to create two beautiful Mothers Day cards. Both card use Distress Oxide Ink to create this flowers.
For the first card, I started with an A2 sized card base using Neenah Classic Crest 110lb heavy weight cardstock. I then die cut a rectangle using MFT - A2 Stitched Rectangles STAX in the largest size from a light blue cardstock. I die cut another rectangle using the same die set, only one size smaller rectangle and smooth white cardstock. I embossed this smaller rectangle, using a flourish embossing plate from Cuttlebug.
I die cut all the pieces needed for my hydrangea from heavy weight smooth white cardstock. I used heavy weight cardstock, because I was going to be adding a lot of Distress Ink and wanted the paper to hold up. Once all the pieces are glued together it's thick but very durable.
I began by adding Distress Oxide Ink in Tumbled Glass, then added Salty Ocean and some Shaded Lilac. For some of the flowers, I added a yellow centre using Squeezed Lemonade. I have posted the how to video for these flowers at the bottom of this post.
I then used Distress Oxide Ink in Mowed Lawn and Rustic Wilderness to color the leaves. Once I had everything colored, I glued the flower together using Lineco Neutral pH glue.
I stamped the Mom sentiment using Simon Says Stamps Sassy Mama stamp, with VersaMark ink and gold embossing powder. Then I stamped the "You are Loved" sentiment from MFT - More Essential Sentiments using VersaMark ink and white embossing powder. I glued everything down on the card base. Lastly, I added some white Stickles glitter gel to the yellow flower centres.
For my second Hydrangea card, I went with a pink and white hydrangea flower. For this card, I started with an A2 card base using Neenah Classic Crest 110lb heavy weight cardstock. I then cut a rectangle from glitter gold cardstock. I found this great woodgrain patterned paper in my stash and used it for the background on this card.
I die cut the pieces of the hydrangea flower from smooth white heavy weight cardstock. Then I used Distress Oxide Ink in Spun Sugar and Picked Raspberry to create this flower. I colored the leaves the same as my first card using Mowed Lawn and Rustic Wilderness Distress Oxide Ink.
For this card, I die cut the word Mother from Karen Burniston's "Happy Mothers Day" die and trimmed the Happy and Day from it. I cut this twice, once from gold glitter cardstock and once from black cardstock, then glued the pieces together to give the word some dimension and stability. Then I stamped the sentiments "happy" and "day" from MFT - Essential Sentiments stamp set, using VersaMark ink and white embossing powder.
I glued everything together using Lineco Neutral pH glue. I just love Honey Bee Stamps Lovely Layers flower dies. They go together very well and they are easy to work with. They turn out so beautifully every time. I highly recommend them. Be sure to check out the how to video below and subscribe to my channel, I post a new video every Thursday! Thank you so much for stopping by and Happy Crafting!
Tuesday, April 9, 2024
Two Different Cards, One Die Set
Hello Crafty Friends and Welcome! I have two cards for you today, using one die set. I recently purchased Spellbinders Windows With a View Bundle and have been playing with the Coastal Escape View die set. I created two different cards, one underwater and one a view of a tropical island.
This is probably the best bundle of dies that I have ever purchased. I can't wait to create more cards using the Window With a View dies.
I started with making the under water card. I began with an A2 sized card base, using Neenah Classic Crest 110lb cardstock. I then used a stripped blue patterned paper as a background. I thought this looked almost like pool tile.
I then die cut the port hole using gray cardstock and a mirrored silver cardstock. I also die cut a circle using the largest circle die in this die set and acetate.
I used the port hole die and cut the inner circle out from smooth white cardstock. I used this to create the underwater background. I used Distress Oxide ink in Tumbled Glass, Salty Ocean and Chipped Sapphire.Monday, April 8, 2024
Tri-Fold Twist Flower Pop-Up Card
Hello Crafty Friends and Welcome! My card today was created for Craft Roulette. It's been quite a while since I played along with Craft Roulette, but I finally had some free time to join in the fun. The parameters this week were:
- Project - Tri-Fold Card
- Color - Sleigh Ride
- Element - Joke(s) or Funny
- Random - Out of Proportion
This is such a cool card and I just love the pop-up surprise in the inside of the card.
I also love the funny sentiment on this card. This is going to be my Mom's Mother's Day card and I think she will think it's beautiful and hilarious.
Thank you so much for stopping by and Happy Crafting!
Tuesday, April 2, 2024
Karen Burniston Designer Challenge - April 2024 - Thirst Quencher!
Hello Crafty Friends and Welcome! It's the beginning of April and that means it's Designer Challenge time. Our theme this month is "Thirst Quencher". For my card, I used the Tea and Coffee Pop-Up to create a beer stein pop-up! Nothing beats an ice cold beer on a hot summer day!
For this card, I started with an A2 sized top fold card using Neenah Classic Crest 110lb heavy weight cardstock. I dug through my patterned paper stack and found this perfect dark blue paper with light blue polka dots to use as my background. Then I found some great balloon paper in my scraps and used that for the border on the top and bottom.
I used Karen Burniston's Border Blends - Party die to create a yellow fancy border between the two patterned papers.
I die cut the mug from the same heavy weight smooth white cardstock as the card base. Then I taped off the areas of the beer stein that are just glass. I used Distress Oxide Ink in Squeezed Lemonade, Mustard Seed and Rusty Hinge to create the beer in my stein. I then sprayed it with a little water and dabbed it off.
I then used my Copic markers to create the glass areas of my beer stein. I was careful not to go into my inked beer area.
I used Karen Burniston's Landscape Scene tree/cloud dies to make the foam on the top of the beer. Once I had the pieces glued on, I went over them with Nuvo Crystal Drops in white to create the beer foam. Then I used Glossy Accents to add water droplets down my stein.
I used Karen Burniston's Word Set 2 - Birthday Die Set to add the Happy Birthday sentiment. I also used Karen Burniston's Lorna Label add on to add a place to sign the card.
For the front of the card, I used the same paper theme, this time adding a yellow Lorna Label. I then used Karen Burniston's Mini Alphabet and Numbers and die cut the word "Cheers". I die cut this twice, once from black cardstock and once from white glitter cardstock, then glued them together to make the sentiment pop! I added the "to you" from the same Word Set 2 as the inside of the card.
How cool is that beer stein!! I really love how it turned out. Thank you so much for stopping by today and Happy Crafting!
Weekly Blind Challenge - Karen Burniston's Tiny Trees Pop-Up!
Hello Crafty Friends and welcome! I'm back with another Weekly Blind Challenge and this week I picked two dies that couldn't be mo...

-
Hello and welcome! On my blog today is this fantastic pop-up card box! Karen Burniston recently added some templates to her online store th...
-
Hi Crafty Friends, Welcome to our Karen Burniston Products - KB Riley LLC September Release Blog Hop. The Design Team have come together w...


