Monday, July 31, 2023

Craft Roulette Challenge - First Submission!

 Hello Crafty Friends and welcome! Today's card was created for the Craft Roulette YouTube channel. In case you don't know what Craft Roulette is, it's a great channel on YouTube that features someone who makes cards, or perhaps own a business that makes things that can be used in card making and they make a card based on what the wheel says! Check it out on Friday evenings for more details. 

This past Friday's challenge was to make a card using the following four themes. 

1. Circle

2. Wizard of Oz

3. On the Road

4. Add Wings

As soon as I seen "On the Road" I immediately thought of this great stamp set I got from My Favorite Things ages ago called "Fast Track Friends". So with that, I created this card for the Craft Roulette Challenge. 


 For this card, I started with a A2 sized card using smooth black heavy weight cardstock. Then I die cut a rectangle from smooth white cardstock. I added a piece of removable tape to create a horizon line. Then with the MFT - Ray of Light stencil and Simon Says Stamp Pawsitively Saturated Ink in Lemonade, I created the sunny background. 

I removed the tape and moved it up so I could work on the grass area. I covered the entire area with Distress Oxide Ink in Mowed Lawn, then I used MFT - Grassy Edges Stencil to create areas of grass throughout the background. 

Once I had the background done and dried, I die cut the road that I believe was an add-on to the Fast Track Friends stamp set, from smooth black cardstock and white cardstock. Then I trimmed the road to fit to the horizon line to the bottom of the card. Once I had the road where I wanted it and glued down, I added the white lines in the middle of the road. 

From there, I stamped the sentiment "Racing to Wish You a Happy Birthday" from the stamp set using Lawn Fawn's Jet Black ink. 

I stamped all my images using the same ink and colored them in with Copic markers. I die cut them all except the red race card. I added wings to the back of the racecar, which came from MFT - Magical Unicorns stamp set. I used masking paper to do this. Then I fussy cut the car out. 

I added all my images to the front of the card using Lineco Neutral pH glue. I then added little red circles of Stickles in Christmas Red. This was an idea from my daughter to look like a field of poppies just like in the Wizard of Oz. I also tried to used colors, like emerald, ruby red and yellow to represent the Wizard of Oz theme. 

This was a fun challenge and I look forward to do the upcoming challenge this Friday. Thank you so much for stopping by and Happy Crafting!

Wednesday, July 26, 2023

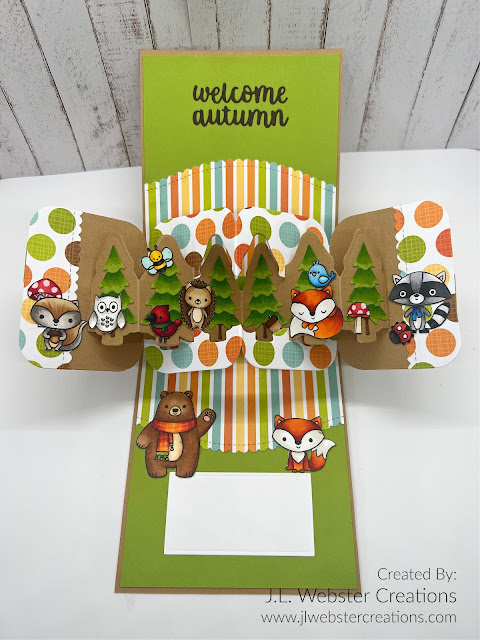
Welcome Autumn Card!

 Hello Crafty Friends and welcome! My card today features Karen Burniston's Twist Panel Pop-Up as well as the Evergreen Pivot Panel. I also used Doodlebug Designs Forest Friends stamp set. 


For this card, I started with an A2 sized top fold card using kraft cardstock. I cut the inside panel from green cardstock and die cut the twist mechanism. 

I die cut two pieces of patterned paper using MFT - Stitched Basic Edges 2 to give each piece a scalloped edge. 

I die cut the Evergreen Pivot Panel from kraft cardstock and added some patterned paper to the top and bottom of the panel. 

I die cut the trees from the same green cardstock as the insert and used Copic markers to color the trees. 

Then I stamped the images using Lawn Fawn Jet Black ink and colored them in with Copic markers. I didn't have to the coordinating dies for this stamp set, so I had to fussy cut all the images. I added them to the card. 

I die cut a small rectangle from smooth white cardstock for a place to sign the card. 

Lastly, I used Karen Burniston's Word Set 7 - Autumn and die cut the sentiment "welcome autumn". 

I kept the front very simple, using a sticker from the patterned paper pack and the same patterned paper as the inside. 

Thank you so much for stopping by today and Happy Crafting!

Monday, July 24, 2023

Pig Time Fun Birthday Card!

 Hello Crafty Friends and welcome! My card today features My Favorite Things - Pig Time Fun stamp set and coordinating dies. I also used the MFT - Outside the Box die set. 


For the "Outside the Box" card base, I used Hero Arts Nautical cardstock. I added a woodgrain patterned paper to the front and side panels of the pop-up box. 

I used MFT - Outside the Box Waves dienamics to create three wave pieces. I added some detail to the bottom of each wave, using Distress Oxide ink in Salty Ocean. 

I used MFT - Outside the Box Snow Drifts to create a sand piece. I also hand cut a sand area for the background of my pop-up box card. I used Distress Ink in Vintage Photo to add some dimension to the sand. 

I die cut the background from smooth white cardstock, then with the MFT - Mini Clouds Stencil and Peacock Feathers Distress Ink, I created a cloud background. I added the sand ground piece I cut and then glued it down to the card. 

I stamped the Pig Time Fun images using Lawn Fawn Jet Black ink and colored everything using Copic markers. I added gloss lines using a size 10 white Gelly Pen. 

I added my images to the pop-up box card using Lineco Neutral pH glue. Then I cut out a rectangle using red cardstock and a smaller rectangle using smooth white cardstock and with my Misti Stamp tool, stamped the "Holy Ship! It's Your Birthday!" sentiment using Lawn Fawn Jet Black ink. 

For the back of the card, I die cut another back panel using the same wood grain patterned paper. Then using the smaller rectangle in the Outside the Box die set, I cut another piece from smooth white cardstock. 

I stamped the sentiment "Let's Sail-ebrate Together Soon" and glued them to the back of the card. 

I added my third pig to the back, adding the little hat to his head. 

I just love this stamp set. Those little pigs are so adorable! Thank you so much for stopping by and Happy Crafting!

Monday, July 17, 2023

MFT Sketch 654 - Otterly Great Birthday Card

 Hello Crafty Friends and welcome! My card today was created for the My Favorite Things Sketch 654 Challenge. For this card, I made a fun shaker card using the MFT - Otterly Love You stamp set. 

I started with an A2 sized card base using Hero Arts Nautical cardstock. I cut a rectangle out using MFT - A2 Double Stitched Rectangle STAX Dienamics

Then I cut a smaller square out of my double stitched rectangle using MFT - Inside & Out Stitched Square STAX. 

I then cut a square of vellum to use as my window for the shaker card and with double sided adhesive, attached it to the back of the rectangle. 

I then stamped the sentiment "Have an Otterly Great Birthday" on to the front of the rectangle. 

Setting that aside, I die cut another rectangle using the double stitched rectangle dies. I traced out the square area onto the second rectangle and then started stamping my images. 

I used some masking paper to create my scene with the otters. Then I used Distress Oxide ink for the sky and water. I sprayed water on the water area to make it look a little more realistic. 

I added foam tape to the back of the window panel, then added my gems to make my shaker card. I added my imaged background to the front rectangle and then pressed it well to make sure that all the foam tape adhered. 

I used double sided adhesive to add it to my card base. Then gave it a shake (just because!). Thank you so much for stopping by today and Happy Crafting!

Wednesday, July 12, 2023

Backyard Garden Card!

 Hello my Crafty Friends and welcome! Today's card is very special because it was inspired by my best friends beautiful backyard garden. She has a very green thumb and once a week, I go visit her and we sit in my Adirondack chairs in the back and just enjoy her beautiful plants. So, I just had to make a card based on her gardens. 


This card is a larger than normal slim line. Not even sure you could still call it a slim line, but it is 10in wide by 8in folded down the middle for 4in wide sides. I wanted this to be big so I could not only fit two pop-up Adirondack chairs, but also two trees and lots of plants and gardening tools, etc. 

For this card, I used Karen Burniston's Adirondack Chair Pop-Up die. I cut the card base first, from Lawn Fawn's Mermaid cardstock. I used my score board and a bone folder to create the center fold. Then I positioned the Adirondack Chair pop-up die where I wanted the two chairs and die cut them out. From there I cut a piece of patterned paper with clouds on it for the background and added it to the back of the card. To do this, I die cut the top of the chair on to the patterned paper exactly where it was positioned on the card base, then trimmed it out of the patterned paper. This fits perfectly around the chairs. Then I added a panel to the back using the same patterned paper to hide the open space behind the chairs. I repeated the same steps for the grass area as well. 

Once I had this done, I die cut two trees using Karen Burniston's Tree Pop-Up die set. I used Lawn Fawn's Coffee Grounds cardstock for the trunk/branches and MFT Limelight cardstock for the leaves. I used my Copic markers to add details to the leaves. Then glued them to either side of the card. 

I die cut a fence using Karen Burniston's Fence Add-Ons from a light brown kraft cardstock. I used my Copic markers and added detail to the fence. From there, I added it to my card. I had to add the fence in small pieces, lining up the fence under and around the chairs, sometimes having to cut small slits in the fence so it would slide around the chair arms. 

Once I had the trees and fence done, it was time to decorate with plants, flowers and garden accessories. I used Karen Burniston's Garden Charms, Backyard Charms, Fence Add-Ons flowers and Fun Flowers. I also used the Coffee Charms to add the mug for tea!

I colored everything using Copic markers to give all my die cuts some dimension. 


One of the pots, I added a flap to the back that was part of Karen Burniston's Frame Pull Pop-Up so that the pot stuck out from the back of the card. 

I added a little mushroom to the back in between the chairs (which is hard to see in my pictures). 

I added the sentiment "from the garden" to the bottom of the card, using bright yellow cardstock. I die cut this twice, once from dark brown cardstock and once from the yellow. Then I added some glitter gel to the sentiment to give some extra pop!

I used Karen Burniston's Short Rectangles - Crosshatch die and die cut a white rectangle to use as a place to sign the card. 

For the front of this card, I kept it very simple. Adding some floral patterned paper along with some mermaid blue cardstock and then added Karen Burniston's Hello die using the same bright yellow cardstock as I did for the sentiment inside the card. I added some of the floral stickers to the front that came with this paper pack. 


My friend was so impressed with her backyard being turned into a card. She said her favorite was the gardening gloves on the chair. I love how this card turned out. Thank you so much for stopping by and Happy Crafting!


Thursday, July 6, 2023

Pop Open Oven Card!

 Hello Crafty Friends! The card I have today was one that I had been thinking about for a bit now. Ever since Karen Burniston came out with the amazing Baking Charms and I made a kitchen background for my pop-up gnome baker, I have been trying to come up with a pop-up or pop-open oven card. 

Finally after thinking till my thinker was sore, I realized that I could use Karen Burniston's Frame Pull Pop-Up only upside down to create an oven with a oven door that opened. 

For this card, I tried to use a slimline card so that I could make bigger counters, but there wasn't enough room to add the Baking Charms to the top of the counter. So I went with a 5x7 card. 

I die cut a rectangle using the Rectangles and Labels - Crosshatch die set. I left the crosshatched edge white and then added some blue checked patterned paper as the wall behind the oven and cupboards.

Then I added a piece of white cardstock trimmed to fit the bottom part of the card front. 

I cut smaller rectangles to create the cupboard doors. With a black pen, I added door handles. Then using the heart dies from the Frame Pull Pop-Up, I added two shiny red hearts using a glossy red cardstock. 

I die cut the oven pieces using the dies from the Frame Pull Pop-Up, adding a "glass" front on the door (which was just some thick acetate I have) and adding some extra details using a shiny silver cardstock along with gray and black cardstock. 

I added a black strip to the inside and then from the Picnic Elements die set, cut out the pie to add to the inside of the oven. 

I added some of the same patterned paper from the background to the pull tab on the oven. 

Once I had the oven glued to the front of the card, I die cut the pieces from the Baking Charms using smooth white cardstock and hand colored them using Copic markers. Then I glued them where I wanted them. 

I stamped the sentiment on the front from MFT - Essential Sentiments using Versa Mark Ink and white embossing powder. 

I just love how this card turned out! Next time, I will try to add some more details to the oven, like an oven handle and maybe something for burners. Thank you so much for stopping by and Happy Crafting!

Tuesday, July 4, 2023

Karen Burniston July 2023 Designer Challenge - Collection Pack Creations!

 Hello Crafty Friends and welcome! It's Designer Challenge time again and this months theme was Collection Pack Creations. What is that you ask? Well each team member was given a patterned paper collection pack and we had to make a card using only the paper pack. This was actually a real challenge when you usually make cards that have lots of coloring, die cuts and add-ons!

For my card, I used Echo Park Paper Co. - Dive Into Summer patterned paper collection pack. 

I started with a 5x7 sized card base, using a light blue cardstock. 

I used Karen Burniston's Rectangles and Labels - Crosshatch dies to die cut the inner panels using a yellow starfish patterned paper from the pack. 

Before I glued the panels down, I trimmed the patterned strips using the paper sheet that has strips of different patterns on them (sorry if that doesn't make sense). I added them to each panel, trimming the extra off the edges. Then I glued the panels down to the card base. 

I decided to use Karen Burniston's Rockin' Rectangle Pop-Up die set for this card. I die cut the pop-up mechanism using the same colored cardstock as the card base. Then following her assembly video (which you can watch by click here) I folded, glued and add the pop-up mechanism to my card. 

I then die cut the "enjoy every minute" piece from the paper pack using the largest rectangle die that comes with the Rockin' Rectangle. I also cut a piece from green cardstock using the same die and glued them together to give the patterned paper some support. 

I added some of the other patterned paper pieces to the left side of the card and then added some of the stickers that came with my paper pack. 

For the front of the card, I added a panel of patterned paper, using the same Rectangles and Labels - Crosshatch die in the largest size. 

I picked one of the bigger pieces that was printed on one sheet of the paper pack and carefully cut it out. I added a green cardstock border to it and glued that to the first panel on the front of my card. 

And that was it! Card finished, and all I used was the amazing Echo Park - Dive into Summer paper pack! 

I hope you are inspired to dig out a paper pack and try this! Thank you so much for stopping by and Happy Crafting!


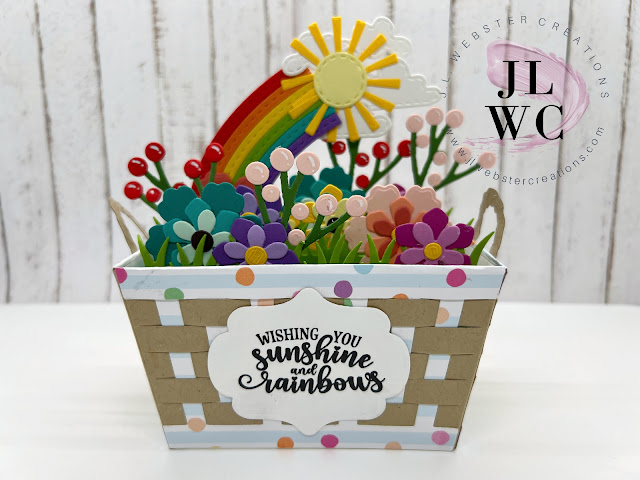
Sending Sunshine Birthday Card

Hello Crafty Friends and welcome!! My card for you today was created using Karen Burniston's Spinner Square Pop-Up. I made this card for...