Friday, June 28, 2024

Karen Burniston July 2024 New Release - Sneak Peek Week Day 5

 Hello Crafty Friends and welcome! It's our last day of Sneak Peek Week and I hope you have enjoyed all the wonderful cards our team has created using this new release. My last card for you features the Boat Pop-Up with the Sailboat Add-On!!


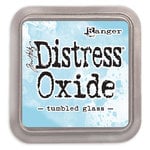
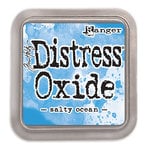
For this card, I made an A2 sized card base using a dark blue cardstock. I then created my water background using Distress Oxide Ink in Tumbled Glass, Salty Ocean and Chipped Sapphire. I also used My Favorite Things Perfect Pool Water Stencil to create the water background. Once the Distress Oxide Ink dried, I added glitter Modge Lodge around my sail boat to add some dimension. 

For the sail boat, I die cut the boat base from red cardstock, then added a white cardstock trim around the top of the boat. I die cut the waves from a light blue cardstock and glued them on the bottom of the boat. 

I added some of the extras to the boat using the dies that came with the set, such as the life preserver and the railing around the front. 

I die cut the sail from smooth white cardstock and created a patterned which I colored in with Copic markers. I die cut this twice and created the same patterned to add to the other side of the boat. 

I die cut the anchors using the Set Sail Borders and a shiny silver cardstock, then added one to the boat and added two rows down the side of the card. 

I stamped the sentiment on the right side using the new Sail Away sentiment stamp. 


For the front of the card, I used this really nice sailing patterned paper I got from Carta Bella called By The Sea. 

Then I added a strip of red cardstock and added some anchors I colored in using Copic markers, which are part of the Set Sail Borders. 

I die cut the word Sail using Karen Burniston's Alphabet dies and a sparkly red cardstock. Then stamped the "come" and "away with me" using the new Sail Away stamp set. 

I added another anchor and life preserver to the front. Isn't this just an amazing add-on for the Boat Pop-Up?? I just love this new die. 

The 12 new dies will be available on July 1st, 2024 and we will also be having our Blog Hop on that day, so be sure to join in the fun for a chance to win a $25 gift certificate to spend online at www.karenburniston.com. Happy Crafting!!


Thursday, June 27, 2024

Karen Burniston New Release - July 2024 - Sneak Peek Week Day Four

 Hello Crafty Friends and welcome! I hope you have all been enjoying all the fantastic cards our Design Team has been coming up with for Sneak Peek Week. I know I always enjoy seeing what my fellow team members create! The 12 new dies will be ready for sale on July 1st 2024. 

My card for you today features the new Piano Pop-Up and Music Charms! I also used the new coordinating sentiment stamp set called Music Sentiments. 


For this card, I decided to go with a slimline card base using a smooth heavy weight 110lb cardstock. I found this pretty light green patterned paper in my stash and used it for my background. 

I die cut the piano keys from lightweight black and white cardstock. I glued this into my slimline card using Lineco Neutral pH adhesive in my fine tip bottle

Then, using Karen Burniston's Long Rectangles - Crosshatch die, cut a long piece to go across the top of the top. I wanted to add a sentiment as well as the music notes from the Music Charms. I used the label shape dies from the Rectangles and Labels - Crosshatch die set to add the sentiment, which I stamped using the new sentiment stamp Music Sentiments and Lawn Fawns Jet Black Ink. I die cut the music notes using a shiny black cardstock. 

For the bottom, I added the Happy Birthday sentiment using the new Birthday/Belated sentiment stamp that Karen is releasing and added more music notes. 


For the outside of the card, I continued the same theme, using more of the Music charms to create the card front. I also added another sentiment to the front as well. 

This is the perfect die set for anyone who loves music!!! I highly recommend it and it's so easy to install!!! Those Music Charms are the perfect addition as well as the coordinating sentiment stamp set. 

Thank you so much for stopping by today, be sure to come back tomorrow for our last Sneak Peek day. Monday we will be having our Blog Hop so come by, leave a comment with your email address to be entered to win a $25 online store gift certificate! It's a lot of fun!! Happy Crafting!

Supplies: For your shopping convenience, all products are linked below and in bolded text in post. Compensated affiliate links are used where possible with no extra cost to you. This helps me to continue to share all the projects I include on my blog. Please note I only use and share products I love. Thank you Crafty Friends!


Wednesday, June 26, 2024

Karen Burniston New Release - July 2024 - Sneak Peek Week: Day Three

 Hello Crafty Friends and welcome. I hope that you have been enjoying all the wonderful cards the Karen Burniston Design Team has made for Sneak Peek Week. My cards for you today use the new Tree Add-On for the Fancy Label Accordion. This fantastic new die set creates beautiful trees in every season! Also I used the new Fancy Solid Frame die that adds a lovely solid frame around the edges of the Fancy Label Accordion and the sentiment stamp set called Seasons. 


For my first card, I created an Anniversary card. I started with black cardstock for the Fancy Label Accordion pieces, which I die cut four panels. Then using the new Fancy Solid Frame die, added a wooden frame around it using a wood patterned paper. 

I had this very pretty wedding themed patterned paper, which I used for the small inner panels. Then added a dark green piece as well as a stamped sentiment piece for each end accordion piece. 

For the Tree Add-On, I used my Mini Clouds stencil from MFT and Distress Ink in Peacock Feathers to create a cloud blue sky. I taped off part of the add-on so that I could create a grass bottom using Distress Oxide Ink in Mowed Lawn and Rustic Wilderness. 

I die cut the trees from smooth white cardstock and colored them in using Copic markers. For these trees, I created seasonal trees, adding cherry blossoms to the spring tree, a bird and a heart to the summer tree, the autumn tree I colored in fall colors adding more hearts and the winter tree white with snowflakes. 

Once the Distress Ink was dry on my Tree Add-On, I stamped the "Happy Anniversary" sentiment using the new Seasons stamp set. 


For my next card, I went with a winter scene. I used a lightweight smooth white cardstock for the Fancy Label Accordion card base. Then I used this beautiful winter patterned paper I recently got from Echo Park called Winter Magic. I die cut four panels from this paper and then trimmed the inner pop-up pieces, instead of using a Fancy Frame. 

I then added some inner labels in white and blue and added a place to sign the card. I also added a sentiment sticker that came from the paper pack. 

For the trees, I added a snowy sky in the background using Distress Oxide Ink in Tumbled Glass and Salty Ocean. Then I splattered white paint on with a small paint brush to give it the snowy look. I added the trees, which I die cut from smooth white cardstock and colored with Copic markers. I left these bare as this was a winter scene. 

Then I used some sentiments from Word Set 3 - Holiday using white and dark blue cardstock. I just love how this winter scene turned out!! 

Thank you so much for stopping by today and checking out my next sneak peek cards. The new release will be available on July 1st 2024. Also we will be having our Blog Hop on that day, so be sure to check out all the Design Teams blogs on that day to join in the fun and have a chance to win a $25 online gift certificate to use with the new release. Happy Crafting!

Supplies: For your shopping convenience, all products are linked below and in bolded text in post. Compensated affiliate links are used where possible with no extra cost to you. This helps me to continue to share all the projects I include on my blog. Please note I only use and share products I love. Thank you Crafty Friends!


Ranger Ink - Tim Holtz - Distress Oxides Ink Pads - Tumbled GlassRanger Ink - Tim Holtz - Distress Oxides Ink Pads - Salty OceanRanger Ink - Tim Holtz - Distress Oxides Ink Pads - Mowed LawnRanger Ink - Tim Holtz - Distress Oxide Ink Pads - Rustic WildernessRanger Ink - Tim Holtz - Distress Ink Pads - Peacock Feathers

Tuesday, June 25, 2024

Karen Burniston New Release - July 2024 - Sneak Peek Week: Day Two

 Hello Crafty Friends and welcome! My next Sneak Peek card for you today uses the new Boat Pop-Up die set! You heard me right, a pop up BOAT!!! How incredibly cool is that!? Also, I used the new Sail Away sentiment stamp set that coordinates with the Boat Pop-Up! 


For this card, I wanted to create a camping scene, so I had to figure out a way to use the Tent Pop-Up as well as the Boat Pop-Up. This card is a slimline, just a little wider than the usual 3.5" card. This is an 8.5 x 4.25" slimline (8.5x8.5 scored at 4.25) which gives enough room to accommodate the tent and boat the way I wanted them. 

I start this card, I created two background panels using smooth white cardstock and Distress Oxide Ink in Tumbled Glass, Salty Ocean and Chipped Sapphire for the water. Mowed Lawn and Rustic Wilderness for the grassy camp site. 

While the background dried, I created the tent using a kraft cardstock and added red panels to it to give it a two tone look. I used a thin hemp string to tie the tent flaps back. I then die cut the fire pit using smooth white cardstock and colored it in with Copic markers. I added a small bam box pop-up piece using the bam box from the Small Scenes Bam Box Pop-Up die set. I also die cut the little attachment piece that comes with the Tent Pop-Up and added it to the side of the tent. Then I die cut the tree stump from smooth white cardstock and colored it in with Copic markers. 

I then die cut the boat out and glueing it all together using Lineco Neutral pH adhesive in my fine tip bottle. I glued the tent and boat into my card, also adding all the extra pieces, such as the fire pit, the rocks around the fire pit, the fish in the lake and the lantern on the tree stump (both which come from the Camping Charms). 

I stamped the one sentiment onto black cardstock, using VersaMark ink and white embossing powder, then I stamped the second sentiment using black ink from Lawn Fawn. 

Lastly, I added a place to sign the card, which came from the Lorna Label Pop-Up die set. 

For the front of the card, I kept it simple. Adding some camping themed patterned paper and using another sentiment from the Sail Away stamp set. 

I also used some anchors from another new die set from this release called Set Sail Borders! This new border set gives you four new fun borders including, whales/dophins, Anchors, Shells and a ships Steering Wheel. 

Isn't great when you can use older die sets with new ones? I just love how this card turned out. 

The new release will be available on July 1st, 2024. Be sure to join for our Blog Hop on that day for your chance to win a $25 online gift certificate to shop the new release! Thank you so much for stopping by and Happy Crafting!


Supplies: For your shopping convenience, all products are linked below and in bolded text in post. Compensated affiliate links are used where possible with no extra cost to you. This helps me to continue to share all the projects I include on my blog. Please note I only use and share products I love. Thank you Crafty Friends!


Ranger Ink - Tim Holtz - Distress Oxides Ink Pads - Tumbled GlassRanger Ink - Tim Holtz - Distress Oxides Ink Pads - Salty OceanRanger Ink - Tim Holtz - Distress Oxides Ink Pads - Chipped SapphireRanger Ink - Tim Holtz - Distress Oxides Ink Pads - Mowed LawnRanger Ink - Tim Holtz - Distress Oxide Ink Pads - Rustic WildernessEcho Park - Let's Go Camping Collection - 12 x 12 Collection KitRanger Ink - Stickles Glitter Glue - Diamond

Monday, June 24, 2024

Karen Burniston New Release - July 2024 - Sneak Peek Week: Day One

Hello Crafty Friends!! It's Sneak Peek Week and I am soooooo excited to share with you cards I made using the new release. I have to say, I love this new release so much!!! There isn't one die that I wasn't excited about!! 


For my first Sneak Peek card, I used the new Happy Birthday Lorna Add-On! This new add-on takes your Lorna Label die to a whole new level!!


 This new die set has 7 dies included, the Happy Birthday die cut, the Happy Birthday word dies, two balloon dies, the balloon strings and a ribbon for the bottom of the balloons. 

Along with the die set, I used the new Birthday/Belated Stamp set! That's right Crafty Friends!!! Karen made matching STAMP SETS!!! I was beyond excited about this. 

For this card, I started with an A2 sized card base using a purple cardstock. I also used the same purple cardstock to cut out my Lorna Label. I then used the new die set to cut out the Happy Birthday for the centre of the Lorna Label, which I cut using a bright blue cardstock. I die cut the Happy Birthday sentiment from yellow and green cardstock, then used my Lineco Neutral pH glue in my fine tip bottle to adhere it to the blue background. 

I had this great birthday paper from Echo Park called Make a Wish Birthday Girl paper pack collection and I used it for my background paper in my card. Then using the Lorna Label dies I created an area to sign the card. 

I die cut a yellow banner and used the new stamp set to add a sentiment. Then added some balloons to the pop-up, which I die cut from smooth white cardstock and colored in with Copic markers. 

Lastly, I used the Baking Borders cupcake border to create borders for the inside of my card. I die cut these from smooth white cardstock and colored them in with Copic markers. 

For the front my of my card, I used the dies from the Lorna Label along with some sentiment stamps from the new Birthday stamp set to create my card front. I added more balloons and I also used the cupcakes from the Cupcake Add-On for the Landscape Rectangle Accordion to add fun cupcakes to the front of my card. 

I can't wait to make more birthday cards using this new die set. The new release will be available for purchase on Monday, July 1st, 2024. We will be hosting a Blog Hop on Monday as well so be sure to join us for a chance to win a $25 online gift certificate to use at www.karenburniston.com! 
Thank you for joining me today, come back tomorrow for another Sneak Peek card!! Happy Crafting!

Supplies: For your shopping convenience, all products are linked below and in bolded text in post. Compensated affiliate links are used where possible with no extra cost to you. This helps me to continue to share all the projects I include on my blog. Please note I only use and share products I love. Thank you Crafty Friends!


Echo Park - A Birthday Wish Girl Collection - 12 x 12 Collection Kit

Tuesday, June 18, 2024

Weekly Blind Challenge - Ice Cream Sundae Pop-Up!

 Hello Crafty Friends and welcome! Once again I challenged myself to make a card by picking two different dies from my Karen Burniston collection. This time, I picked the Ice Cream Sundae Pop-Up and the Woodland Animals dies. What a combination!!! 


For this card, I started with an A2 sized card base from Ground Coffee cardstock by Lawn Fawn. I then used some pretty patterned paper I recently got from Echo Park called I Love Family for the background. For the bottom of my card I used a tartan patterned paper from Echo Parks Let's Go Camping patterned paper pack. 

I die cut the pop-up mechanism from the patterned paper and then carefully added it to the card base, making sure that all the folds were folded properly. To see how to assemble this pop-up, click here to watch Karen Burniston's assembly video. 

I then die cut the sundae dish along with the ice cream and toppings from heavy weight smooth white card stock. To create the colors on the sundae dish, I used Simon Says Stamp Pawsitively Saturated Ink in Seafoam. I went over the dish once then used the die to add more ink to add the detail to the dish. I colored the ice cream with Copic markers, as well as the ice cream toppings. I used Karen Burniston's Autumn Elements acorn die to add fun acorn ice cream toppers to go along with my woodland theme. I added Glossy Accents to the caramel and chocolate sauce on the top of the ice cream, as well as the cherry on top. 

I then die cut the spoon from a mirrored cardstock. I die cut the Woodland Animals from the same heavy weight cardstock and colored them in with Copic markers. I added them to the front of the sundae, holding the spoon. 

I then added a place to sign the card, using rectangle pieces from Karen Burniston's Rockin' Rectangle. 

For the front, I continued the theme, only added an ice cream cone instead of a sundae and created a raccoon. 

I added the "celebrate" sentiment as well as the "Happy Birthday" sentiment on the inside to the card using Karen Burniston's Word Set 2 - Birthday. I used Lineco Neutral pH glue and a fine tip bottle to glue everything into my card. 

I never would have ever thought to make the ice cream sundae forest themed, but it's really cute!! Thank you so much for stopping by today and Happy Crafting!

Supplies: For your shopping convenience, all products are linked below and in bolded text in post. Compensated affiliate links are used where possible with no extra cost to you. This helps me to continue to share all the projects I include on my blog. Please note I only use and share products I love. Thank you Crafty Friends!


Lawn Fawn - 8.5 x 11 Cardstock - Ground Coffee - 10 PackRanger Ink - Glossy Accents - Clear Dimensional Embellishment - 2 ouncesEcho Park - Let's Go Camping Collection - 12 x 12 Collection Kit

Friday, June 7, 2024

Lawn Fawn Beehive Cards!

 Hello Crafty Friends and welcome! I have two cards for you today, both which use Lawn Fawn's Magic Iris Beehive Add-On. 


A good friend of mine gave me Lawn Fawn's Hive Five stamp set with coordinating dies for my birthday and I thought today would be a good day to finally use it. I decided to make two different but similar cards, one just a flat card and one using the Magic Iris. 

For my first card, I started with an A2 sized card base using heavy weight smooth black cardstock. 

I added a piece of patterned paper which I die cut using MFT - A2 Stitched Rectangle STAX in the largest sized stitched die. 

I then used Lawn Fawn's Magic Iris Add-On and die cut it from heavy weight smooth white cardstock. Then, using MFT - Mini Clouds stencil and Distress Ink in Peacock Feathers, I created a cloud background. 

I die cut the bee hive from the same heavy weight smooth white cardstock and colored it in using Copic markers. 

I die cut all the pieces that go along with the Magic Iris Beehive Add-On from the same cardstock and colored them again with Copic markers. 

I die cut all the mechanisms for the Magic Iris and put the mechanism together. Then I die cut the inner circle from black cardstock and stamped a sentiment on it using Lawn Fawn's Magic Messages. 
Lastly, I stamped the sentiment on the bottom of the card, using Lawn Fawn's Hive Five stamp set. 

For my second card, I did the same thing with this bee hive as I did with the first card. 

I added a different sentiment in the centre of the beehive, using the same Magic Messages stamp set.

Then, on a piece of heavy weight smooth white cardstock, I stamped all the images using Lawn Fawn's Hive Five stamp set. 

I colored all the images using Copic markers. Then I die cut all the images using the coordinating dies. 

I added Glossy Accents to the honey pots and Stickles Glitter Gel in Diamond to the wings of the bees. 

How cute are those little bees!! I really like this stamp set and love even more the Beehive Add-On!! Please see below for the list of supplies I used in this card. Thank you so much for stopping by and Happy Crafting!


Supplies: For your shopping convenience, all products are linked below and in bolded text in post. Compensated affiliate links are used where possible with no extra cost to you. This helps me to continue to share all the projects I include on my blog. Please note I only use and share products I love. Thank you Crafty Friends!


- Supplies -


Lawn Fawn - Lawn Cuts - Dies - Magic Iris Beehive Add-OnRanger Ink - Tim Holtz - Distress Ink Pads - Peacock FeathersLawn Fawn - Lawn Cuts - Dies - Magic IrisLawn Fawn - Lawn Cuts - Dies - Magic Iris Add-On

Lawn Fawn - Clear Photopolymer Stamps - Magic MessagesRanger Ink - Glossy Accents - Clear Dimensional Embellishment - 2 ouncesRanger Ink - Stickles Glitter Glue - DiamondLawn Fawn - 8.5 x 11 Cardstock - Black Licorice - 10 Pack

Thursday, June 6, 2024

Barnyard Birthday Card!

Hello Crafty Friends and welcome! I recently was in a zoom meeting with the Karen Burniston Design Team and one of my fellow designers mentioned how she missed all the different card making challenges there use to be. It got me thinking, why not make my own challenge! So I closed my eyes and reached into my Karen Burniston die collection and grabbed one. Then I did the same with my collection of animals/add-ons and such. I ended up pulling out the Little Twist Panel Pop-Up and the Cow and Goat dies. So I made this super fun Barnyard Birthday card!


 I will defiantly be giving myself a challenge every week because this was fun! I started my card with an A2 sized top fold card base, from Ground Coffee cardstock from Lawn Fawn. I dug through my stash of patterned paper and found this great farm themed paper to use for my background. 

I die cut the pop-up mechanism using a light weight smooth white cardstock, then I die cut all the pieces I needed for the pop-up, using various scraps of the same farm themed paper. I die cut the two scalloped rectangles from heavy weight smooth white cardstock and added a blue sky and grass using Distress Oxide Ink in Mowed Lawn and Distress Ink in Peacock Feathers. I also used my Grass Stencil from MFT to create the grass. 

I then die cut the cow and goat from Karen Burniston's Cow and Goat die set using heavy weight smooth white cardstock and colored them in using Copic markers. 

I also die cut the barn from the Barn Pop-Up and I used the Farm Edges to add a fence behind the barn and the chicken fence at the bottom. On the barn, I added wood panels and lines using a white pencil crayon. 

I die cut a shape to add a place to sign the card and stamped a sentiment on it using MFT - The Whole Herd stamp set. 

For the front of the card, I carried over the paper theme and again added a stamped sentiment from the same stamp set. 

This time I used the chicken and pig from the Chicken, Pig and Lamb die set. I die cut these from heavy weight smooth white cardstock and colored them in with Copic markers. 

This was so much fun to create! You should try it yourselves! Just reach into your stash and pull out the first thing you grab and have fun!

Thank you so much for stopping by today and Happy Crafting! Also be sure to check out my YouTube channel for my latest how to video on how to create three different cats using Karen Burniston's Cat and Dog die set!! 

Please see below for the products I used to make this card. 


Supplies: For your shopping convenience, all products are linked below and in bolded text in post. Compensated affiliate links are used where possible with no extra cost to you. This helps me to continue to share all the projects I include on my blog. Please note I only use and share products I love. Thank you Crafty Friends!


- Supplies -


Lawn Fawn - 8.5 x 11 Cardstock - Ground Coffee - 10 PackEcho Park - Fun On The Farm Collection - 12 x 12 Collection KitRanger Ink - Tim Holtz - Distress Oxides Ink Pads - Mowed LawnRanger Ink - Tim Holtz - Distress Ink Pads - Peacock Feathers

Tuesday, June 4, 2024

Karen Burniston Designer Challenge - June 2024 - Borders, Borders, Borders!!

 Hello Crafty Friends and welcome! It's Designer Challenge time once again and our challenge this month was Borders, Borders, Borders! We had to use some (or all if you want to get really creative!) of Karen Burniston's fantastic border dies! For my card, I used the Baking and Kitchen Borders along with the Oven Pop-Up!


For this card, I started with an A2 sized card base using Ground Coffee cardstock by Lawn Fawn. I then used a some great patterned paper from Echo Park called Celebrate Autumn for the wallpaper background. I used a wood/brick patterned paper pack I got from Michaels for the floor. 

I then began die cutting all the pieces I needed for the Oven Pop-Up. I also used the Oven Extras for my card as well. To see how this goes together, Karen Burniston has a wonderful assembly video which you can watch here. Once I had my oven assembled, I began die cutting the extra pieces for my little kitchen. I used the Kitchen Borders to create the frying pan with the egg and the toaster. 

I die cut two pie borders from the Baking Borders and created cherry, pumpkin, blueberry and peach pies for my borders. I die cut these from smooth white cardstock and colored them in with Copic markers. I added Glossy Accents to all the pies but pumpkin to add some extra dimension to them. 

I die cut the Happy Birthday sentiment from Word Set 2 - Birthday using a shiny black cardstock. I also die cut a small rectangle using the small scalloped die from the Little Twist Panel Pop-Up, so that the card could be signed. 

For the front of the card, I kept the same theme, adding another pie border. I used the Circle - Crosshatch die set to create a sentiment centre on my card. 

I used the Mini Alphabet and Numbers to die cut the word "Apple". I also used several Word Set dies to create the sentiment "You're The" and "of my pie". I will list these below. 

I added the rolling pin borders from the Baking Borders, die cutting them from smooth white cardstock and coloring them in with Copic markers.

I just love how my card turned out. Those pies make me want to get in my kitchen and start baking! Thank you so much for stopping by today and Happy Crafting!!


Supplies: For your shopping convenience, all products are linked below and in bolded text in post. Compensated affiliate links are used where possible with no extra cost to you. This helps me to continue to share all the projects I include on my blog. Please note I only use and share products I love. Thank you Crafty Friends!


Other Supplies:


Karen Burniston Word Set 2 - Birthday 

Karen Burniston Word Set 17 - Congratulations

Karen Burniston Word Set 18 - Connectors


Lawn Fawn - 8.5 x 11 Cardstock - Ground Coffee - 10 PackRanger Ink - Glossy Accents - Clear Dimensional Embellishment - 2 ouncesRanger Ink - Stickles Glitter Glue - DiamondBazzill Basics - 12 x 12 Cardstock - Canvas Texture - Mono - Bazzill OrangeScrapbook.com - Cardstock - 8.5 x 11 - Neenah Solar White - 50 Pack

Weekly Blind Challenge - Karen Burniston's Tiny Trees Pop-Up!

  Hello Crafty Friends and welcome! I'm back with another Weekly Blind Challenge and this week I picked two dies that couldn't be mo...