Monday, September 30, 2024

STAMPtember - Riley and Company - Flying By

 Hello Crafty Friends and welcome! I am so excited for today's blog post. My card for you today was created for STAMPtember's Riley and Company stamp that is now available for purchase at Simon Says Stamp. This exclusive stamp set comes with 7 images and 6 sentiments. Be sure to stop by SSS to purchase this super cute stamp set!!


For this card, I wanted to have it appear that the plane was actually flying, so I used Karen Burniston's Raising Platform Pop-Up die set. Because of the way I wanted to position everything, I couldn't use an A2 sized card base, so I made a side fold 5x7 card base using a dark blue cardstock. I then added a lighter solid blue paper for my background. 

I wanted it to appear that this scene was up in the clouds, so I cut a piece of white cardstock the same size as my background paper then drew out clouds. I did this twice for each side. I went over the edges of the clouds with Speckled Egg Distress Oxide Ink. Then, with my craft scissors, I cut the clouds out and glued them on to my card. 

I wanted to add some more Riley images, so I used my STAMPtember stamp set from last year (or might have been the year before that), It's Your Day, to add more fun characters. I had to do some masking, then add hands/paws but I think it turned out pretty cool. I added the balloons from the same stamp set, drawing on the strings to make it easier when fussy cutting the balloons. 

I added the stamped sentiments to the bottom from the Flying By stamp set. I stamped the Riley in the plane using Lawn Fawn Jet Black Ink, then colored them in with Copic makers. I did this will all the images on this card. 

I die cut clouds from Karen Burniston's Landscape Scene using smooth white cardstock. I just love how this card came out. That stamp set is super cute so be sure to head on over to Simon Says Stamps for the last day of STAMPtember to buy the Riley and Company Flying By stamp set. Thank you so much for stopping by today and Happy Crafting!

Supplies: For your shopping convenience, all products are linked below and in bolded text in post. Compensated affiliate links are used where possible with no extra cost to you. This helps me to continue to share all the projects I include on my blog. Please note I only use and share products I love. Thank you Crafty Friends!

Lawn Fawn - Premium Dye Ink Pad - Jet BlackEcho Park - Pets Collection - 12 x 12 Paper Pack - SolidsRanger Ink - Tim Holtz - Distress Oxide Ink Pads - Speckled Egg

Friday, September 27, 2024

Hey There Pumpkin!

 Hello Crafty Friends and welcome! I have a new card and video for you today which uses Karen Burniston's Twist Flower Pop-Up and Ovals - Crosshatch dies! Learn in my YouTube video how to create pumpkins using the Ovals - Crosshatch, the link is at the bottom of my blog post. 


I started with cutting a sheet of Lawn Fawn Ground Coffee cardstock, 8.5 x 7 scored at 3.5 for folding. I then added some beautiful patterned paper from my favourite paper company, Echo Park called Celebrate Autumn. 

From there I created my pumpkins, using three ovals die cut from heavy weight smooth white cardstock. I glued them together in a position that would look like a pumpkin. Then I coloured them in using Copic markers. I created stems for the top of my pumpkins. Then using Karen Burniston's Big Birthday Charms, die cut three streamers to use as the curly vine that grows on the top of the pumpkins. I also die cut three leaves from the Twist Flower Pop-Up to add to the pumpkins once they are in the card. 

I die cut the pop-up mechanisms from the same Ground Coffee cardstock as the card base. I added three pop up mechanisms to the card. I measured 1 inch from the top, 4.5 inches from the bottom and 1 3/4 inches from the bottom as markers for the mechanisms. Then I glued them in place, closing the card after to make sure everything worked. 

I then added a sentiment to the pumpkins using Karen Burniston's Word Set 7 - Autumn and Word Set 18 - Connectors and the same brown cardstock as the rest of the card. 

I also added two strips of the same patterned paper only the opposite side up both sides of the card. 

For the front of the card, I die cut a circle using Karen Burniston's Circle - Crosshatch and stamped a sentiment from Spellbinders Fall Greetings stamp set. Then I die cut a pumpkin border from Karen Burniston's Halloween Border and cut it in half. I colored in the pumpkins using the same Copic markers as the pumpkins on the inside of the card. 

I glued this on to the front of my card. The glue I used for this card is Lineco Neutral pH Adhesive and a fine tip bottle both which you can get from Karen Burniston's website. 

I am very happy with how this fall themed card turned out. Thank you so much for stopping by today. Be sure to check out the YouTube video on how to create this card step by step. I appreciate it so much! Happy Crafting!


Supplies: For your shopping convenience, all products are linked below and in bolded text in post. Compensated affiliate links are used where possible with no extra cost to you. This helps me to continue to share all the projects I include on my blog. Please note I only use and share products I love. Thank you Crafty Friends!


Lawn Fawn - 8.5 x 11 Cardstock - Ground Coffee - 10 Pack

Friday, September 20, 2024

Spooky Halloween Card using Karen Burniston's Fancy Label Accordion!

 Hello Crafty Friends and welcome! Recently, Karen held a zoom class where she made this fantastic card using the Fancy Label Accordion and the Tree Add-On! It's a 5 x 7 side fold card that pops out in such a unique way! So I wanted to make a fun Halloween card using this technique!!


For this card, I started by creating the card base using a light weight black cardstock. I cut two rectangles, one 5 x 7 and one 5 x 7.5, then using my scoring board, scored a fold at the 1/2 in mark on the longer rectangle. Then using my Lineco Neutral pH adhesive and my fine tip bottle, I glued the two pieces together, creating the card base. 

I then added some lime green cardstock 1/8in small than the card base. This is MFT - Limelight cardstock. I then dug through my Halloween patterned paper and found this purple spooky paper from Echo Park called Monster Mash. I added this on top of the green cardstock, again 1/8 in smaller then the green cardstock. 

Once I had the background paper down, I created the Fancy Label Accordion insert, following the video that Karen made. You can watch that here if you would like to try this technique out! For the Fancy Label Accordion insert, I added the Fancy Solid Frame to create the edges of the accordion insert. I also used a black patterned paper from Echo Park - Halloween Magic. 

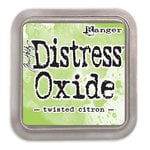
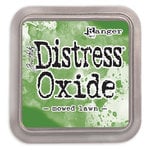
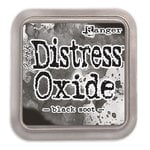
For the Tree Add-On, I die cut this from heavy weight smooth white cardstock. I used my MFT - Cloud stencil and Distress Oxide Ink in Twisted Citron, Mowed Lawn and Black Soot to create the background. Then I die cut four trees from the Tree Add-On, using heavy weight black cardstock and added them to the pop out piece. 

I used Karen Burniston's Halloween Elements and Halloween Charms to create all the fun add ons to the inside of the card. For the pumpkins, I die cut these from smooth white cardstock and colored them in with Copic markers. 

For the front of the card, I continued the same patterned paper, then added "picture" frames to the front. 

I used the Skeleton and Bat die to add a skeleton to the one picture window. Then I added another ghost from the Halloween Elements. 

I die cut the sentiment from a glitter dark purple cardstock using Karen Burniston's Happy Halloween sentiment die. 

This was a really fun card to make! I highly recommend checking out Karen's video on YouTube. Thank you so much for stopping by today and Happy Crafting!!

Supplies: For your shopping convenience, all products are linked below and in bolded text in post. Compensated affiliate links are used where possible with no extra cost to you. This helps me to continue to share all the projects I include on my blog. Please note I only use and share products I love. Thank you Crafty Friends!


Echo Park - Halloween Magic Collection - 12 x 12 Collection KitEcho Park - Monster Mash Collection - 12 x 12 Collection KitRanger Ink - Tim Holtz - Distress Oxides Ink Pads - Twisted CitronRanger Ink - Tim Holtz - Distress Oxides Ink Pads - Mowed LawnRanger Ink - Tim Holtz - Distress Oxides Ink Pads - Black Soot

Monday, September 16, 2024

Happy Fall Card using Karen Burniston's Parcel Pop-Up!

 Hello Crafty Friends and welcome! I have a fall themed card for you today. This card uses Karen Burniston's Parcel Pop-Up and Autumn Elements to create this pop-up card!


For this card, I started with a 5.5 x 11 inch card base (finished folded card measures 5.5 x 5.5) using Lawn Fawn's Ground Coffee cardstock. 

Digging through my stash of patterned paper, I found this beautiful pumpkin and leaves paper from Echo Park called My Favorite Fall. I used that as my background. I also added a green cardstock from the same paper pack. I trimmed the paper with a thin piece of black cardstock. 

I die cut the Parcel Pop-Up from Lawn Fawn Kraft Cardstock and Ground Coffee cardstock. I followed Karen's wonderful assembly video on YouTube to assemble the pop-up mechanism. To see that video click here

I die cut all the Autumn Elements leaves, apples and acorns from smooth white heavy weight cardstock and colored them all in with Copic markers. I added these to the pop up mechanism on the Parcel Pop-Up, making sure that the card could close each piece I added. 

I added the little label to the front of the box and stamped a small sentiment on to the tag using Spellbinders Welcome Sign and Sentiments. I also used Spellbinders Welcome Fall die set and cut the wooden basket to use in this card. 

I added a place to sign the card using the Lorna Label die set and smooth white cardstock. 

For the front of the card, I continued the same patterned paper. I added ovals using Karen Burniston's Oval - Crosshatch dies. Then I die cut the sentiment "Happy Fall" using Karen Burniston's Word Set 7 - Autumn

Fall is defiantly my favorite season, so making these kinds of cards are so much fun!! Thank you so much for stopping by today and Happy Crafting!!!


Supplies: For your shopping convenience, all products are linked below and in bolded text in post. Compensated affiliate links are used where possible with no extra cost to you. This helps me to continue to share all the projects I include on my blog. Please note I only use and share products I love. Thank you Crafty Friends!


Lawn Fawn - 8.5 x 11 Cardstock - Ground Coffee - 10 PackLawn Fawn - 8.5 x 11 Cardstock - Kraft - 10 PackSpellbinders - Etched Dies and Clear Photopolymer Stamps - Welcome Sign and SentimentsSpellbinders - Etched Dies - Welcome Fall

Friday, September 13, 2024

Light Up Gamer Cards!

 Hello Crafty Friends and welcome! I have two fun cards for you today that would be perfect for a child who (like my kids) love playing computer/video games! For these cards, I used My Favorite Things - Game On stamp set along with their Level Up stamp and matching die set. 


To start, I created two card bases using heavy weight black cardstock. This is a cardstock I purchased at my local Michaels store and you can get 100 sheets for around $30 Canadian. I added a rectangle piece measuring 3.5 x 5.5 of a silver textured cardstock. I then cut a piece from pink and blue cardstock that measured 3 3/8 x 5.5. 

I used Simon Says Stamps Pawsitively Saturated Ink in Sweets and Surf and some of the stamps from the MFT Level Up stamp set to create the backgrounds for my cards. This is a great way to get a lot of use from sentiment stamp sets!

I stamped the cute little critters from the Game On stamp set using Lawn Fawn Jet Black Ink and heavy weight Neenah Classic Crest Solar White 110lb cardstock. I colored them in with various Copic markers. I added gloss lines with a size 10 white Gelly Pen. 

I die cut the game controllers using a shiny smooth black cardstock, adding grey for some of the buttons and colored circles for the other buttons. I added Glossy Accents to the buttons to add some dimension. Then, with an Exacto knife, I cut the circle from the top of the controller. I added a thick piece of vellum twice to the back of the controller. This is where the card will light up from!! 

I marked on my background where I wanted my light to sit. I used Pear Blossom Press single lights. These were super easy to use!!! I highly recommend them. I added double sided adhesive to the back of the light and pressed it down to adhere to the background. 

I added foam tape to the back of the controller then added it to the card, making sure it lined up with the button and lights. 

I wrote "Push" with a white Gelly Pen on the button to push down. 

Then I added all my cute little gamer characters to each card using Lineco Neutral pH adhesive in a Fine Tip Bottle. Last but not least, I added a sentiment to the tops of the card using the matching sentiments from the Game On stamp set and black cardstock. I used VersaMark Ink and white embossing powder. I do enjoy making light up cards and let me say Pear Blossom Press makes this soooooo incredibly easy!! Thank you so much for stopping by today and Happy Crafting!

Supplies: For your shopping convenience, all products are linked below and in bolded text in post. Compensated affiliate links are used where possible with no extra cost to you. This helps me to continue to share all the projects I include on my blog. Please note I only use and share products I love. Thank you Crafty Friends!


My Favorite Things - Jenoblade Collection - Clear Photopolymer Stamps - Game OnMy Favorite Things - Jenoblade Collection - Die-namics - Dies - Game OnRanger Ink - Glossy Accents - Clear Dimensional Embellishment - 2 ouncesLawn Fawn - Premium Dye Ink Pad - Jet BlackTsukineko - VersaMark Watermark Ink Stamp Pad - Large - ClearHero Arts - Embossing Powder - White

Wednesday, September 11, 2024

Fireworks Celebration Card!

 Hello Crafty Friends and welcome! I have a fun card for you today, which I made for Craft Roulette! It's been a while since I joined in the fun with Craft Roulette and finally I had some time this weekend to participate. 

The parameters for this week were:

  • Project: Outside Inside
  • Colors: Tulips
  • Element: Festival
  • Random: Checks
The festival element made me think first of an Apple Festival. But then I remembered years ago, there use to be a Festival of Lights in Toronto where different countries would create a fireworks display all to music. It was absolutely incredible!! So I decided to use Spellbinders Vista View Window to create the inside view and the fireworks display as the outside view. 


For this card, I started with an A2 sized card base using Neenah Classic Crest smooth white heavy weight (110lb) cardstock. 

I added patterned paper in a checkered patterned as my background (or wallpaper for the front) then I created the outside view. For this I die cut a window from smooth black cardstock. Then using MFT - Festive Fireworks stamp set and several different Distress Oxide Inks (all are listed below for you), I created the fireworks. 

I die cut the window frame from smooth white cardstock and then added a piece of vellum to the back of the window. I added foam tape to the back of the window frame and then added it over the fireworks background. 

I die cut the shelf from the same Spellbinders die set from smooth white cardstock and colored it in with Copic markers. 

I used Spellbinders The Botanical Solarium potted plants and I also die cut a second pot from MFT - Spring Garden Dienamics. I colored all these in with Copic markers as well. 

I stamped a sentiment on to the shelf using Spellbinders Sending Sunshine Sentiments, VersaMark ink and white embossing powder. Lastly, I added a little black cat from Spellbinders Daydreaming die set. I glued these all down using Lineco Neutral pH adhesive in a fine tip bottle

I had never used Distress Oxide Ink on black cardstock before but I love how it turned out!! It worked perfectly. To see how I made this card, please visit my YouTube channel by the link below. I try to post weekly, so be sure to subscribe so you don't miss a video! Thank you so much for stopping by today and Happy Crafting!


Supplies: For your shopping convenience, all products are linked below and in bolded text in post. Compensated affiliate links are used where possible with no extra cost to you. This helps me to continue to share all the projects I include on my blog. Please note I only use and share products I love. Thank you Crafty Friends!


Spellbinders - Windows with a View Collection - Etched Dies - Vista View WindowSpellbinders - Windows with a View Collection - Etched Dies - The Botanical SolariumSpellbinders - Windows with a View Collection - Clear Photopolymer Stamps - Sending Sunshine SentimentsRanger Ink - Tim Holtz - Distress Oxide Ink Pads - Kitsch FlamingoRanger Ink - Tim Holtz - Distress Oxides Ink Pads - Peacock FeathersRanger Ink - Tim Holtz - Distress Oxides Ink Pads - Wilted VioletRanger Ink - Tim Holtz - Distress Oxides Ink Pads - Twisted CitronRanger Ink - Tim Holtz - Distress Oxides Ink Pads - Mustard SeedRanger Ink - Tim Holtz - Distress Oxides Ink Pads - Squeezed LemonadeRanger Ink - Tim Holtz - Distress Oxides Ink Pads - Picked Raspberry

Monday, September 9, 2024

Make a Splash - Birthday Card Request!

 Hello Crafty Friends and welcome! I have a very special card for you today. I will not be linking anything I used to make this card because of the circumstances for this card. Mary Gunn, from Craft Roulette sent out a message on the Craft Roulette Facebook page asking for cards for a special little girls 4th birthday. The family recently lost their 2 year old son because of a drunk driver accident. This little girl loves going to the mailbox every day and Mary thought why not fill her mailbox with birthday cards from all of us. How could I not brighten her day even just a little! Mary said that she loved Mermaids, so I had to make her an amazing Mermaid card!


For this card, I used Karen Burniston's Rockin' Rectangle die. I started with an A2 sized card base using heavy weight smooth white cardstock. I created the backgrounds using a very light weight cardstock and Distress Oxide Ink in Peacock Feathers, Mermaid Lagoon and Chipped Sapphire. Then I sprayed the background with water and dabbed them dry. 

I used MFT - Mermazing stamp set to create my Mermaids with. I colored them in with various Copic markers. I also used this stamp set to stamp the little fish in the background. I used Distress Oxide Ink in Chipped Sapphire for this. 

For the front of the card, I made a window card so you could see the Mermaid on the pop-up rectangle. 

I used Karen Burniston's Alphabet dies to cut the word "splash" which I cut from a glitter blue cardstock and a dark blue cardstock. 

I added a light pink frame around both sides of the window. 

I really hope this card brings a smile to Addi's face. Even for a minute. I have two kids of my own and my heart absolutely breaks for this family. 

Thank you so much for stopping by today and Happy Crafting. 


Thursday, September 5, 2024

Spook-tacular Halloween Card using Karen Burniston's Lorna Label and Explosion Pop-Up

 Hello Crafty Friends and welcome! I have a fun Halloween card for you today, using Karen Burniston's Lorna Label Pop-Up and Explosion Pop-Up!


For this card, I started with a 5.5 x 5.5 sized card base using a light weight black cardstock (65lb). Then I used some new patterned paper I just picked up from Michaels. If you are in Canada, they currently have some of their seasonal patterned paper packs buy one get one free! I cut the patterned paper 1/8" smaller than the card base, then used double sided adhesive to tape it down to the base. 

I also picked up some really pretty thin patterned paper that was double sided and perfect for the Explosion Pop-Up because it's so thin. I die cut the two explosion sides and folded as per Karen Burniston's instructional video, which you can watch by clicking here. I glued these into my card using Lineco Neutral pH adhesive and my fine tip bottle

I then added two 3 x 3 pieces of pumpkin patterned paper to the centre. This was to give the card some more color and to cover the edges of the explosion pieces. 

I then added the Lorna Label Pop-Up. I die cut the centre out of it so that I could hang a charm! I added some black sparkly cardstock to the front, not only to add dimension but to glue the charm in place. For the charm, I used the ghost from the Halloween Charms. I die cut the ghost twice so that if the charm spun you would see the ghost on both sides. 

I then added a skull border to the top and bottom to hide the paper lines. I used the Halloween Borders die to do this. 

I die cut the sentiment "Spook" using the Alphabet die set and the word "tacular" using the Mini Alphabet and Numbers die set. I die cut this from gold glitter cardstock and black cardstock for the word Spook, then black glitter cardstock for the tacular. 

Then I added some more ghosts and cobwebs using pieces from the Halloween Elements and Halloween Scene dies. Lastly, I added a place to sign the card using a rectangle from the Short Rectangles - Crosshatch die set. 

For the front of my card, I continued the same patterned paper as the inside. Then I added a scene using the Halloween Scenes die set. 

I die cut a circle using the Circles - Crosshatch die and added some moon detail to it using a moon stencil from Tim Holtz called Moon Mask. 

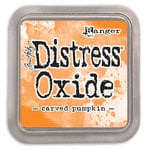
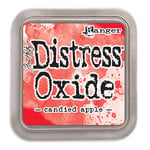
I glued everything down, then I die the sentiment on the front using the Halloween sentiment die and mixing Carved Pumpkin and Candied Apple Distress Oxide Ink. 

I added some glitter gel to the sentiment to make it pop! 

I just love this card!! Thank you so much for stopping by. To see the whole video on how I made this card, click the clip below to visit my YouTube Channel. Be sure to subscribe and like. Happy Crafting!


Supplies: For your shopping convenience, all products are linked below and in bolded text in post. Compensated affiliate links are used where possible with no extra cost to you. This helps me to continue to share all the projects I include on my blog. Please note I only use and share products I love. Thank you Crafty Friends!

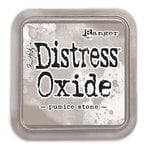
Ranger Ink - Dylusions Dyamond - Designer Series Stickles - StardustRanger Ink - Tim Holtz - Distress Oxides Ink Pads - Carved PumpkinRanger Ink - Tim Holtz - Distress Oxides Ink Pads - Candied AppleScrapbook.com - Clear Double Sided Adhesive Roll - 1/4 Inch x 81 Feet - Permanent - 1 RollRanger Ink - Tim Holtz - Distress Oxides Ink Pads - Pumice StoneRanger Ink - Tim Holtz - Distress Oxides Ink Pads - Black SootStampers Anonymous - Tim Holtz - Halloween - Layering Mask - Moon

Festive Fall Cards using Spellbinders Large and Small Die of the Month: September!

  Hello Crafty Friends and welcome! I have two cards for you today which use Spellbinders Picture Perfect Autumn (Large Die of the Month) an...