Thursday, August 22, 2024

Happy Halloween using Karen Burniston Twist Panel Pop-Up!

 Hello Crafty Friends and welcome! My card for you today uses Karen Burniston's Twist Panel Pop-Up along with several of her fantastic Halloween themed dies!


I was never much into making Halloween cards, but last year, I really got into making them and now I have to admit, they're my favorite!!! The colors, the fun, the spooky characters!!

For this card, I wanted to make something using the Twist Panel Pop-Up. I started with an A2 sized card base using a light weight black cardstock. Then I found this fun Halloween themed patterned paper in my stash and used it for the background. I really liked the colors in the paper, so I created a blue cloud background for the card using MFT - Mini Clouds Stencil and Simon Says Stamps Pawsitively Saturated Ink in Seafoam, Surf and Ocean. 

I then die cut the mechanism pieces from the same light weight black cardstock as the card base. I die cut all the characters to add to my twist panel using Karen Burniston's Witch and Cauldron, Skeleton and Bat, Halloween Elements and Halloween Charms

I then used Border Blends - Trims to create the fun spiral border in orange and purple cardstock. I added two pieces of black cardstock to add a sentiment and a place to sign the card. I die cut the white rectangle using the scalloped border in the Twist Panel Pop-Up. Then I added two pumpkins from the Autumn Elements die using heavy weight smooth white cardstock and colored them in with Copic markers. 

For the front of the card, I cut a rectangle from smooth white cardstock just big enough to fit the Slim Pattern Plate - Spiders die. I created the cloud background the same way I did for the inside. 

I die cut the spider pattern from a glitter cardstock and then glued it down to the cloud background. 

I added a piece of orange cardstock that was just a 1/8in larger on both sides to create a border along the sides. Then I added that to the front panel of the card. 

I used Distress Oxide Ink in Carved Pumpkin and Candied Apple on smooth white cardstock, then I die cut the Happy Halloween sentiment from the Happy Halloween die set. I cut a glitter purple cardstock background for the sentiment. 


How cool is this Halloween card! I just love the background and all the fun characters on the inside. Thank you so much for stopping by today and Happy Crafting!

Supplies: For your shopping convenience, all products are linked below and in bolded text in post. Compensated affiliate links are used where possible with no extra cost to you. This helps me to continue to share all the projects I include on my blog. Please note I only use and share products I love. Thank you Crafty Friends!
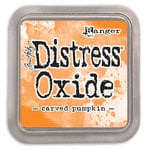
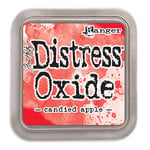
Ranger Ink - Tim Holtz - Distress Oxides Ink Pads - Carved PumpkinRanger Ink - Tim Holtz - Distress Oxides Ink Pads - Candied AppleScrapbook.com - Cardstock - 8.5 x 11 - Neenah Solar White - Ultra Thick - 25 Pack

Thursday, August 15, 2024

8 Fun Christmas Tags using Karen Burniston's Topper Tags!

Hello Crafty Friends and welcome! This year has gone by super fast! Before you know it, it will be Christmas time again. So today I am showing you 8 different Christmas tags using Karen Burniston's Topper Tags die set along with several other of her wonderful die sets. I made two different tags for each sized tag die. 

Our first tag uses the Sleigh Pop-Up as well as the Winter Animals and Christmas Animals dies to create this scene!


 I won't be going through all the steps I did to make these tags on my blog today because I have a great video on how I made each one of these tags which you can view below. 

For my second tag, I used the Fireplace Pop-Up and Fireplace Add-On's 1 and 2


The next two tags use the second largest die in the Topper Tags set. For this first tag, I used the Holiday House die set. 


The next tag, I used the Winter Charms and Holiday Charms to create this fun gingerbread cookie tag!


The next set of tags uses the Outdoor Scene dies to create this wintery scene. I also used the Small Script - Christmas die set to create my sentiment!


My next tag uses the Snowman die set to create this cute little snowman scene!


My last two tags use the Holiday Charms and the Fun Flowers die sets to create a beautiful poinsettia and a hanging ornament tag!


To see how I made these tags, click on the video below! Be sure to subscribe and like and click notifications as I try very hard to post a video or two once a week. Thank you so much for stopping by today and Happy Crafting!!


Supplies: For your shopping convenience, all products are linked below and in bolded text in post. Compensated affiliate links are used where possible with no extra cost to you. This helps me to continue to share all the projects I include on my blog. Please note I only use and share products I love. Thank you Crafty Friends!


Wednesday, August 7, 2024

Spellbinders Large Die of the Month - July 2024 - Christmas Birdhouse Card!

 Hello Crafty Friends and welcome! My card for you today features Spellbinders Large Die of the Month for July - Snowcapped Holidays! This fantastic die set comes with everything you need to create a beautiful Christmas themed birdhouse card. 


For this card, I went with a 5x7 sized card base. This was so I could fit more foliage into the background to showcase all the great pieces that come with this die set!

I cut a piece of smooth white cardstock just slightly smaller than the card base, then using Distress Oxide Ink in Tumbled Glass, Salty Ocean and Chipped Sapphire, created a snow sky background. Once my ink was dry, I used Copic Opaque ink with some water and splattered it with a small paint brush to look like falling snow!

I then die cut all the pieces for the birdhouse using cardstock in the following colors. (Most of this is using scrap cardstock that I saved)

  • kraft
  • light red
  • dark red
  • white 
  • dark brown
I added Distress Ink in Vintage Photo to the edges of the birdhouse to add some dimension. I also added some shadow detail using Copic markers. 

I die cut all the foliage using smooth white heavy weight cardstock and colored it all in with Copic markers. Yes, this is time consuming but it add so much detail to the card!! I feel like it is well worth it. The only thing I didn't cut and color was the pine cones. 

I added everything together and glued it all down using Lineco Neutral pH adhesive in a fine tip bottle. This is my most favorite glue. 

I added the sentiment by die cutting an oval using Karen Burniston's Oval - Crosshatch dies and stamping a sentiment from Spellbinders "Santa's Sippin' Sayings" stamp set. I used VersaMark ink and gold embossing powder. 

I also die cut the birds from scrap cardstock in reds, black and orange then added some glitter gel to the belly of each bird. I also added glitter gel to the little red berries in the foliage. 

I really love this die set! It works so well for a 5x7 card, which I wish more companies would do as you can really get a lot of detail into a 5x7 card! Thank you so much for stopping by today and Happy Crafting!

Supplies: For your shopping convenience, all products are linked below and in bolded text in post. Compensated affiliate links are used where possible with no extra cost to you. This helps me to continue to share all the projects I include on my blog. Please note I only use and share products I love. Thank you Crafty Friends!


Ranger Ink - Tim Holtz - Distress Oxides Ink Pads - Tumbled GlassRanger Ink - Tim Holtz - Distress Oxides Ink Pads - Salty OceanRanger Ink - Tim Holtz - Distress Oxides Ink Pads - Chipped SapphireTim Holtz Distress Ink Pads - Vintage PhotoRanger Ink - Stickles Glitter Glue - Diamond

Tuesday, August 6, 2024

Karen Burniston Designer Challenge - August 2024 - Let The Music Play

 Hello Crafty Friends and welcome! It's Karen Burniston's Designer Challenge for the month of August and our theme this month is "Let the Music Play!". For my card, I used the new Piano Keys Pop-Up die along with the Music Charms to create this Phantom of the Opera card!


The Phantom of the Opera is hands down my most favorite musical. I've seen it twice and the first time I was so mesmerized, I don't even remember some of it. The singing, the way they made the boat seemingly float along the stage, it was all incredible!

For this card, I started with an A2 sized top fold card using a heavy weight black cardstock. I then cut two rectangles just slightly smaller then my card base from a light weight smooth white cardstock and stamped a rose background on them using MFT - Roses All Over stamp. 

I colored some of the roses on the top background using Copic markers. I only did a few because I wanted to keep the black and white but with a pop of color!

I used Karen Burniston's Parcel Pop-Up to make the Phantoms mask rise up from back. For this I used black cardstock. Then I die cut the square "parcel" piece and colored it to look aged, using Distress Ink in Vintage Photo and Simon Says Stamps Pawsitively Saturated Ink in Mocha. I added a die cut piece to act like the stand to hold the sheet music. This is a die in the Parcel Pop-Up set. I die cut it three times (twice from black cardstock and once from kraft cardstock which I then added ink to) then added it to the bottom of the Parcel Pop-Up. 

I printed off the sheet music that I found online onto to printer paper and added Distress Ink in Vintage Photo and Antique Linen to it to give it an aged look as well. 

I die cut the Piano Pop-Up from smooth white cardstock and black cardstock and added it to the front of the Parcel Pop-Up. If you would like to see the assembly video for how to put the Piano Pop-Up together, click here to see Karen Burniston's video!

Lastly, I printed out the Phantoms mask onto heavy weight cardstock and then carefully trimmed it and added it to the back of the card. I found this image on Google and then printed it out first on printer paper to make sure it was the right size. I then added a place to sign the card, using labels from the Lorna Label Pop-Up die set. 

For the front of the card, I stamped the background using a light grey ink (SSS - Pawsitively Saturated Ink in Flannel). 

I die cut the music notes and bars using the Music Charms and black cardstock. I added Glossy Accents to the music notes to add some dimension. 

I stamped the sentiment "You make my heart sing" on to the background using Karen Burniston's new Music Sentiments clear stamp set.

I kept the front of this card simple as there is so much going on in the inside. 

I am so pleased with how this card turned out. Also it's a great way to show that the Piano Pop-Up can mix and match with other dies that Karen makes!!!

Thank you so much for stopping by today and Happy Crafting!


Supplies: For your shopping convenience, all products are linked below and in bolded text in post. Compensated affiliate links are used where possible with no extra cost to you. This helps me to continue to share all the projects I include on my blog. Please note I only use and share products I love. Thank you Crafty Friends!


Tim Holtz Distress Ink Pads - Antique LinenTim Holtz Distress Ink Pads - Vintage PhotoLawn Fawn - 8.5 x 11 Cardstock - Black Licorice - 10 PackScrapbook.com - Cardstock - 8.5 x 11 - Neenah Solar White - 25 PackRanger Ink - Glossy Accents - Clear Dimensional Embellishment - 2 ounces

Friday, August 2, 2024

Weekly Blind Challenge: Coffee Cup Pop-Up Birthday Card!

 Hello Crafty Friends and welcome! It's been a week! I am looking forward to my kids going back to school so I can spend more time on cards and less time getting snacks, snacks and more snacks!!! Lol! 

I have another Weekly Blind Challenge card for you today. This time from my Karen Burniston dies, I pulled out the Rockin' Rectangle, Gnome and Santa and Coffee Charms. So I decided, instead of using the rectangle that comes with the Rockin' Rectangle, I would use the Coffee Cup Pop-up cup!


For this card, I started with an A2 sized card base using my favorite brown cardstock from Lawn Fawn called Ground Coffee (seemed appropriate! Lol). Then I found this great patterned paper in my stash from Echo Park called I Love Family, which I used as my background. 

I die cut the pop-up mechanism from the same brown cardstock as well as the scalloped borders around the window in the front of the card. To see how to make this window card or how to add the pop-up mechanism, click here to view Karen Burniston's assembly video on YouTube. 

I added a piece of thick acetate to the window and used double sided adhesive to keep it in place. I then die cut the coffee cup from the Coffee Cup Pop-Up and trimmed away the pieces I wouldn't be using with my craft scissors. 

I added the coffee cup sleeve, cutting this from Kraft Cardstock and then added the coffee bean front to it using cardstock scraps. 

I used MFT - Coffee Order stamp set to stamp a sentiment to go on the inside of the card. Then I die cut a place to sign the card using dies from the Little Twist Panel Pop-Up

I then added some of the coffee charms to the left side of the card, creating another coffee cup and a cup with iced coffee in it. I added glossy accents to the front of the iced coffee to look like clear plastic. 

For the front of the card, I created a gnome using the Gnome and Santa die set. I added some more coffee charms and added some mugs using the Tea and Coffee Borders dies. Then I stamped a sentiment onto brown cardstock using MFT - Coffee and Conversation stamp set. 

I really love how this card came out! It's a great card for anyone who loves coffee! Thank you so much for stopping by today and Happy Crafting!

Supplies: For your shopping convenience, all products are linked below and in bolded text in post. Compensated affiliate links are used where possible with no extra cost to you. This helps me to continue to share all the projects I include on my blog. Please note I only use and share products I love. Thank you Crafty Friends!

Supplies:


Lawn Fawn - 8.5 x 11 Cardstock - Ground Coffee - 10 PackLawn Fawn - 8.5 x 11 Cardstock - Kraft - 10 PackRanger Ink - Glossy Accents - Clear Dimensional Embellishment - 2 ounces

Let it Snow Snowman Card - Waffle Flower Postage Card

 Hello Crafty Friends and welcome. My card for you today uses Waffle Flower Postage Collage and Waffle Flowers Postage Collage Snowman Stenc...