- 2 new Pop-up Die Sets
- 3 new Pop-up Add-ons Die Sets
- 2 new Stand Alone Die Sets
- 1 new Sentiment Die Set
- 2 new Charm Set Die Set
- 5 new Clear Sentiment Stamp Sets
Monday, October 28, 2024
Karen Burniston - KB Riley LLC October 2024 Release Blog Hop
Friday, October 25, 2024
Karen Burniston October 2024 New Release - Sneak Peek Week - Photo Fan Pop-Up
Hello Crafty Friends and welcome! It's the last day of Sneak Peek Week and what a week of creativity it's been! The new release will be available on October 28th as well, we will be having our Blog Hop where if you leave a comment with your name and email you will be entered to win a $25 online gift certificate to shop at Karen Burniston's website! The new release has 10 new dies and 5 new sentiment stamps.
My card for you today features the new Photo Fan Pop-Up! I used the Photo Fan to create a beautiful fan of Aster flowers. These flowers were created using the new Fireworks Die!
I die cut these from smooth white cardstock and colored them with Copic markers in pink and purple to create the Asters.
I also used the new Photo Memories sentiment stamp set to add some birthday sentiments to my card. This is an A2 sized card base.
Thank you so much for stopping by today for the last Sneak Peek of the new release! Be sure to join our Blog Hop on Monday! Happy Crafting!
Thursday, October 24, 2024
Karen Burniston October 2024 New Release - Sneak Peek Week - Penguin and Reindeer Snowman Add-Ons
Hello Crafty Friends and welcome! I hope you are enjoying all the fantastic cards the Design Team have created with the new release. I know I loved seeing all the amazing designs over these last few weeks. My cards for you today feature the new Penguin and Reindeer Snowman Add-Ons. These adorable add-ons pair with the Snowman Pop-Up and make for an adorable card! This new release features 10 new dies and 5 new sentiment stamps.
For my first card, I made a Penguin in a snow globe!
For this card, I used a 5.5 x 5.5 card base from heavy weight smooth white cardstock. Then I added dark blue paper and then a pretty snow globe patterned paper.
For the base of the snow globe, I used the base cake from the Cake Pop-Up die set. I added my penguin to that to pop him up.
I added a border of mittens at the top using the Christmas Borders, and then another circle for the area to sign the card.
I also used the new Winter Hugs sentiment stamp add a sentiment to my circle.
I kept the front of my card very simple, since there is so much going on inside the card!
For the Reindeer card, I used the Christmas Trees Pop Stand along with the Reindeer add-on to create this fun scene! This is a 5 x 7 card base to be able to fit the two trees and Reindeer into one card. I also added the Merry Christmas from the new Merry Christmas Lorna Add-On to the top of my card!
The new release will be available on October 28th. Be sure to join us for our Blog Hop for a chance to win a $25 gift certificate for www.karenburniston.com. Happy Crafting!
Wednesday, October 23, 2024
Karen Burniston October 2024 New Release - Sneak Peek Week - Fireworks!
Hello Crafty Friends and welcome to another Sneak Peek card day for the new Karen Burniston October 2024 New Release. There are 10 new cards in this release including 5 new sentiment stamps! I hope you've been enjoying all the fantastic cards the Design Team has made.
I am especially excited to share with you my card today. This is one that I am especially proud of! This card showcases the new Fireworks die set. This die comes with all different shapes of fireworks that can be used with the Palm Tree Pop-Up!
For my card, I used the House of Cards die set to create this city scape New Years Fireworks display!
This is a 5x7 side fold card, with a 1/8in spine down the middle to fit the House of Cards pop-up inside the card.
The front of my card uses the new Happy New Year sentiment die along with more of the fantastic fireworks!!
The new release will be available on October 28th. Be sure to join our Blog Hop on that day for a chance to win a $25 online gift certificate to Karen Burniston.com!! Thank you so much for stopping by today, come back tomorrow for another Sneak Peek! Happy Crafting!
Tuesday, October 22, 2024
Karen Burniston October 2024 New Release - Sneak Peek Week - Poinsettia
Hello Crafty Friends and welcome to Day 2 of our Sneak Peek Week for Karen Burniston's October 2024 New Release. This release features 10 new die and 5 new sentiment stamp sets.
My card for you today showcases the new Poinsettia die set. This die comes with the flower, the flower centre and all the little foliage to create a beautiful poinsettia card! For my card, I used the Rockin' Rectangle to create a pop out poinsettia card.
This card also uses the new "Season of Cheer" sentiment stamp set! They coordinate perfectly together for sure! This is an A2 sized card base. I die cut the poinsettia from smooth white cardstock and colored it with Copic markers.
The new release will be available on October 28th. Be sure to join us for our Blog Hop on that day for a chance to win a $25 online gift certificate. Thank you so much for stopping by today, come back tomorrow for the next Sneak Peek card. Happy Crafting!
Monday, October 21, 2024
Karen Burniston October 2024 New Release - Sneak Peek Week - Postage Pop-Up
Hello Crafty Friends and welcome to the first day of Sneak Peek Week for the Karen Burniston October 2024 New Release! I hope you are as excited as I am about this new release! There are 10 new dies and 5 new sentiment stamp sets!
My card for you today showcases the new Postage Pop-Up die set. This die set comes with everything you need to make a pop-up postage card, included a paper airplane die, a post mark die and there is a coordinating sentiment stamp as well!!
For these two cards, I went with a baby card theme. I used the Baby Charms as well as the Special Delivery sentiment stamp to create these two cards.
This first card uses an open window card front so you can see the little die cuts on the inside of the card. I also used Word Set 7 - Autumn to add the word "Welcome" to the front of the card.
This is a 5.5 x 5.5 sized card base using smooth white heavy weight cardstock.
The Postage Pop-Up is a very easy pop-up to put together as well!
You can also detach the "stamps" to make singular stamps to add to your card, as shown inside the card where you would sign it.
The sentiment stamp is the perfect add-on for the pop-up.
I made another baby card, this time with a blue theme, but didn't add a window on the front. This way you could see both cards and how it would look.
The baby charms work so well with the Postage Pop-Up, especially with the stamp that says "special delivery".
Thank you so much for stopping by today for our first Sneak Peek day! Be sure to come back tomorrow for another Sneak Peek!
The new release will be available on October 28th. Be sure to join us on that day for our Blog Hop where you could win a $25 online gift certificate at www.karenburniston.com!
Happy Crafting!
Saturday, October 12, 2024
Festive Fall Cards using Spellbinders Large and Small Die of the Month: September!
Hello Crafty Friends and welcome! I have two cards for you today which use Spellbinders Picture Perfect Autumn (Large Die of the Month) and Autumn Scarecrow (Small Die of the Month) dies.
For the first card, which uses the Large Die kit, I started with an A2 sized card base using Lawn Fawn's Ground Coffee cardstock. I die cut the background pieces using Neenah Classic Crest Smooth white heavy weight cardstock, then colored my background with Distress Oxide Ink in Mustard Seed, Carved Pumpkin, Candied Apple, Twisted Citron, Mowed Lawn, Rustic Wilderness, Tea Dye and Rusty Hinge.
I die cut all the pieces of this card using the same Neenah heavy weight cardstock and colored them in using Copic markers. I used Spellbinders Fall Greetings to stamp my sentiment on the front of my card using Lawn Fawn's Jet Black Ink.
For the second card, I used the same Ground Coffee cardstock for the card base, making a top fold A2 sized card base. Then I created my background using Lawn Fawn's Slimline Hillside Stencil and Distress Oxide Ink in Tumbled Glass, Salty Ocean, Mowed Lawn, Rustic Wilderness and Ground Espresso.
I die cut all the pieces of this card using the same heavy weight Neenah cardstock and colored them in using Copic markers. I also used the same stamp set using VersaMark Ink and white embossing powder.
To see how I put these cards together, check out my YouTube video below. Thank you so much for stopping by and Happy Crafting!
Supplies: For your shopping convenience, all products are linked below and in bolded text in post. Compensated affiliate links are used where possible with no extra cost to you. This helps me to continue to share all the projects I include on my blog. Please note I only use and share products I love. Thank you Crafty Friends!





Thursday, October 3, 2024
Lawn Fawnatics Challenge 181 - Awesome Autumn!
Hello Crafty Friends and welcome! I thought I would join in on Lawn Fawn's Challenge 181 - Awesome Autumn. Autumn is my most favorite season! The changing of the leaves, the cool air, the pumpkin pie but most of all Halloween!!! I love watching my oldest make her own Halloween costume. My youngest just loves dressing up in fun costumes! So I decided to make a Halloween card for this challenge.
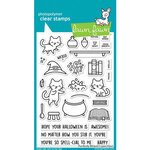
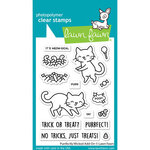
For this card, I started with an A2 sized card base using a light weight black cardstock. Then I planned out my card, because I wanted to use masking paper to create this. I used Lawn Fawn's Purrfectly Wicked stamp set and the Purrfectly Wicked Add-On stamp to create this card.
I stamped all the images I wanted to use on my masking paper. I really love using gina.K Masking Magic Sheets. They work really well! I cut them out with my craft scissors, then set them aside.
I started stamping my images and masking them. Once I had everything stamped, I drew out the window with my pencil, then once I was happy with how it looked, I went over it with a black thin tipped marker. I then created the floor using Simon Says Stamps Pawsitively Saturated Ink in Cappuccino and Mocha. Then I used MFT - Woodgrain Stamp to create the wood floor.
I used MFT - Small Brick Wall Stencil and SSS Pawsitively Saturated Ink in Flannel and Earl to create a brick wall. I then removed all my masking paper and colored in the rest of the card with my Copic markers.
I stamped the sentiment on the bottom of the card using the coordinating sentiments with the Purrfectly Wicked stamp set. I used VersaMark Ink and white embossing powder.
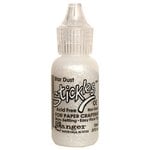
Lastly, I added Glossy Accents and Stickles Glitter Gel in Stardust to add some detail to my card. I just love how this turned out!!! This is such a cute stamp set. Thank you so much for stopping by and Happy Crafting!
Supplies: For your shopping convenience, all products are linked below and in bolded text in post. Compensated affiliate links are used where possible with no extra cost to you. This helps me to continue to share all the projects I include on my blog. Please note I only use and share products I love. Thank you Crafty Friends!

Tuesday, October 1, 2024
Karen Burniston's Designer Challenge - October 2024 - Haunted!
Hello Crafty Friends and Welcome! It's Designer Challenge time once again and out theme for October 2024 is Haunted! Holy moly it's already October!!! This year has flown by. My card for you today uses the Tiny Trees Pop-Up to create a Haunted Forest!!
For this card, I wanted to put in four trees (I wish I could have put in more) so I went with a 5x7 card base from black cardstock.
I dug through my patterned paper stash and found some great purple swirl paper. I thought this would be perfect for my haunted forest floor. I also added some fun halloween paper to the sides of my card and added a strip of green cardstock for trim.
I die cut all my trees from heavy weight smooth black cardstock. I die cut the extensions for the trees using the same paper as the card base. Then I glued my trees in using Lineco Neutral pH adhesive in my fine tip bottle.
I then die cut my ghosts using Karen Burniston's Halloween Elements and a heavy weight vellum. This way, you could still see through them and they were strong enough to handle being folded down with the trees.Happy Birthday Mom - Karen Burniston's Cupcake Pop-Up
Hello Crafty Friends and welcome! I have a very special card for you today. It is my Mom's 76th Birthday card, so please join me in wis...

-
Hi Crafty Friends, Welcome to our Karen Burniston Products - KB Riley LLC September Release Blog Hop. The Design Team have come together w...
-
Hello and welcome! On my blog today is this fantastic pop-up card box! Karen Burniston recently added some templates to her online store th...


