Hello Crafty Friends and Welcome! My card for you today uses Karen Burniston's Topper Tags and Flutter Charms to create a bottle with fireflies in it. This is also a light up card!!
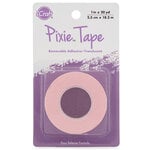
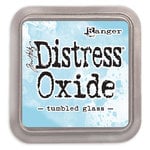
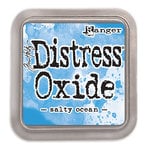
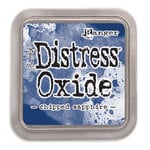
For this card, I went with a 5x7 sized card base using heavy weight smooth white cardstock. I then used Karen Burnsiton's Rectangles and Labels - Crosshatch to die cut the background panel. I taped off the crosshatch edges (because they really are so pretty!) using Pixie Tape, then started to create my night background. For this, I used Distress Oxide Ink in Tumbled Glass, Salty Ocean, Chipped Sapphire and Black Soot. I set this aside to dry completely.
While my background was drying, I created my fireflies. For this, I used the bumblebee dies in the Flutter Charms die set. I looked up what fireflies looked like and seen that they were orange and like a dark brown/gray color. So I used my Copic markers to create these little guys. Then, using my tiny hole punch, I punched a small hole in the last slot in the bottom of the firefly. This way, the light will show through.
I then die cut the largest topper tag twice using heavy weight smooth white cardstock. I trimmed the top of the topper tag off and then used Distress Oxide Ink in Speckled Egg to create the blue bottle. I then took the second topper tag and trimmed the top off. I trimmed a small piece of the remaining topper tag and created a lid for my bottle. I will be posting a how to video Tuesday, May 7th on how I did this. I colored the lid in with gray Copic markers.
I cut a grass bottom using Karen Burniston's Nature Edges die and colored this in with Distress Oxide Ink in Mowed Lawn and Rustic Wilderness.
Once my background was dry, I splattered it with white Copic Opaque paint mixed with a little water to add stars to the sky. Then I began to mark where my lights would go. I added punch holes where the lights would be, then glued down my bugs onto the bottle using Lineco Neutral pH glue and a Fine Tip Bottle.
I added Chibi lights to the card, which I will show you in my how to video as mentioned above. Once I had my lights in place, I added foam tape to the background and added the background to the card front. I then added my sentiment using Karen Burniston's Word Set 9 - Love and Mini Alphabet and Numbers. I tested the lights again to make sure they worked and voila!! We have a light up bottle card!
Be sure to check out my YouTube channel (click here) for more card making how to videos and for the how to video on this card next Tuesday. Thank you so much for stopping by and Happy Crafting!!
Supplies: For your shopping convenience, all products are linked below and in bolded text in post. Compensated affiliate links are used where possible with no extra cost to you. This helps me to continue to share all the projects I include on my blog. Please note I only use and share products I love. Thank you Crafty Friends!
Other Products Used:


No comments:
Post a Comment