Wednesday, August 31, 2022

Sneak Peek Week: Day 3 - Snowman Pop-Up

 Hello and welcome to day 3 of Sneak Peek Week! I'm so excited to share with you today, this three tiered snowman using Karen Burniston's Surprise Ball Pop-Up, Bitty Ball Pop-Up, Mini Ball Pop-Up and the brand new Snowman Add-On's die set, which is part of the August 2022 new release, available at www.karenburniston.com on September 5th!


To make this card, I cut a card with green cardstock, 5x10 inches, folded to make a 5x5 card. I printed the sentiment "warm wishes and snowman kisses" on heavy weight smooth white cardstock and cut it out to fit the card. I used a red plaid pattern paper for the background and added a snow hill. I added the "Season's Greetings" sentiment using Karen Burniston's Word Set 3 - Holiday from sparkly white cardstock and smooth white cardstock. I glued the smooth white cardstock to the back of the sparkly cardstock to add some strength and dimension to the sentiment. 

The snowman is made from heavy weight smooth white cardstock (110lb). I cut each ball out and glued everything together using Lineco Neutral pH adhesive. I die cut the snow man arms from kraft cardstock and using my Copic markers I added some shadows. I die the carrot nose twice and with my Copic markers added some details to the nose then glued it on the snowman's face. I die the eyes, smile and buttons from a shiny black cardstock and with a white Gelly Pen (size 10) I added some detail to the eyes. 

For the snowman's hat, I added ribbon and punched out the two green leaves and berries from some scrap cardstock I had. The berries I made from a hole punch and the leaves were from a Recollections punch I've had for years. I added some glossy accents to the berries and once that was dry, I added some highlights with my white Gelly pen. 

I keep all my scraps of paper/cardstock in drawers based on color or pattern, so I dug through my Christmas paper drawer and found a plaid like paper to use for the snowman's scarf. 

I die cut out the snowflakes using the same sparkly white cardstock as the sentiment, using the snowflake that came with the Snowman Add-On die set. 

I currently do not have the Flap and Closure dies (although I did order them, because you can never have too many dies!) so I created my own flap to use as a closure. I cut out a green piece of cardstock 5x2 inches and added a score line at 1 inch. Then added it to the bottom of the card. 

The Snowman Add-On is so great, especially if, like me, you absolutely love all things snowmen! Be sure to add this to your shopping cart on September 5th, because it is a great addition to your collection!

Thank you so much for stopping by and Happy Crafting!


Tuesday, August 30, 2022

Sneak Peek Week Day Two: Just Bee-cause

 Hello and welcome to Day 2 of Sneak Peek week! Today's card features two die sets from the new release, Word Set 15 - Just Because and the new Label Charms Pop-Up. This card also features Karen Burniston's Flutter Charms die set. 


I started with an A2 size card using a light kraft cardstock. For the background, I used Lawn Fawn Flower Market cardstock in the gray color. I die cut the honeycomb in three different colors and die cut the bee and flowers from scrap pieces of cardstock in various colors. 

I die cut the word "Just" in black and added it to the background die cut. I added dimension to the flowers and bee. I also die the leaves from the Karen Burniston's Flowers and Bee die set.

I created a black border around the center by first die cutting the main pivoting panel that's on the front of the card. From there with a pencil, I created a border around the die cut as shown below. 

I used my craft scissors to carefully cut out the border and then added to the front and inside of the card. I just find that this gives the card a more finished look. 

I added the flowers and leaves, along with the honey comb to the front of the card. I added different colored areas to the honeycomb and added my bee using Lineco Neutral pH adhesive. Best glue ever!

I also added a background to the small panel that pivots when you open the card. This is the same cardstock from Lawn Fawn, just the other side of the paper. 

For the inside of the card, I kept with the same theme, using the flowers and bee's along with the honey comb. 

I die cut smaller pieces from the Label Charms Pop-Up in smooth white cardstock and added my sentiment bee-cause. 


I actually die cut the word because from the new Just Because Word Set and added the second 'e' to the word bee. I left the last piece open space to sign a name or write a note to the recipient. 

Thank you once again for stopping by on Day 2 of Sneak Peek Week. The new release will be available on the Karen Burniston website on September 5th! Happy Crafting!


Monday, August 29, 2022

Get Ready! It's Sneak Peek Week! Day One: Sewing Charms.

 Hello and Welcome to day 1 of Karen Burniston's sneak peek week for the upcoming new release that will officially be available September 5th. I am so excited to share with you cards each day that show off the new dies in the release!

As you can see, there are so many new and exciting dies that will be available. So get ready to get creative! 

Also on September 5th we will be having a blog hop! I can't wait to show you what I came up with for the blog hop, but you will just have to wait for one more week!

For today's card, I used the new Sewing Charms and also Karen Burniston's Tag Book Pop-Up. As soon as I seen the new sewing charms I couldn't wait to make something with them. 

They include a spool of thread, a sewing needle, two buttons, a thimble, a pair of scissors and a sewing machine. 


For this card, I cut the tag book pop-up out heavy weight smooth white cardstock. For the inside mechanism, I used a peach colored cardstock.

I used a piece of smooth white cardstock and stamped it using Concord and 9th's Stitched Turnabout Stamp. This creates a background that looks almost quilted. I used Gina K. Designs ink in Peach Bellini, Lovely Lavender and Ocean Mist. I also used Hero Arts Shadow Ink in Soft Vanilla to create the stitched background.

For the front of this tag book, I die cut a rectangle from Karen Burniston's Rectangles - Crosshatch using the same peach cardstock as the inside. I also die cut a smaller rectangle from the same set to stamp the sentiment on. 

The sentiment is called Quilt Quotes from Close to my Heart. I added the spool of thread using some blue embroidery thread I had on hand. I die cut the spool from Kraft cardstock and added some dimension with Copic markers. I die cut the needle using a mirrored silver cardstock and ran the embroidery thread through the eye of the needle. 


For the inside of the tag book, I continued with the Stitched background paper as well as some yellow cardstock. I added the different elements from the sewing charms and stamped the sentiment "sew happy we're friends" from the Concord and 9th Stitched turnabout stamp.

I think my favorite thing about this is how much fun it was to add all the cute sewing charms. They are absolutely adorable! 

Thank you for stopping by on day 1 of the sneak peek week. I look forward to showing you more cards using the amazing dies from the Karen Burniston August 2022 release. Happy Crafting!


Friday, August 26, 2022

Light Up Holiday House using Karen Burniston's Holiday House Die Set

 Hello and welcome! Today's card features Karen Burniston's Holiday House die set. This die set gives you everything you need to create a festive Christmas themed house or you can even use it to make a spooky Halloween house! For this card, I used it to make a light up Christmas card.


I started with an A2 sized card base using red cardstock. I die cut out a rectangle from heavy weight smooth white cardstock and created the dark blue sky background with Distress Oxide inks in Chipped Sapphire and Salty Ocean. 

I die cut a snow hill from the same heavy weight smooth white cardstock. I cut out the pieces of the Holiday House from various scraps of cardstock. For the brick work, I ran the section through the embossing plates and then cut it out. I used my cool gray Copic Markers to add the brick details. For the main house, I had a really hard time deciding what to do. I tried wood paneling, red brick using a stencil but it just didn't seem to work. So I used Distress Oxide ink in Pumice Stone and added flecks of white and black water color paint watered down. I dabbed it with kleenex and it give the main house a very cool stone look. 

I die cut the windows using dark brown cardstock and heavy weight vellum. I traced the shape of the windows on to the main house using a pencil and cut the rectangle shape out with an exacto knife. The dies do not allow you to cut out the window, so in order to make this light up, I had to cut it out by hand. I glued all the pieces together and set it aside. 


I used Chibitronics yellow lights to make the windows glow. I added foam tape to the back of the snow hill to hide the electronic parts. 

For the sentiment on the front, I used my Glimmer Hot Foil machine and added the sentiment with gold hot foil. The last step was to add the snow in the background and I did that using a size 10 Gelly Pen.

Thank you so much for stopping by and Happy Crafting!


Thursday, August 25, 2022

Happy Autumn with Karen Burniston's Tiny Trees Pop-Up!

 Hello and Welcome! Today's card features Karen Burniston's Tiny Trees Pop-Up and Word Set 7 - Autumn. I have had the tiny trees die for a while now and finally got it out to play! 


I don't know about you, but I love Fall! It's my favorite season, so the past few days I've been making some fall cards. For this card, I started with orange cardstock cut to make an A2 size card. I recently purchased the Doodlebug Design Inc. 12x12 "Pumpkin Spice" paper pack. This came with 12 sheets of double sided cardstock and 1 sheet of this and that stickers. I used the leaf cardstock for the background on the front of the card. I die cut a rectangle using Karen Burniston's Rectangles - Crosshatch die set using a teal blue cardstock that came close to matching the blue leaf on the background cardstock. I cut the next size smaller rectangle in smooth white cardstock. I die cut the Happy Autumn sentiment from Word Set 7 - Autumn out of cardstock that I had previously colored with Distress Oxide ink. 

Next I die cut three sets of trees using the Tiny Trees Pop-Up, including leaves in yellow, green, red and orange cardstock. I made up the tree as per the instructions and folded it flat to go on the front of the card. I trimmed the bottom and added foam squares to the back of the front part of the leaves on the tree to make it kind of pop out. This was a great tip from Karen Burniston's how to video on YouTube, which you can see by clicking here.

For the inside of the card, I continued with the patterned paper for the outside edges and just a smooth green cardstock for the background. I added a piece of blue trim from the sticker sheet of the paper pack. 

I added the trees, using fall colors for the leaf parts in orange and yellow cardstock for one and red and orange cardstock for the second tree. I added fallen leaves around the bottom of each tree and added a little bit of dimension to the fallen leaves with Copic markers. 

I die cut a small rectangle so that if you were going to give this card to someone you could sign it or write a personalized message. 

I added the "Thankful for You" sticker just above the white rectangle which also came from the this and that sticker sheet. 


Even though this card is simple, it just feels like fall! I can't wait to use this die set again. It was simple to put together, and this die set also allows you to add more trees to your card with an extension arm that will allow to add as many trees as you want. 

You can also get an add-on die called Tree Fruit which allows you to add apples, lemons, peaches, cherries, pears and oranges. 

As with all of Karen Burniston's die, this can be used to make cards for any season, for any reason. This is one of the reason's I just love her dies!

Thank you so much for stopping by and Happy Crafting!


Monday, August 22, 2022

It's Turkey Time with Karen Burniston's Spinner Square Pop-Up!

 Hello and Welcome! I had so much fun making today's card! For this card I used Karen Burniston's Spinner Square Pop-Up, Feathered Animals, Word Set 7 - Autumn and Autumn Elements.


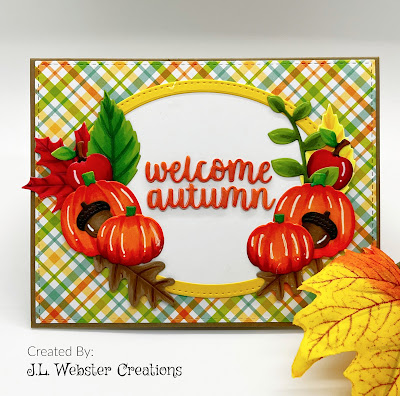
To make this card, I started cut a piece of Kraft cardstock for an A2 sized card. I die cut the background paper from Doodlebug Designs Inc. "Pumpkin Spice" paper pack. I die cut the words "Welcome Autumn" from heavy weight cardstock that had been colored with Distress Oxide inks in Carved Pumpkin and Candied Apple. I die cut the oval from MFT Stitched Oval STAX dies and cut a second one to make a frame around the white oval. I die cut out the leaves, pumpkins, apples and acorns from Karen Burniston's Autumn Elements. I used Copic markers to add some details to the die cuts. 

To make the inside, I used the same Autumn Elements as well as the turkey from Karen Burniston's Feathered Animals. I used the Spinner Square Pop-Up mechanism twice so the turkeys pop up together. 

I added the Happy Thanksgiving sentiment from the Word Set 7 - Autumn. I also die cut a small white rectangle from Karen Burniston's Rectangle - Crosshatch shape dies, so you could sign the card to the recipient. 

I printed the "I came in like a butterball" on heavy weight cardstock and die cut the sentiment out using the speech bubble that comes with the Spinner Square die set. 

I added white shine lines using a Gelly Pen in size 10. 


When I make a card that has several elements in it, like the leaves, apples, etc, I cut everything out first, add details with Copic markers then glue everything together. This way, everything is ready to go when I assemble the card itself. It might be time consuming to add marker detail to each die cut, but the end result is so worth it!

Thank you so much for stopping by and Happy Crafting!


Thursday, August 18, 2022

Christmas in August with Karen Burniston's House and Fence Pop-Up.

 Hello and Welcome! Todays card features Karen Burniston's House and Fence Pop-Up. I wanted to create Santa's house up in the north pole, so I used the House and Fence Pop-Up to create this Christmas scene.


To make this card, I started with dark blue cardstock and cut to an A2 size card. I cut three rectangles using MFT A2 Stitched Rectangle STAX, in the largest size from white heavy weight cardstock. On two rectangles, I created a dark sky using Distress Oxide ink in Chipped Sapphire and Broken China and added white snow flakes using my Gelly Pen in size 10. I made a snow hill background using Karen Burniston's Nature Edges die set. 

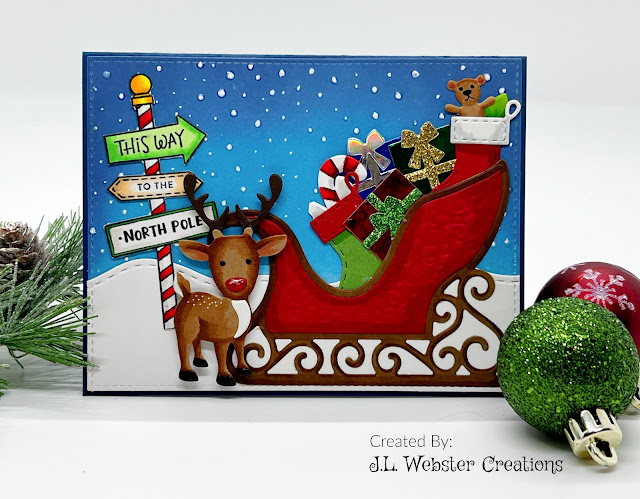
For the front of the card, I made the sleigh using Karen Burniston's Sleigh Pop-Up.  I also used the Holiday Charms die and the Christmas Animals die set. I used my Copic markers to give the die cuts some dimension. I used a Christmas stamp from Simon Says Stamps I had and stamped and colored the North Pole sign. I didn't have a matching die so I fussy cut the sign out. 


For the inside of the card, I made the house look like a log/stone house. I die cut out the trees from the Winter Charms die set from green cardstock and added details using Copic markers and snow tips with my Gelly Pen in size 10. I created the polar bear and Santa and added them to the two tabs on the floor of the pop-up panel. I die cut the fence from red cardstock and added snow to it. If I make this pop-up again, I will double up on the cardstock for the fence, it wasn't very strong with the cardstock I used. 

For the house, I die it out from white cardstock and used Copic markers to add all the details. I used the wreaths that go on the fence to go on the windows and doors. I colored in the stone path way with Copics and added them to ground panel. The chimney is made from the door die. I cut it out from gray cardstock and the door frame from black cardstock and created the chimney. 

I die cut the candy canes and colored them with Copics as well and added them to the fence. I am so happy with how my Santa house came out. I hope you like it as much as I do! Thank you so much for stopping by and Happy Crafting!

Thursday, August 11, 2022

Happy Birthday Dad - Using Karen Burniston's Little Labels Pop-Up

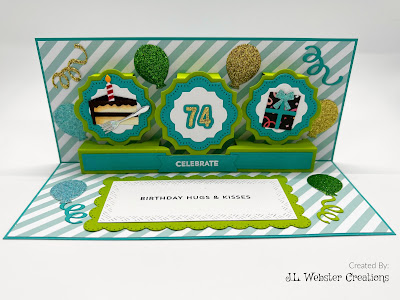
 Hello and Welcome! Today's card features Karen Burniston's Little Labels Pop-Up and the Big Birthday Charms die sets. This card was made for my Dad who turned 74 yesterday, so Happy Birthday Dad!


I make this card, I started with a slimline size card (3.5 x 8) using a dark teal heavy weight cardstock. I decided on Lawn Fawn "Let it Shine" striped cardstock for the background. I used heavy weight green cardstock for the pop-up mechanism and some of the extra pieces. 

I used the Big Birthday Charms for the inside of the card, to decorate the Little Labels pop-ups and used Karen Burniston's Mini Alphabet and Numbers die to cut out the 74. This is a great set, because you get the number and a background piece for each letter and number. So you can choose to use it or not, which I love. 

I stamped the sentiment "Celebrate" and "Birthday Hugs & Kisses" from MFT Bitty Birthday Wishes


I love the bright colors in this card. I added some little confetti pieces I had in my supplies to add a little extra to the front of the card. I used Karen Burniston's Happy Birthday die and glitter cardstock to make the front sentiment. 

I would love to hear from you, so please feel free to leave me a comment or if you have a question about this card or any of the other cards on my website. Thank you for stopping by and Happy Crafting!


Monday, August 1, 2022

August 2022 Karen Burniston Designer Challenge

 Hello and Welcome to a very special post! Todays card showcases my very first Karen Burniston Designer Challenge: Labels! For this card I used Karen Burniston's Landscape Rectangle Accordion Die. As soon as I seen this die set, I knew I wanted to make a gnome garden! This card incorporates quite a few of Karen's die sets. 


For this card, I die cut the Landscape Rectangle Accordion 3 times out of 110lb white cardstock. I used the KB Short Rectangles - Crosshatch dies and created the yellow frame for each panel. I die cut out the Landscape Rectangle Accordion panel three more times out of white cardstock and cut the center piece out so I could use it for the background in each panel. 

When I make a card like this one, where there are a lot of little pieces, I like to die cut out several of each thing just in case I need them and I have everything ready when I go to put the card together. For this card I used the following dies from Karen Burniston:
    - Flutter Charms for the butterfly
    - Word Set 14 - Hugs - for the word Hugs and xoxo
    - Garden Charms 
    - Tiny Gnomes
    - Tiny Trees Pop-Up - for the birds and flowers
    - Nature Edges


For the majority of these cute little die cuts, I used my Copic markers to give them depth and add little details, such as the gnomes beard and the center of the white and purple flowers. I personally feel that this just gives your card that little extra "wow" factor. It does take a lot of time but I think it's totally worth it. I used double sided adhesive tape and Lineco Neutral PH glue to put everything together. 

For the Flutter Charms and Garden Charms I cut the little portion that turns the die cut into a charm off.  I added some shine lines of the plants and white spots on the gnomes hat with a white Gelly Pen. I also added some glossy accents to the butterfly body. For the gardening gloves, I cut them out of patterned paper as well a solid colored cardstock and used the solid color to make the cuff on the gloves. 

For the background clouds, I used the Mini Cloud stencil from My Favorite Things and Distress Ink in Peacock Feathers. 


I am so pleased with how this card came out. The accordion mechanism was easy to create. Karen Burniston also has a how to video on YouTube that you can see here, which makes creating with any of her Pop-Up dies super easy. 

As always, thank you so much for stopping by and Happy Crafting!


Honey Bee Stamps: Lovely Layers Magnolia

 Hello and Welcome! Todays card features the new die from Honey Bee Stamps, Lovely Layers collection, the Magnolia! This die set gives you everything you need to make absolutely stunning magnolia flowers and leaves.  

For all three cards, I used an A2 card base with 110lb smooth white cardstock. I die cut three rectangles using the largest die in the MFT A2 Stitched Rectangle STAX set. 

I used my Spellbinders Glimmer Hot Foil machine and Spellbinders Essential Glimmer Rectangles and Essential Duo Lines Glimmer Rectangles along with Glimmer Hot Foil in Pewter to make the foiled detailed around the card. 

I die cut the magnolia pieces out of cream and white colored cardstock and added some details on the petals using Copic markers. 

I die cut the leaves out of dark green cardstock and also added details to them using Copic markers. 

I stamped and die cut the words, You, Bloom and Thanks using Honey Bee Stamps Bitty Buzzwords and Bitty Buzzwords: Bloom
I also used the corresponding sentiments from both stamp sets and added the sentiments to the front of the cards. These stamp sets come with several different large printed words along with matching sentiments. 

Another great thing about these large collections of stamped sentiments is you can get the matching dies so you cut out the large print words perfectly!

I glued the magnolia flowers on to the fronts of the cards with Lineco Neutral PH glue. I trimmed the edges of the flowers that went over the card base. 


I have tried several of Honey Bee Stamps Lovely Layers flowers. I personally love using them. They make absolutely gorgeous flowers for your cards or even for scrapbooking! 

For the insides of the cards, I used some flower patterned cardstock I had and cut a smaller white rectangle out of white cardstock and added some simple sentiments to the inside of the card. 

I just love how simple and yet elegant these cards are. If you don't feel like adding dimension with Copic markers, you can cut the pieces out from different shades of cardstock and put them together. 

As always, thank you for stopping by and Happy Crafting!


Easter Scene using Karen Burniston's Landscape Rectangle Accordion!

 Hello Crafty Friends and welcome! My card for you today uses Karen Burniston's Landscape Rectangle Accordion, along with the Fence Add-...