Hello Crafty Friends and Welcome to our last day of Sneak Peek Week. I hope you have enjoyed seeing all the Design Teams fantastic creations using the 9 new dies in this release. Be sure to come back on Monday, September 18th for Blog Hop Day!!
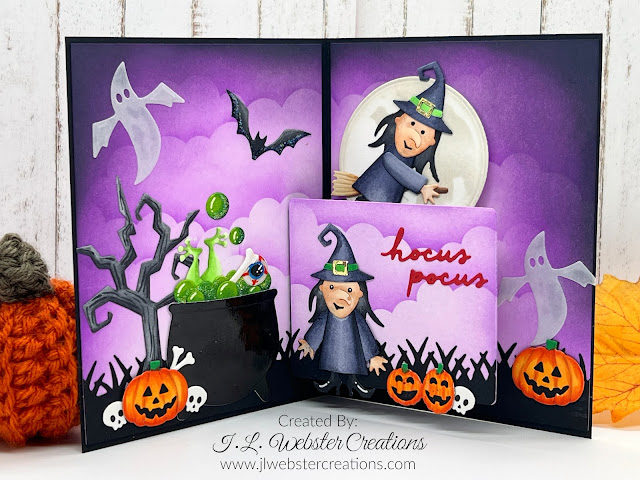
My card today uses the new Witch and Cauldron die along with the Pop and Swap to create this amazing card!
For this card, I started with an A2 sized card base using smooth black 110lb cardstock. I cut two rectangles from 110lb smooth white cardstock and created spooky backgrounds using Simon Says Stamps Pawsitively Saturated ink in Lilac, Orchid and Amethyst. I added some Distress Oxide ink in Black Soot. I used my MFT - Mini Clouds stencil as well to create a cloud background.
I die cut the rectangle panel from the Pop and Swap and placed it where I wanted it. Then I did the same background on it.
I die cut the grass using Nature Edges and black cardstock. I die cut my pop-up mechanism from black cardstock, turned it backwards so it pops up instead of down. To see how to do this check out Karen Burniston's video here.
I die cut the Witch twice from smooth white cardstock and colored them both in using Copic markers. I also did the same for the Halloween borders and the tree from Halloween Scene. I die cut the cauldron from shiny black cardstock.
I then die cut the ghosts, bats and other pumpkins from other Karen Burniston Halloween dies. I added everything together and glued it all down using Lineco Neutral pH glue. I then added Glossy Accents and Glitter Gel to bubbling brew in the cauldron and the bat in the sky.
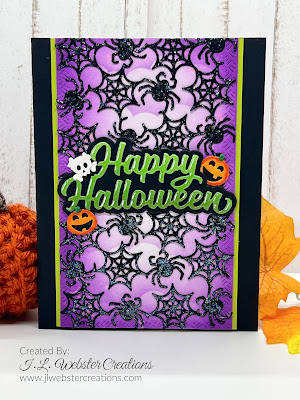
For the front of the card, I created the same type of background, this time using the Short Rectangles - Crosshatch die in the largest size to create a panel. Then I die cut the Spiders Slim Pattern Plate from black cardstock and glued it to my background panel. I added Glitter Gel to the entire pattern plate die cut.Once that dried, I die cut the sentiment from the Happy Halloween die. I added some green ink in various shades to create my sentiment. I added it to a black background. Then I added Glossy Accents to the letters and set it aside to dry.
I cut a bright green piece of cardstock to fit just slightly larger than the purple background. Once everything was dry, I glued it all together and then added a couple of left over Halloween Border pieces.
As you can see in the above video, when you open the card, the witch and the moon rise up! I just love how this card turned out. It's one of my most favorite. Thank you so much for stopping by today, be sure to come back on Monday for Blog Hop Day and also check out the other Design Team members cards from this week. Happy Crafting!!


No comments:
Post a Comment