Saturday, January 31, 2026

Karen Burniston February 2026 New Release - Sneak Peek Week Day 4 - Love is in the Air Charms

 Hello Crafty Friends and welcome! I'm back with another Sneak Peek Card for the upcoming Karen Burniston release. This new release has 10 new dies sets and 5 new stamp sets. 4 of those die sets include a new Pop-Up and Add-Ons. The new release will be available on Monday, February 2nd, 2026.


My card for you today uses the new Love is in the Air Charms set. These adorable little charms are perfect for a Valentine's Day card, or Anniversary, or really anything! For my card, I made a Valentine's Day card. 

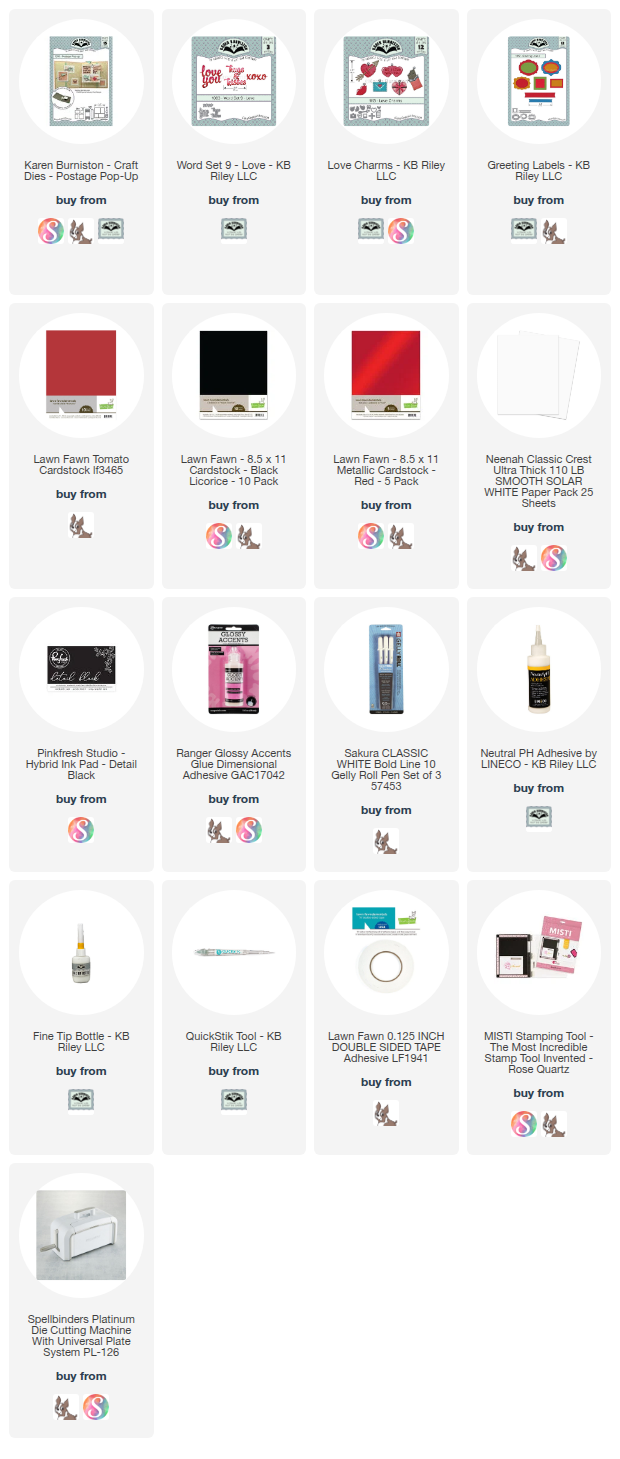
I started by making an A2 sized side fold card base from red heavy weight cardstock. I used the Postage Pop-Up to make my card and I cut the pop-up mechanism from the same cardstock as the card base. I also die cut the postage square from the same cardstock. 

I used a bone folder to add a fold to my card base. Then I dug through my stash and found a piece of scrap patterned paper, so I'm not sure where it came from, my apologies. I added this to both sides of my card. Then in my paper stash I found an old Recollections paper pad from Michaels that had this great heart vellum. I added that to both sides of my card, then added some pretty heart sparkly ribbon. 

I put the pop-up mechanism together and added it to my card base. I glued it in using Lineco Neutral pH adhesive in a fine tip bottle. If you would like to see the assembly video by Karen Burniston, you can click here to watch it. Once I had my pop-up glued in, I set the card aside to work on the postage square. I wanted to get the decorations on before I added it to my card. 

I die cut the pieces from the new Love is in the Air Charms and I also used the Love Charms as well. I cut the pieces from smooth white cardstock and coloured everything in with Copic markers. I stamped the small sentiment using the new Love Notes stamp set and added that to the smallest square on the postage square. Then I glued down the other die cuts. 

Lastly, I added a label from white cardstock so there is a place to sign the card. I added some Glossy Accents to the teddy bears eyes and nose. Once dry, I added shine lines using a size 10 white Gelly Pen.


For the front of the card, I added the same patterned paper and vellum. Then I added two small hot air balloons from the Love is in the Air Charms. I die cut these from smooth white cardstock and coloured them in with Copic markers. I added little white hearts to the one balloon, these come from the same charm set. 

I used Word Set 9 - Love to die cut a sentiment. I cut it from a metallic red cardstock and a heavy weight black cardstock, gluing them together so that the black added a bit of a shadow under the red. Then I used the ribbon die in the Greeting Labels die set to add a stamped sentiment from the new Love You Phrases stamp set. 

I really love the new hot air balloons and those new charms are so adorable. Thank you so much for stopping by today. Below is a list of the supplies I used to make this card. Happy Crafting.

Supplies: For your shopping convenience, all products are linked below. Compensated affiliate links are used where possible with no extra cost to you. This helps me to continue to share all the projects I include on my blog. Please note I only use and share products I love. Thank you Crafty Friends!


Friday, January 30, 2026

Karen Burniston New Release - February 2026 - Sneak Peek Week Day 3 - Stage Pop-Up

 Hello Crafty Friends and welcome! It's Day 3 of our Sneak Peek Week for Karen Burniston's February 2026 New Release. This release is fantastic!! There are 10 new dies and 5 new stamp sets, including a new die and add-ons!!


My card for you today uses the new Stage Pop-Up and Sea Stage Add-Ons. For this card, I wanted to make a pirate themed card. So I created this fun Pirate card, including the map from the Goonies!!

For this card, I started with a card base that was 5.5 x 6.5. This is to account for the edges of the Sea Stage Add-Ons which stick out when you close the card. So it needed to be long enough to hide those sides. I then added some blue patterned paper, that had a kind of ocean look to it. I downloaded a picture of the map from the Goonies and sized it to fit the inside of my card. I cut it in half and added it to my card base. 

I die cut the Stage Pop-Up from a dark teal blue cardstock. I also die cut the Sea Stage Add-On wrap around from the same cardstock. I die cut the two top pieces for the Stage Add-On from a large piece of smooth white cardstock that I had added Distress Oxide Ink in Tumbled Glass, Salty Ocean and Chipped Sapphire on. Then I sprayed it with water to give a water look. I set that aside to dry. 

I die cut all the pieces for my pirate ship from smooth white cardstock and hand coloured them all in with Copic markers. The only pieces that aren't hand coloured are the black flags. Then I glued all the pieces together to create the ship. I also die cut the small water pieces from my left over Distress Ink water so that it matched the water on the top of the stage. 


Before I added my Sea Stage Add-On wrap around to my stage base, I added the decorator pieces. For this I die cut 6 rectangles from smooth black cardstock. On three rectangles, I added some pieces from the Pirate Borders. On the other other three rectangles, I added stamped sentiments using Karen Burniston's Pirate Sentiments, with VersaMark Ink and white embossing powder. I glued these all on using Lineco Neutral pH adhesive in a fine tip bottle.

Once the water base was dry, I added it to my stage and glued the stage into my card. Then I added the Pirate ship. Once they were glued on, I added my Sea Stage Add-On wrap around. Lastly, I added a label so there was a place to sign the card. 


For the front of the card, I wanted to continue the pirate theme. I thought about doing a "Goonies Never Say Die" sort of thing, but I decided on a treasure chest instead. 


For this, I added another piece of patterned paper. Then I found a different map and printed that out and added to the front of my card. 

I used Karen Burnsiton's Treasure Chest die set to create my Pirate booty and added that to the front. I used one of the labels from the Greetings Labels, which I die cut a black cardstock label and added another sentiment from the Pirate Sentiments stamp set. 

I absolutely love this card. It's one that I may just keep for myself because I'm so proud of it. Thank you so much for stopping by today. Below is a list of the supplies I used to make this card. Happy Crafting!

Supplies: For your shopping convenience, all products are linked below. Compensated affiliate links are used where possible with no extra cost to you. This helps me to continue to share all the projects I include on my blog. Please note I only use and share products I love. Thank you Crafty Friends!


Thursday, January 29, 2026

Karen Burniston New Release - February 2026 - Sneak Peek Week Day 2 - Love You Lorna Add-Ons

 Hello Crafty Friends and Welcome! It's day 2 of our Sneak Peek Week. I hope you are as excited as we are about this new release and that you have been loving all the cards our talented Design Team has shown so far. The new release has 10 new dies and 5 new stamp sets. 


My card for you today uses the new Love You Lorna Add-Ons die set. This makes a cute little card for occasions like Valentines Day, an Anniversary or just to drop a note to say "I Love You". For this die set you will need the Lorna Label die set. 

For this card, I started with an A2 top fold card base using a heavy weight red cardstock. I found an old Valentines Day paper pack from Michaels and used some white paper with red hearts for my background. 

I die cut the pop-up mechanism from the same red cardstock as my card base. I die cut the label out from the middle of the pop up. Then I die cut the Love You from a peach/pink coloured cardstock. I used a shimmery red cardstock for the word "love" and a sparkly white cardstock for the word "You". Then I die cut some hearts from different red, pink and white cardstock. 

I glued the pop-up into my card base using Lineco Neutral pH adhesive in a fine tip bottle. I added the decorations to the pop-up before adding it to my card. Once it was in my card and I made sure it opened and closed properly, I added some extra hearts to the pop-up. 

I then die cut several small hearts that come with the new die set and created a border for the top and bottom of my card. I also added some more peach/pink paper to the top and bottom. I added a label to the pop-up using one of the new stamp sets called Love You Phrases. Then I added a blank label so there was  a place to sign the card. 

For the front of the card, I added the same paper as the inside, adding another heart border, this time using larger hearts with smaller hearts. Then I used the Heart - Crosshatch dies to cut several hearts in different sizes to add to the front of my card. I stamped a sentiment to the front of the white heart using the new Love Notes stamp set. 

I like how this is a simple card, but still pretty and perfect for Valentines Day! Thank you so much for stopping by today, below is a list of the supplies I used to make this card. The new release will be added once it is available on Monday, February 2nd. Happy Crafting!

Supplies: For your shopping convenience, all products are linked below. Compensated affiliate links are used where possible with no extra cost to you. This helps me to continue to share all the projects I include on my blog. Please note I only use and share products I love. Thank you Crafty Friends!


Wednesday, January 28, 2026

Karen Burniston New Release - February 2026 - Sneak Peek Week Day 1 - Hot Air Balloons

 Hello Crafty Friends and welcome! Karen is coming out with a new release on Monday, February 2nd, 2026 and let me tell you, this release is FANTASTIC!!! There are 10 new dies sets and 5 new stamp sets. I can honestly say, there isn't one die set in this new release I wasn't excited about!! 


For my first Sneak Peek card, I used the new Hot Air Balloons to create this beautiful baby card. The new Hot Air Balloon die set comes with two larger hot air balloons and one smaller one. It comes with two different cloud dies and a banner to go across the balloons. 

For this card, I started with a 5x7 card base using a dark green cardstock. I then add some patterned paper that looks like burlap to the inside of my card. I added some baby patterned paper to the edges of my card. Then I added some green ribbon to add some decoration. 

I die cut all my balloons from smooth white heavy weight cardstock and coloured them in with Copic markers. I tried to use the same colours as my baby patterned paper. I also die cut two little hot air balloons from the new Love is in the Air Charms. 

I die cut my pop up mechanism using the Triple Platform Pop-Up from the same paper as my card base. Then I added some patterned paper from the same paper pack as the baby paper. I glued the mechanism in to my card base using Lineco Neutral pH adhesive in a fine tip bottle. 

I used the small banners from Karen's Little Twist Panel Pop-Up to create banners for each corner of the card. Then I began gluing in my hot air balloons. I made sure to double check that nothing was sticking out the side of the card when it was closed. I then glued the two little balloons to either side of the card. 

Lastly, I stamped a sentiment using Karen's Special Delivery stamp set on to a label and added it to my card. I die cut a blank label so there was a place to sign the card.

For the front of the card, I added more of the baby patterned paper. Then used the Oval - Crosshatch die to cut two ovals. One for the background and one for the frame around the background. I added two more hot air balloons to the front and more clouds. 

Then I die cut the "Welcome" sentiment three times from heavy weight black cardstock and glued them together to add my card. This not only adds dimension, but makes the sentiment more sturdy. I used the Baby Charms to add the blocks saying baby. 

I just love how this card turned out. I hope you love the Hot Air Balloons as much as I do!! Thank you so much for stopping by today. Below is a list of the supplies I used to make this card. I will update this list with the new release dies once they are available. Happy Crafting!

Supplies: For your shopping convenience, all products are linked below. Compensated affiliate links are used where possible with no extra cost to you. This helps me to continue to share all the projects I include on my blog. Please note I only use and share products I love. Thank you Crafty Friends!


Wednesday, January 14, 2026

Space Themed Birthday Card using Karen Burniston's Waterfall Die Set

 Hello Crafty Friends and welcome. My card for you today uses Karen Burniston's Waterfall die set to create this fun space themed birthday card, perfect for anyone who loves all things space!!! From aliens to rocket ships, this card packs it all. So let's take off to see how I made this. 

For this card, I started by making an A2 side fold card base using smooth black heavy weight cardstock. I scored it at 5.5 and folded it in half. I added some great space themed patterned paper from Echo Park called Blast Off, to the front and inside of the card. I used the small half circle die to cut the notch in the end of the card opening so that you are able to use the pull tab for the Waterfall to work. 

Karen has a great assembly video on YouTube, which you can watch by clicking here

Next, I die cut the two pieces needed to make this flip card work. I cut these from the same black cardstock, making sure I go over the score lines with a bone folder a few times. It's important to make sure you have good crisp folds in order for this to work properly. 

Using my Lineco Neutral pH adhesive glue in a fine tip bottle, I put the mechanism together. I set this aside and die cut my four coloured squares. I tried to choose cardstock that matched my patterned paper. I glued these all on (Karen's video will show you how to do this) and set that aside. 

I wanted to make some cool space backgrounds. I find that Distress Oxide Ink is good, but doesn't give that bright, colourful background I was looking for, so I used my alcohol ink and Yupo paper to create my background. I used one sheet of Yupo paper and several colours of alcohol ink. Then I let it dry completely. Once it was dry, I splattered white paint on the background to create stars. For that, I used Copic Opaque paint with a little water. Once that was dry, I used the smaller square in the die set to cut out my backgrounds. 

I glued all my backgrounds on, adding some additional patterned paper to the backs of all my flip squares. This is from the same great space themed patterned paper. 

Next, I used Karen's Space Charms and Rocket Pop-Up to create the pictures in each flip square. I die cut everything from smooth white cardstock, then coloured everything in with Copic markers. 

I used MFT - Bitty Birthday Wishes sentiment stamp set and the Space Explorer stamp set to add sentiments to my card. I used this because they are very small and worked perfectly with the small space on each square. 

I just love how this card turned out! I think my favourite part is making the backgrounds! Thank you so much for stopping by today. Below is a list of all the supplies I used to make this card. Happy Crafting!

Supplies: For your shopping convenience, all products are linked below. Compensated affiliate links are used where possible with no extra cost to you. This helps me to continue to share all the projects I include on my blog. Please note I only use and share products I love. Thank you Crafty Friends!


Friday, January 9, 2026

Yappy Birthday Card for Lawn Fawnatics Challenge 212 - Let's Celebrate

 Hello Crafty Friends and welcome! It's been quite a while since I played along with the Lawn Fawnatics Challenges and to be honest I really missed it!! I love Lawn Fawn products, from their stamps and dies to their papers and patterned paper pads. So it was a really fun way to spend my day making this card! For this card, I used the Yappy Birthday stamp set along with Pawsome Birthday and Simply Celebrate Hangouts stamp sets. 


I started by cutting a background piece measuring 3 3/8 x 8 3/8 from smooth white cardstock. I decided to make an outdoors background, so I used MFT - Mini Cloud stencil and Peacock Feathers distress ink to create a cloudy sky. Then I used MFT - Slimline Grassy Hills die to create my grass for the background. I added some Distress Oxide Ink in Mowed Lawn to the edges and cut the grass from Spellbinders cardstock in Peridot. 

I glued this down to my card base and set it aside. I stamped all the images I wanted to use for this card using Detail Black Ink and my Misti stamping tool. I let the ink dry for 5 minutes and then used Copic markers to colour all my stamped images in. 

Once I had everything coloured in, I used the coordinating dies to cut my images out. For this, I used a Spellbinder Platinum machine. Then the fun part! Deciding how I wanted the front of my card to look. I love this part. Once I knew what I wanted to do for my puppy birthday party, I got everything else I'd need ready. This was die cutting the script Birthday from purple glitter paper and stamping the sentiment "Yappy" on to black cardstock and heat embossing it with white embossing powder. 

I started by gluing down the birthday sentiment. Then I glued down all my dogs and party items. Once I had everything in place and the glue had set, I trimmed off the excess on the edges. Then I added the "Yappy" sentiment and stamped the dogs howl onto my card front. 

I used Glossy Accents on the balloons to make them shine and I also used Stickles glitter gel on the banners for the table and the dog house. Once everything was dry, I used a white size 10 Gelly Pen to add some final details to my card. 

This will be a fun card to give a dog lover on their birthday! Thank you for joining me today. Below is a list of all the supplies I used to make this card. Happy Crafting!!

Supplies: For your shopping convenience, all products are linked below. Compensated affiliate links are used where possible with no extra cost to you. This helps me to continue to share all the projects I include on my blog. Please note I only use and share products I love. Thank you Crafty Friends!


Thursday, January 8, 2026

Tulip Birthday Card using Honey Bee Stamps!

 Hello Crafty Friends and welcome. Well I'm still working on Birthday cards, building up my stock and I wanted to share this pretty birthday card that I made using Honey Bee Stamps Lovely Layers - Tulips die set. I really love all the Lovely Layers die sets that Honey Bee Stamps makes, so if you haven't already sene them, be sure to check them out!


I started with making an A2 size card base from some heavy weight cream coloured cardstock I purchased at my local Michaels. I then cut two rectangles from a pretty teal coloured cardstock and used Spellbinders  Leafy 3D embossing folder on both pieces. 

I die cut an arch using Spellbinders Essential Arches die set and Neenah Classic Crest Solar White 110lb smooth white cardstock. 

I then die cut all the pieces for my tulips. I used three different colours of yellow cardstock, then used my Copic markers to add some detail to the tulips. I used two different colours of green cardstock for the leaves and then added some detail to them using Copic markers. 

I glued all the pieces together using Lineco Neutral pH adhesive in a fine tip bottle and set them aside. I created a sentiment for the front of my card using Honey Bee Stamps Bitty Buzzwords. I stamped the "birthday" greeting using VersaMark Ink and white embossing powder, then die cut the word out with the coordinating die. I also cut two more birthday shapes using smooth black cardstock. I glued them all together to make the sentiment stand out more. I stamped the sentiment "greetings" on to white cardstock and used Detail Black Ink. 

I glued everything together and then added a sentiment to the inside of my card. I just love these flower dies from Honey Bee Stamps. They just make beautiful flowers to add to your cards. Thank you for stopping by today. Below is a list of the supplies I used to make this card. Happy Crafting.

Supplies: For your shopping convenience, all products are linked below. Compensated affiliate links are used where possible with no extra cost to you. This helps me to continue to share all the projects I include on my blog. Please note I only use and share products I love. Thank you Crafty Friends!


Wednesday, January 7, 2026

Happy Birthday Card using the Lorna Label

 Hello Crafty Friends and welcome! I recently discovered I need to restock my birthday card selection. I try to keep a bunch of cards available in case anyone needs any. So I decided to make a fun pop-up card using Karen Burniston's Lorna Label. I also used the Happy Birthday Lorna Add-Ons. 

For this card, I started by making an A2 top fold card base using a light yellow cardstock. Then I found this pretty patterned paper in my stash and decided to use it on my card. I used the floral pattern paper as my base for the other colours in my card. I die cut three rectangles from the red polka dot paper using Karen Burniston's Rectangle - Crosshatch die in the largest size. Then I cut two rectangles from the floral paper using the same die. I cut the top and bottom to fit the inside of my card. Then I cut two dark blue strips to add as a border inside my card. 

I added the paper in to my card base using double sided adhesive tape. I used glue for the dark blue strips. Then I die cut the pop-up piece that goes inside the card. I die cut the centre out of my Lorna label using the die that comes with the Happy Birthday Lorna Add-Ons die set. Then I die cut the happy birthday piece from the same light yellow cardstock as my card base. I used some scrap cardstock pieces to cut out the sentiment and then fishtail banner. I glued everything on to my pop-up and then glued the pop-up piece into my cardbase. 

I used the Birthday Charms and Big Birthday Charms to add some decorations. I also added some balloons using the ones that come with the Happy Birthday add-on. I used the Birthday/Belated sentiment stamp set to add some sentiments to the inside of my card. 

Lastly, I added a label from the Greetings Labels die set so there was a place to sign the card. 


For the front of the card, I kept the same patterned paper and added some more balloons and another sentiment for the front. I try to keep them simple as there is always so much going on inside the card. Thank you so much for stopping by today. Below is a list of supplies that I used to make this card. Happy Crafting!

Supplies: For your shopping convenience, all products are linked below. Compensated affiliate links are used where possible with no extra cost to you. This helps me to continue to share all the projects I include on my blog. Please note I only use and share products I love. Thank you Crafty Friends!


Tuesday, January 6, 2026

Karen Burniston Designer Challenge - January 2026 - Insects!

 Hello Crafty Friends and welcome! It's our first Designer Challenge for 2026 and our theme to start off our new year is Insects. I had so many ideas floating around, but decided (since I love bee themed pattern paper) on a bee card. For this card, I used the Postage Pop-Up along with the new Bug Borders and my very favourite Flutter Charms. 

For this card, I wanted to make a window card so that you could see the postage square before you even open the card. To start, I made an A2 side fold card, using a terra cotta coloured cardstock. I then added my three panels of pretty bee themed patterned paper. I have a short video below on how I made the window card. Unfortunately, my camera didn't record how I decorated it, I'm very sorry about that. 

For the window in the front, I decided to use the Square - Crosshatch die set to find a square that would fit the postage square. I used the second square from the largest to die cut the window in the front of the card. I added a piece of acetate to the inside to create my window. Because the card wasn't big enough to used the largest square in the crosshatch set to make a frame for my windows, I had to cut a piece of paper just slightly larger than my window square and then use that square die to cut out a frame. It's very thin, but just gives my window a finishing touch. I added a frame to the front and inside of the window. 

Then I die cut my Postage Pop-Up from black cardstock. I added the pop-up mechanism into the card first. Then I set that aside while I decorated my Postage Pop-Up. 

I used the new Greeting Labels to add frames for each postage stamp area. Then added the white backgrounds on top. I used the Tiny Gnomes, Flutter Charms, Fun Flowers and Fence Landscape Add-On to add bees, flowers and gnomes! I added a sentiment to one postage stamp using the new Bug Greetings stamp set from Karen Burniston. 

I added this to my card, by placing the Postage Pop-Up in to my window, then adding glue to the mechanism and then closing the card on to the Postage stamp piece. This ensures its centre in my window and that you will be able to see it when the card is closed. 

I added some Gnome Bee patterned paper to the edge of the inside of my card, adding some extra decorative paper. Then added more bee themed decorations. 

For the front of the card, I added another bee border and another little gnome guy. I just love how this card turned out. With those little gnomes and the bees!! Then the big window on the front, just makes this card extra special. Thank you so much for stopping by today. Be sure to check out the other fantastic cards by our Design Team. Below is a list of the supplies I used to make this card and the video on how to make the window card base! Happy Crafting!


Supplies: For your shopping convenience, all products are linked below. Compensated affiliate links are used where possible with no extra cost to you. This helps me to continue to share all the projects I include on my blog. Please note I only use and share products I love. Thank you Crafty Friends!


Monday, January 5, 2026

75th Birthday Card using Spellbinders Muscle Car!

 Hello Crafty Friends! I hope you all have had a wonderful holiday season and I wish all of you a very Happy New Year. My first card for you for 2026 is a card I made for my Father in Law for his 75th Birthday. My husband and father-in-law love working on cars/trucks. So when I asked my hubby what kind of card to make for his Dad, he said the muscle car!

For this card, I used Spellbinders Muscle Car die set, along with the Crusin' By sentiment stamp set. 

For this card, I started with an A2 sized card base using a heavy weight smooth white cardstock. I then die cut two rectangles from a light blue cardstock and pressed it with a 3D embossing folder. I added one rectangle to the front and one to the inside of the card. 

I added a band of silver paper and added a smaller band of black polka dot paper to the front of my card. I then die cut the pieces for the odometer and the muscle car. Once I had all the pieces cut, I began putting everything together. If you would like to see all the steps, see the video below. 

I glued everything on with Lineco Neutral pH adhesive in a fine tip bottle, pressing to make sure it adhered to my card front. Then I stamped a sentiment on to smooth white cardstock using Detail Black ink and used to the coordinating die cut to cut out my sentiment. 

I stamped another sentiment on to a smaller rectangle to add to the inside of the card. This was actually a pretty simple card to put together but makes a big impact because of how cool the car turned out!! I think next time, I will use packing tape on my cardstock first and then die cut the car out, so the car (or truck) is shiny! Thank you for joining me today. Below the video is a list of all the supplies I used to make this card. Happy Crafting!


Supplies: For your shopping convenience, all products are linked below. Compensated affiliate links are used where possible with no extra cost to you. This helps me to continue to share all the projects I include on my blog. Please note I only use and share products I love. Thank you Crafty Friends!


Valentines Card Ideas with Karen Burniston's Fancy Label Accordion!

 Hello Crafty Friends and welcome. I took a couple of days off after the Blog Hop, Designer Challenge and 5 days of Sneak Peeks but I'm ...