Friday, December 9, 2022

Karen Burniston Sneak Peek Week - Dog House Tiny House Add-Ons

 Hello and welcome to the last day of Sneak Peek Week! I am so excited to share this card with you that features the new Dog House Tiny House Add-On! 

This was actually one of the first cards I made with this new die set. This is a 5x7 sized card. 

I wanted to give my dog a yard to be in, so I added some apple trees from the Tiny Trees Pop-Up die set. 

Then I wanted to create a pond for my little dog, so I cut out a piece of blue cardstock and used the MFT Perfect Pool Water stencil to create the look of water in the pond. I die cut some stones from Karen Burniston's Tent Pop-Up and added some detail to them using Copic markers. 

From there I created a red dog house with a gray roof, which I sponged a darker gray ink on to using the die as a stencil. 

I made the dog a Dalmation named Fido. I added dimension to the dog bowl using Copic markers. 

I then die cut a place to write the sentiment to the recipient using the new Banners - Crosshatch dies. 
Then I added the "make a wish" and "celebrate" sentiments from Word Set 2 - Birthday. 

As if the Tiny House Add-Ons couldn't get much better, we get a dog house add-on that just takes the cake! I can't wait to see all the amazing creations from the Pop-Up Peeps! 

Don't forget to stop by on December 12th for New Release and Blog Hop Day! We will be giving away great prizes and hopefully inspiring you with the amazing cards from our Design Team! Thank you so much for stopping by and Happy Crafting!


Thursday, December 8, 2022

Karen Burniston Sneak Peek Week - Surprise Cube Pop-Up

 Hello and welcome to day 4 of Sneak Peek Week for Karen Burniston's December 2022 Release. Today's card features the new Surprise Cube Pop-Up! This die set has everything you need to create fun pop-up cubes that can be used for any occasion!

For my card, I needed a card base that would be able to hold the boxes down, so I followed the instructions on the video Karen Burniston made for Removable Characters (click here to see that video). 

I used a heavy weight light purple cardstock to match with the theme of my patterned paper. The patterned paper I chose is from a paper pack I got that has got a lot of use this year! I've used the Doodlebug Designs "Winter Wonderland" patterned paper for several cards. For this card, I used the yeti paper. 

To make the Surprise Cubes, I die cut three different patterned cubes. I added a white background then die cut little pictures of the Yetis. I built all the boxes first and set them aside. 

I created the card base, adding coordinating patterned paper here and there. I added a place to sign the card on the flap enclosure and stamped the Merry Christmas sentiment using MFT Bitty Holiday Wishes and Pinkfresh Studios black detail ink. 

For the front I die cut the letters to make the word "Yeti" using Karen Burniston's Alphabet die set. 
I printed out the "Are You" and "For Christmas". 

How fun is this card with those Suprise cubes? These could be used for any kind of card and there are so many fun charms dies that you could use on the front of these cubes. 

Thank you so much for stopping by and Happy Crafting!


Wednesday, December 7, 2022

Karen Burniston Sneak Peek Week - Wedding Charms!

 Hello and welcome to Day 3 of Sneak Peek Week for the new Karen Burniston December 2022 New Release! I am so excited to show you another great card, this time using the brand-new Wedding Charms dies. For this card, I used Karen Burniston's Label Charm Pop-Up die set along with the new Wedding Charms. 

This new set comes with a bride and groom, a pair of champaign glasses, a set of wedding rings and the "Best Wishes" sentiment. 

For this card I started with an A2 side fold card using an off-white smooth heavy weight cardstock. Using Karen Burniston's Rectangle - Crosshatch dies in the largest size, I cut three panels using this beautiful wedding paper from Echo Park - "Just Married". 

I die cut the front panel die from the Label Charm Pop-Up (which is the one that turns when you open the card), but first I measured the center point so that I positioned the die exactly in the middle. I then measured the center point for two of the patterned paper panels so that when I die cut the patterned paper it would fit perfectly on the front and inside panel of the card. 

Once I added all the pieces of patterned paper, I then created an outer edge to go around the cut out on the front and inside panel of the card. I used a pink cardstock that was similar to the pink of the patterned paper. I had to do this by hand because there isn't a die in the Label Charm set that allows you to do with the larger die cut. You can with the smaller die cuts, but not the largest. 

I then die cut the inside pieces that attach to the front label. I used the back side of the patterned paper I used for the background of the card. I glued these into the card with Lineco Neutral pH glue which you can get through Karen Burniston's online store. 

I then die cut some center pieces, one for the middle "label charm" and one for the mounted label charm. These pieces have a really nice, pierced look around the edges which I really like! Just gives them a little extra decoration. 

I then die cut out all my Wedding Charms. For the bride and groom, I die cut the brides dress from white cardstock and glitter cardstock. For the groom's tux, I die cut the tux in black and red and then the small piece for the shirt in white cardstock. I trimmed the bow tie from the red cardstock piece and added it to the black tux. 

I die cut the Champaigne glasses from heavy weight vellum and added glitter gold for the liquid part. 

On the front of the card, I added the wedding rings, which I die cut from gold cardstock and white glitter cardstock for the diamond. 

I die cut the "Best Wishes" sentiment from white glitter cardstock and black cardstock and glued them together to make the sentiment pop out and add some dimension. 

I die cut some hearts that come with the Label Charms Pop-Up set and added them around the card. 

This is a simple yet elegant card that will be perfect to give the special couple on their big day! These Wedding Charms can be used on any pop-up card or even for an engagement or anniversary card! Thank you so much for stopping by and Happy Crafting!! 


Tuesday, December 6, 2022

Karen Burniston December Designer Challenge - Fireplace Die Through the Year

 Hello and welcome once again to the Karen Burniston Designer Challenge. For December we were each asked to pick a theme and use the Fireplace Pop-Up Die. I chose Beach/Summer for my theme and came up with a tiki beach hut using the Fireplace Pop-Up Die as well as several other fantastic dies from Karen Burniston. 

For this card, I started with an A2 size card base made from smooth white cardstock. Then using the Rectangles - Crosshatch dies in the largest size, cut 3 pieces from 110lb smooth white cardstock. Two of these pieces were used to create the beach theme on the inside and one was for the front. 

For the inside of the card, I created a beach and sky using various Distress Oxide inks. I added flecks of browns using Distress ink spray. 

I die cut the main "fireplace" front and with a blending brush added some detail to it. Then I die cut three pieces using the mantel die. I cut one side of the mantel pieces to create the thatched roof of the tiki hut. I then added details with Copic markers. 

I die cut the flip flops from the Beach Charms set and added the seashells on the beach from the Tropical Scene die set. I created a turtle and crab using the Sea Animals die set. 

I used the vine from the Monkey and Lion die set and added little flowers to it using the flower die from the Tiny Trees Pop-Up. For the background, I made the sun from the Tropical Scene set and the two palm trees came from the Palm Tree Pop-Up. I added details to everything using my Copic markers. I die cut the word "enjoy" from Word Set 6 - Summer, twice using yellow cardstock and black heavy weight cardstock. I glued them together to give the word some dimension and to bulk up the cardstock as it was very thin. 

For the front of the card, I wanted to keep it simple, but still carry on the same theme. I die cut the waves and small beach hill with the palm trees on it from the Tropical Scene set and added the shark from the Sea Animals set. Then I die cut the words Hello and Sunshine from Word Set 6 - Summer. I cut the words three times each, once using colored cardstock and twice from black. This really makes the words pop out. I didn't put a lot of detail on the front because the inside of the card is the real surprise!

There are so many unique ways to use the Fireplace Pop-Up die and this is just one of many! I look forward to seeing all your creations on the Pop-Up Peeps Facebook page. Thank you for stopping by and Happy Crafting!

Monday, December 5, 2022

Karen Burniston Sneak Peek Week - Wide Woven Basket Box Card

 Hello and welcome to day 1 of Sneak Peek Week for the new Karen Burniston December 2022 release. I am starting this week with this box card using the new Wide Woven Basket Box Card die set. 


For this box card, I made an Easter themed card. To make a rectangle shaped box card you will need Karen Burniston's Woven Basket Box Card die set which you can purchase from her online store. If you just want to make a square shaped wide woven box card, then you only need the new die set. 

For this card I made a rectangular shaped box. I used a light blue gingham patterned paper to look like fabric woven through the basket. 

I die cut two trees from the Tiny Trees Pop-Up and added flower blossoms on the trees to give them a spring look. 


I used the Spring Animals die set to create the bunnies and chicks. I added some Easter eggs from the Easter Charms die set. I also used the "Happy Easter" sentiment on the front of the basket from the Easter Charms die set as well. I added details to the die cuts using Copic markers and Distress Oxide inks. 

At first, the woven box looks intimidating, but it's a very simple die set to use. I can't wait to give this box card to someone special next Easter! Get ready for our Blog Hop on December 12th to celebrate the new release! You could win a prize and see some wonderful card ideas from our awesome Design Team! I look forward to sharing more cards this week for Sneak Peek week! Thank you for stopping by and Happy Crafting!

Monday, November 21, 2022

Gift Card Pop Up Boxes

 Hello and welcome! On my blog today is this fantastic pop-up card box! Karen Burniston recently added some templates to her online store that you can get which gives you the directions to make these absolutely, hands down, amazing pop-up card boxes. As soon as I seen the video she posted I went online to my nearest craft store and bought the patterned paper she used (because swoon!) and downloaded the instructions. I spent my entire weekend in my office making these amazing boxes! 

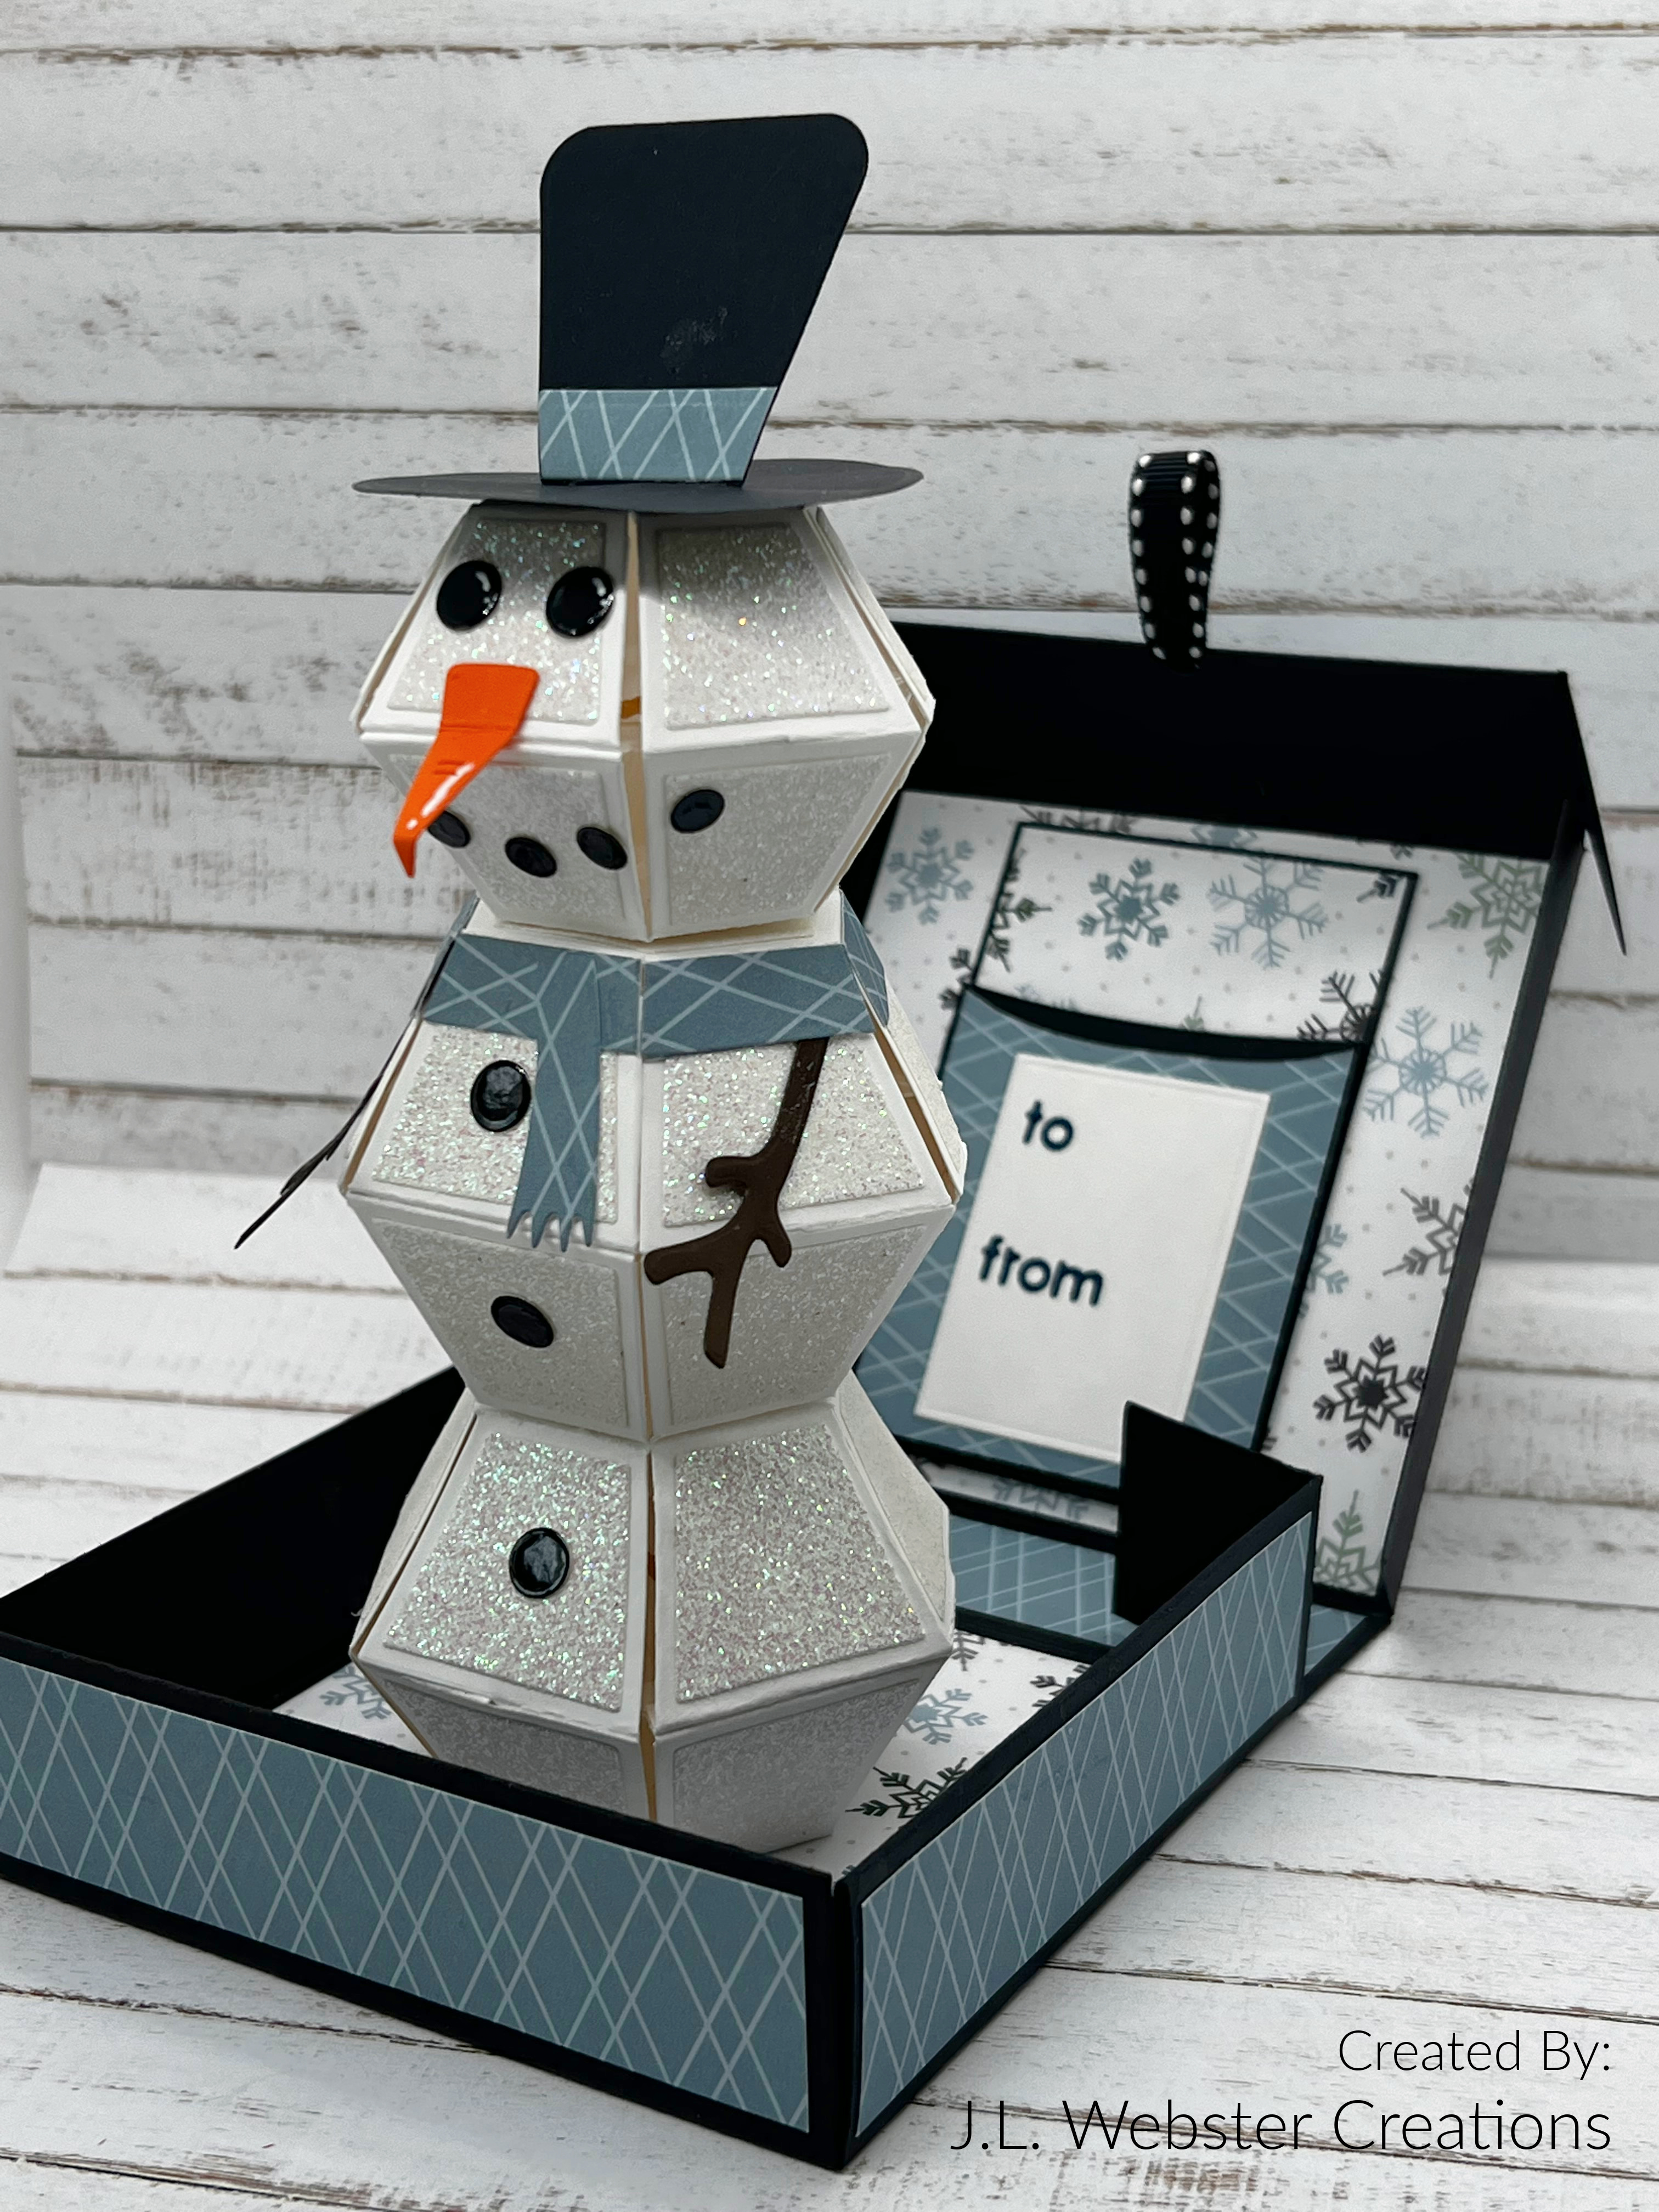
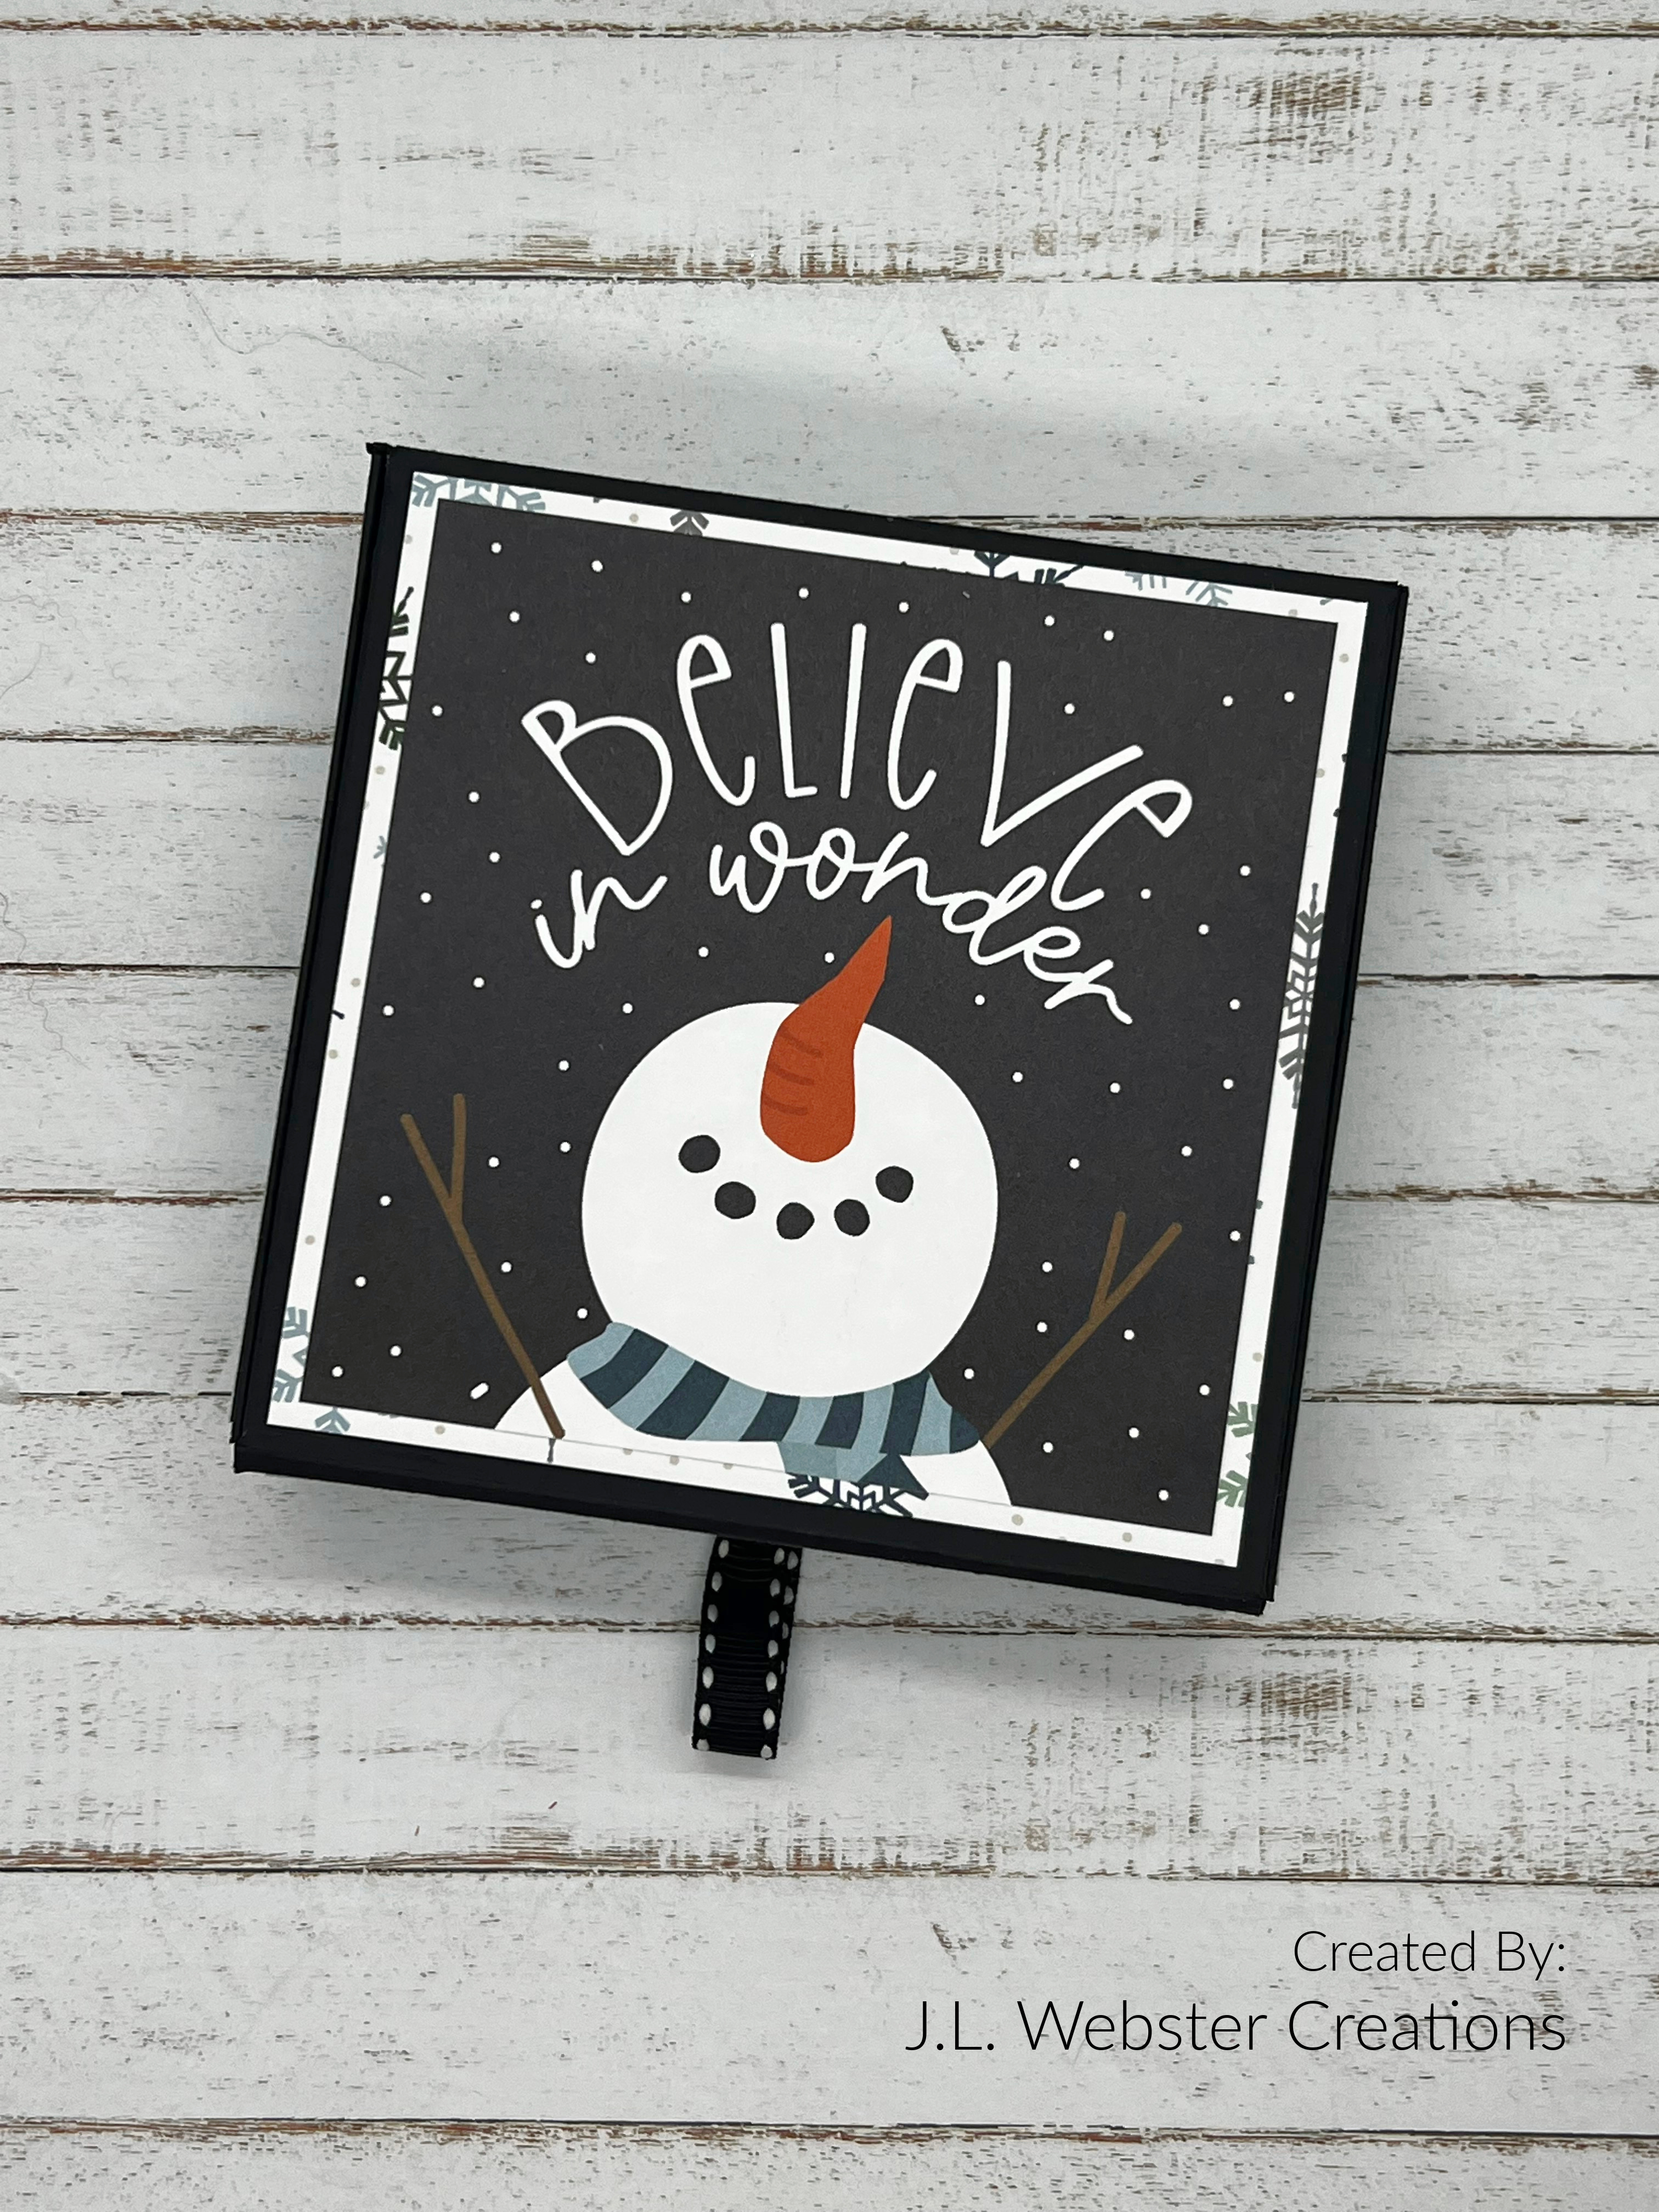
I wanted to turn these card boxes into gift card boxes. This is such a neat way to give someone a gift card this holiday season! For this first box, I decided on a pop-up snowman. 

The paper I chose, came from Echo Park and it's called Snowed In. This paper pack comes with a sheet of different winter themed squares that fit perfectly on the top of these boxes. That's why I made sure to buy the same paper. 

I chose a sheet of patterned paper from the paper pack and used both sides to create the inserts and side panels for this box. 

I used 110lb heavy weight black cardstock to make the box. You can get the instructions from Karen Burniston by clicking here to visit her store. 

I used Karen Burniston's Bitty Ball and Mini Ball Pop-Up dies along with the Snowman Add-On dies to create this super cute pop-up snowman. 

For the gift card holder, I used My Favorite Things Gift Card Pocket. Then I added the "To" and "From" using My Favorite Things Tag Builder Blueprints 6 Die-namics

I think when I make more of these (because I've already been requested to make more!) I will print a nicer "To" and "From" on my computer and die cut it out to add on to the gift card pocket. 

I loved how this one turned out so much, that I had to make a second one. To watch the pop-up in action, see the video below. 


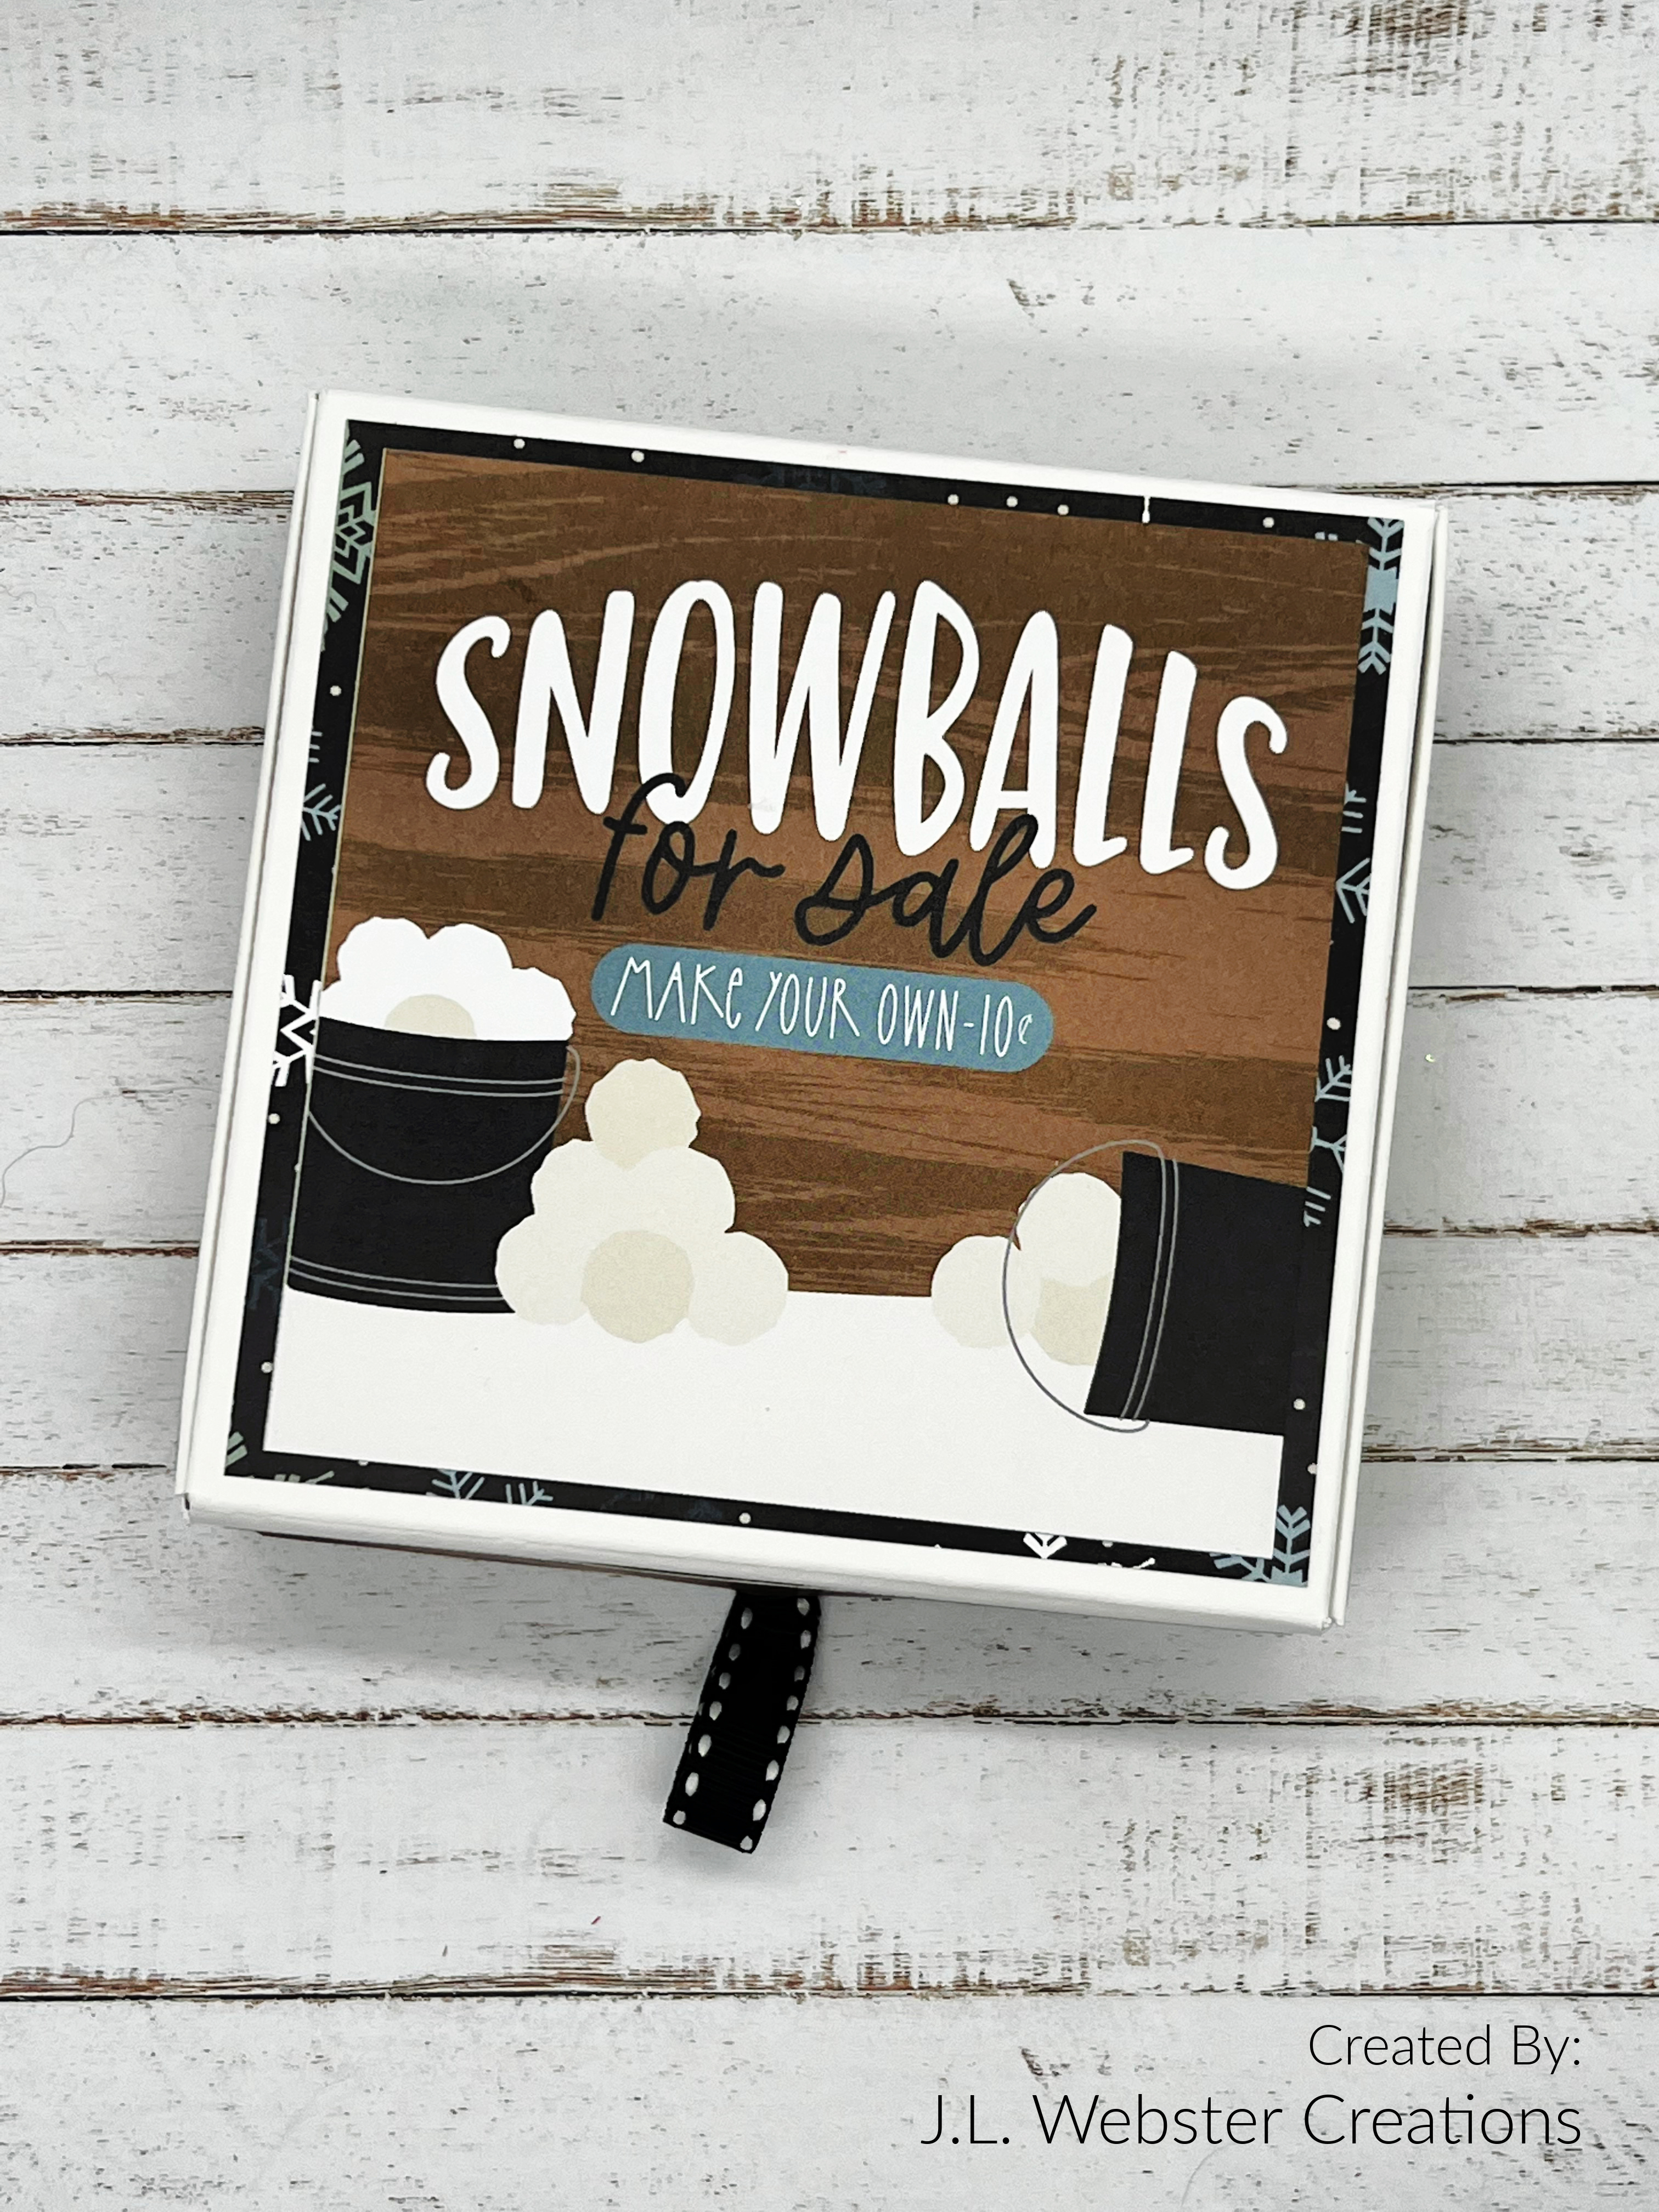
For the second box, I used 110lb heavy weight smooth white cardstock and this time I made 5 "snowballs" using Karen Burniston's Mini Ball Pop-Up and sparkly white cardstock. 

I followed all the same steps, except when the recipient opens this box, snowballs pop out! 

I had an absolute blast making these boxes and I can't wait to make more! This was an incredible idea and I hope that this has inspired you to make some of these as well! Thank you so much for stopping by and as always Happy Crafting!

Thursday, November 17, 2022

Always Welcome with Spellbinders!

 Hello and welcome! Today's card features a die set I got when I was still a member of the die of the month club through Spellbinders. I absolutely loved being a part of the small and large die of the month (and after I got my glimmer machine, I joined that one as well), unfortunately to save money, I had to give them up. This die set was the reason I signed up in the first place. I just loved the Always Welcome set and although you can no longer get this die, they have a new door die set called Open House and they have all kinds of add-ons for any occasion!

For this card, I started with an A2 sized card base using red cardstock. I die cut a rectangle using MFT A2 Stitched Rectangle STAX in the largest size from 110lb smooth white cardstock. I then used the MFT Small Brick Wall Stencil and Hero Arts Wet Cement ink to create the brick wall for the background. 

I die cut the frame around the door using 110lb smooth white cardstock. I cut the pillars twice and added a piece of foam tape to the back of one of the pillars and layered them on top of each other to give the card some dimension. 

The best part about die sets like this is, it lets you use up all those scraps you might hang on to. For the rest of the accessories for the door I used scrap cardstock in various colors. I die cut the front door mat in dark green and stamped the "Merry Christmas" sentiment from Spellbinders Sunday Drive All-Occasion Sentiments using VersaMark Ink and white embossing powder. 

I wanted to add some decorations to the front porch, so I created the little trees. The tree part comes from Honey Bee Stamps, Gingerbread House Add-On and the pot comes from Spellbinders Day Dreaming which was a small die of the month die set. I added some red and white gems to the trees and added some detail to the trees using Copic markers. 

This is one of my most favorite Christmas cards to make. It's simple, yet elegant and when someone opens the envelope to see this card, they would be wowed by how beautiful this comes out. Thank you so much for stopping by and Happy Crafting!


Tuesday, November 15, 2022

Woven Basket Christmas Pop-Up Card

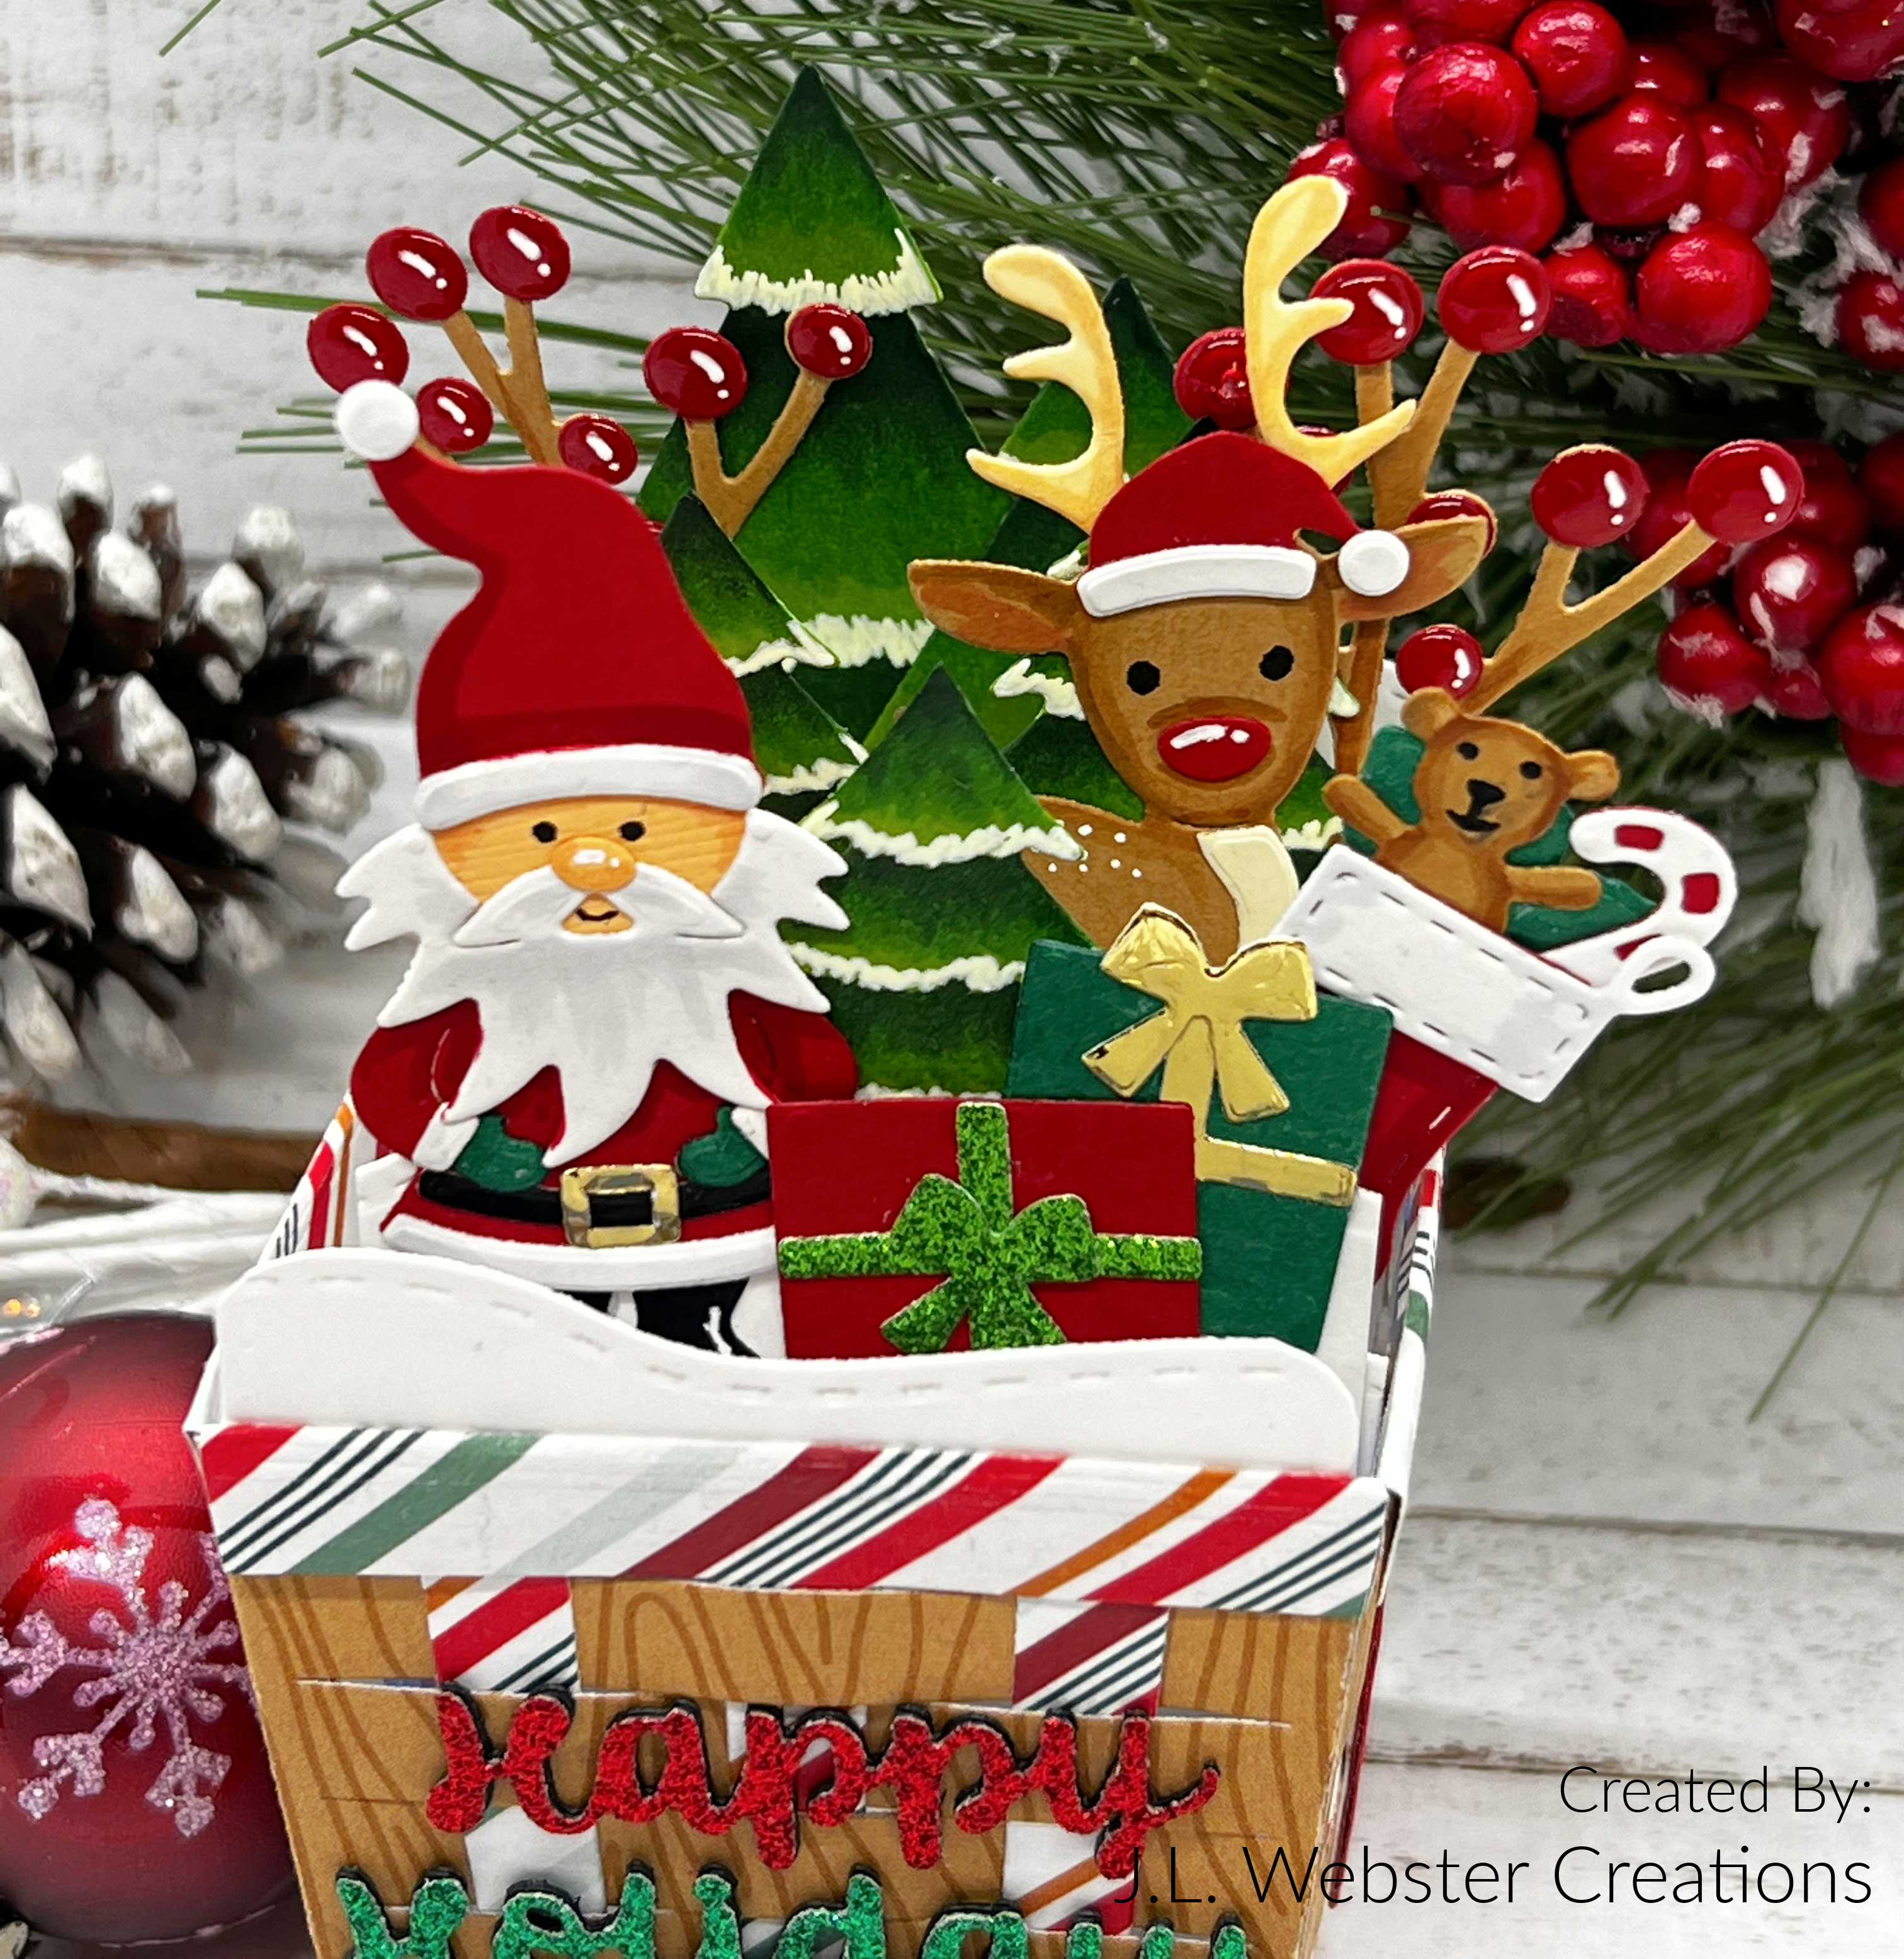
 Hello and welcome! Today's card features Karen Burniston's Woven Basket Box Card Pop-Up. I had this idea to make a Christmas card using the Woven Basket Box dies along with everything Christmas! 

For this card I started with a wood grain patterned paper and added a striped patterned paper to match. I cut out four grass inserts and trimmed off the grass. Then I measured the pieces and cut out a larger piece of white cardstock and with the Natures Edges snow hill die, made snow hills to add to the inside of the box card. 

From there, I set the box card aside and started making all the little things I wanted to put in the box card. I die cut two trees from the Christmas Trees Pop Stand die set and added them to the back of the card. Then I die cut three trees using the tree die in the Winter Charms set. 

I wanted to add Santa, so I used the Gnome and Santa set and die cut all the pieces to make this super cute Santa. I then die cut the pieces to make the reindeer from the Christmas Animals set. 

I added the stocking filled with a cuddly teddy bear and a candy cane using the Holiday Charms and Winter Charms die sets. 

I wanted to add some gifts, so I used the gift boxes that come with the Sleigh Pop-Up. I then die cut the sentiment "Happy Holiday" from Word Set 3 - Holiday, using a glitter red and green cardstock. 

For some added detail, I used the branch and berries that come with the Woven Basket Box die set. I added some glossy accents to the berries and once dry, I added some shine lines with a white Gelly Pen. 

On the back of the card, I added a small square of white cardstock, die cut from the Square - Crosshatch set, so the sender has a place to write a message to the recipient. 

This may be a small card, but it is full of so many details that it is sure to put a smile on anyone's face. I am so pleased with how this turned out, that Santa just makes me smile. 

Also, I made a small 5-minute video for you my Crafty friends on how I color the trees to give them dimension and details! It's my first video and I had to hold my camera with one hand while coloring with the other, so bear with me while I navigate getting use to filming! Lol. Click here to watch the video.

I hope you find it helpful. As always, thank you so much for stopping by and Happy Crafting!


Tuesday, November 8, 2022

Merry Everything! Using Karen Burniston's Explosion Pop-Up

 Hello and welcome! Do you ever find a paper pack that just makes you smile, and you come up with all kinds of different ideas on how to use it? Well, that is just what the Doodlebug Designs Winter Wonderland paper pack did for me. I absolutely fell head over heels for this cute paper design. So, todays card features the Winter Wonderland paper and Karen Burniston's Explosion Pop-Up

When I recently made a card for the Karen Burniston Design Team monthly challenge, I used patterned paper from the same paper pack. I just loved how the card turned out and especially how the snowmen in the card turned out. So, while flipping through YouTube, I found a how-to video from Karen Burniston on how to make a mini slimline card with the Explosion Pop-Up. Inspiration hit and so I headed into my office to create this card. 

I started by cutting a piece of heavy weight (110lb) smooth white cardstock 6 x 7, folding at the 3.5 mark to make a mini slimline card base. Then, using the light blue snowflake paper, cut both explosion side panels. I glued them into my card and measured the space in between the outer panels. Then, I cut a piece measuring 3 3/8 x 6 and cut the pop-up mechanism for the center of the card. Once I had the inner piece glued into the card, I cut a strip the said "let it snow" from the paper pack and glued it to the top and bottom of the inside of the card. This covers up and imperfections and adds that little extra to your card. 

Using Karen Burniston's Short Rectangles - Crosshatch dies I made the inner piece that is glued to the pop-up mechanism. I die cut the scalloped edge piece from smooth white cardstock and used the smaller crosshatch die on a dark blue patterned paper to make the background. 

I die cut the word "Merry" from white glitter cardstock and heavy weight black cardstock, using Karen Burniston's Alphabet die set. I glued the glitter piece to the black piece to give the letters some dimension and strength, then using a ruler, glued them down to the inner pop-up. I stamped the sentiment "everything" from MFT Bitty Holiday Wishes on heavy weight smooth black cardstock using VersaMark ink. Then I heat embossed it with white embossing powder. 

I die cut the snowmen from Karen Burniston's Snowman die set and added some details using Copic markers. Then using some glitter cardstock, I cut out a bunch of different snowflakes from various die sets and glued them into the card. I die cut a smaller rectangle to place on the bottom of the card so the sender could write a personal message to the recipient. 

For the front of the card, I die cut a rectangle from the Short Rectangles - Crosshatch in the largest size using the same paper from the inside of the card. I added another snowman to the front and several snowflakes. 

Using Karen Burniston's Alphabet die set again, I cut the word "Joy" out and added it to the front, once again cutting it out of black cardstock as well to give it dimension. 

From the same MFT stamp set, I stamped the sentiment "from me to you" and heat embossed it with white embossing powder. 

I am so excited for how well this card turned out. It's cute but has that WOW factor when you open to reveal the explosion pop-up. To watch Karen Burniston's YouTube on how to make the explosion pop-up in a mini slimline, click here

Thank you so much for stopping by and Happy Crafting!


Monday, November 7, 2022

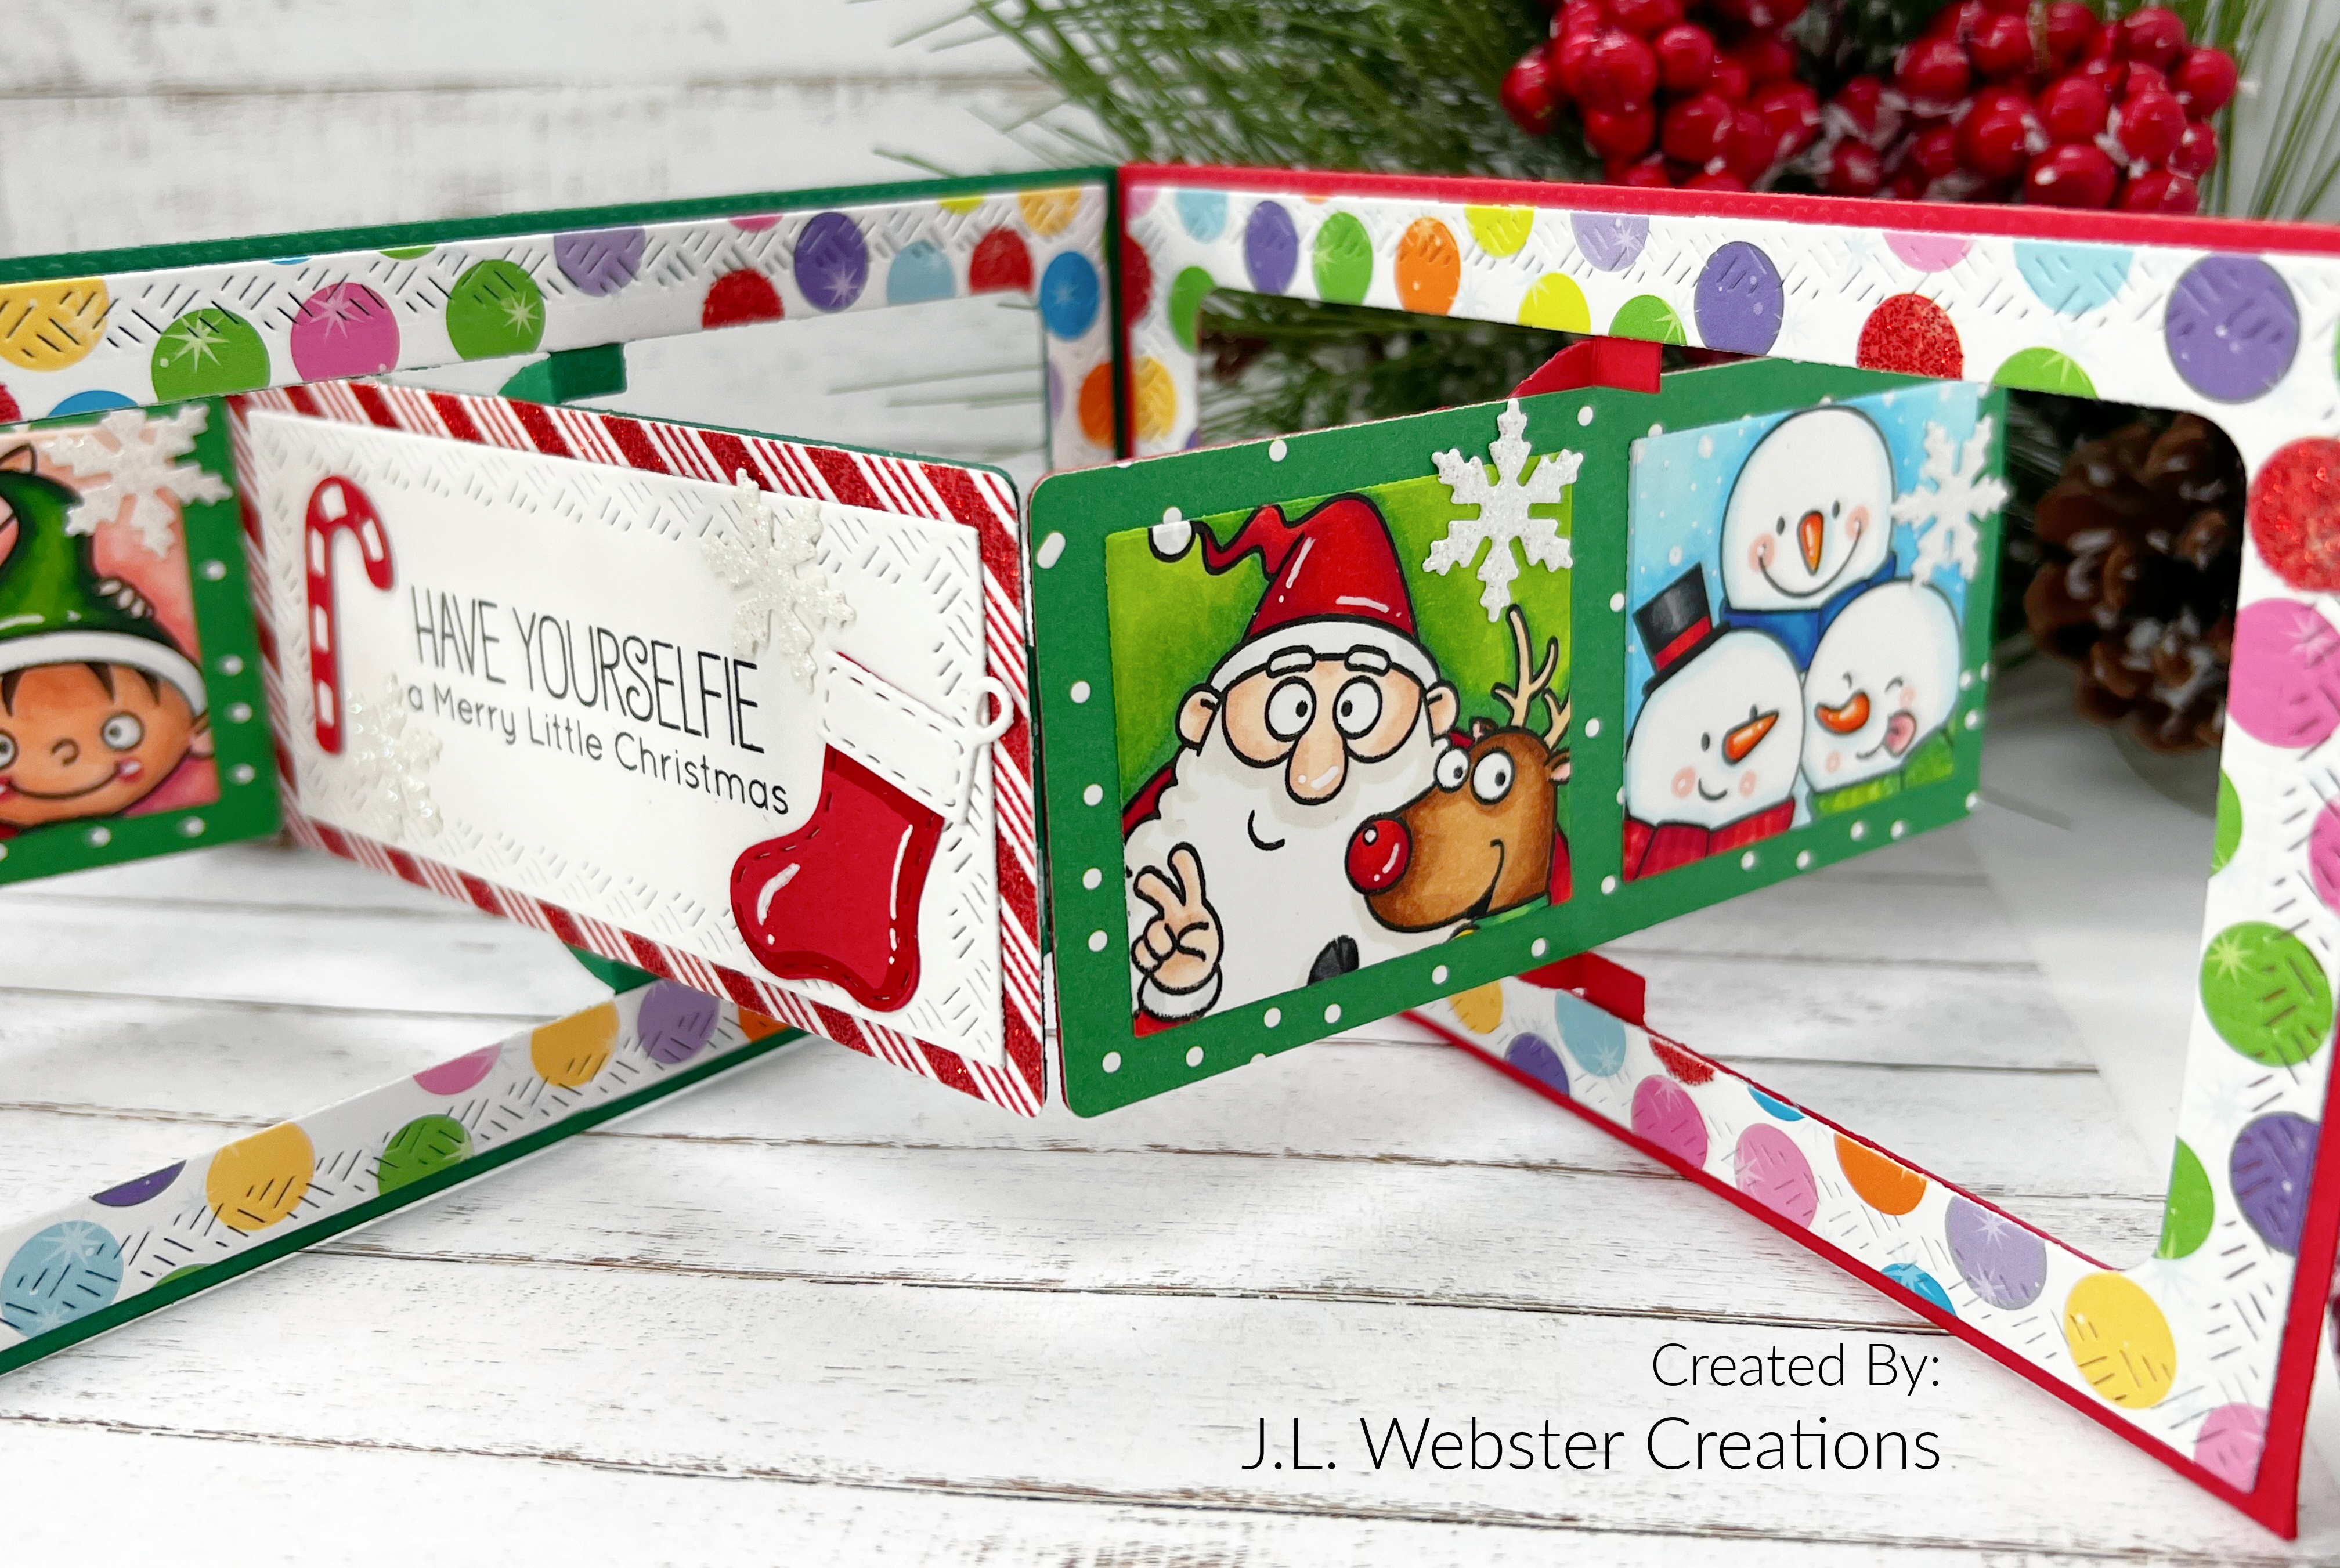
Have Yourselfie a Merry Little Christmas with Karen Burniston's Landscape Rectangle Accordion

 Hello and welcome! Today's card uses Karen Burniston's Landscape Rectangle Accordion and My Favorite Things BB Christmas sELFies

For this card, I die cut three panels from the Landscape Rectangle Accordion die set using red and green cardstock. Then, using a patterned paper, I cut three more panels. I then trimmed the middle part from each patterned paper panel, then using Karen Burniston's Short Rectangles - Crosshatch biggest die, I cut each panel out. 

I glued these to the red and green main panels. Then, I die cut three more panels using a green and white snowfall patterned paper and a red and white sparkly paper. I trimmed away the outer part of the panel and used only the inner piece to give my "selfie" pictures a background to sit on.

I stamped the images from MFT BB Christmas sELFies using Pinkfresh Studios Detail Black ink and colored them in using Copic markers. I die cut the images using one of the rectangles pieces that comes in the Landscape Rectangle Accordion and glued them to the first panel and the last panel. 

For the center panel, I die cut a small rectangle from the Short Rectangles - Crosshatch and stamped the "Have Yourselfie a Merry Little Christmas" sentiment from the stamp set using Pinkfresh Studios Detail Black ink. 

I then die cut a stocking and a candy cane from Karen Burniston's Holiday Charms die set and added them to the center panel. I also added some detail to the pieces using Copic markers and a white Gelly Pen. 

I wanted to add some snowflakes to the panels, so I die cut some snowflakes using the snowflake die that comes in Karen Burniston's Snowman die set. 

I added some more white shine lines on the "selfies" using a Gelly Pen. 

Then, using my Lineco Neutral PH glue, I glued the tabs together to create the accordion. 

I think I glued these the wrong way, so I had to make a front panel for this card. I wanted to keep it simple, since when the recipient opens this card there are so many things to look at. So, I kept the same green snowfall paper and die cut a Merry Christmas sentiment from Karen Burniston's Merry Christmas die and the shadow die that goes along with it. 

I die cut a larger snowflake from white sparkly cardstock using one of the snowflakes from the Holiday Charms die set. 

I just think these accordion cards are so neat! It's a unique way to send someone a special greeting. 

I am very excited to announce that in the New Year I will be starting a YouTube channel, so stay tuned for some fun videos on card making using all kinds of products, including coloring techniques. 

Thank you so much for stopping by and Happy Crafting!


Saturday, November 5, 2022

Celebrate the Season with Karen Burniston's Christmas Trees Pop Stand

 Hello and welcome! Today's card features Karen Burniston's Christmas Trees Pop Stand and Winter Animals dies. The Christmas Trees Pop Stand is a die set that I've had for many years, and it's sat in the back of my Karen Burniston die collection almost forgotten about, but I pulled it out to make a very cute Christmas card today. 

For this card, I wanted to include 3 trees to pop up, so I went with a 5 x 7 sized card. I also have been into the vintage look with Christmas cards and continued that with this card by adding some Distress Ink in Vintage Photo to the edges of the papers I chose. 

I die cut the trees from different green patterned papers. I die cut the big frame with the stitched look from a solid dark green cardstock. I added brown cardstock stocks to the bottom of the trees. 

I die cut the ornaments from some scrap patterned paper I had. I added a gold star to the stop of the center tree.
I die cut the word "Merry" from Karen Burniston's Merry Christmas word die twice from red cardstock and once from red glitter cardstock. Then I glued all the pieces together to give the word some dimension. 

I stamped the sentiment "Have Yourself a" and "Little Christmas" from My Favorite Things Bitty Holiday Wishes on to heavy weight black cardstock using VersaMark ink. I then heat embossed it with white embossing powder. 

I die cut a red oval using Karen Burniston's Oval - Crosshatch dies and cut an off-white oval as well to give the sender a place to write a personal sentiment.

I then wanted to add some animals to give it a forest feel. I used the Bear and Hedgehog from the Winter Animals dies and added them beside the ovals.

For the front of the card, I cut out the word Celebrate using Karen Burniston's Celebrate word die. Then stamped the sentiment "The Season" from the MFT Bitty Holiday Wishes. 

I added trees in the same patterned cardstock as the inside of the card, using the trees that are the extra pieces when you die cut the tree frame for the pop-up trees inside the card. 

I kept the front of the card simple, since all the fun part of the card is on the inside. 


I am very pleased with how this card came out. I just love the little animals; they are so darn cute! I especially love the trees! If you would like to see how to use the Christmas Trees Pop Stand die, check out Karen Burniston's instructional video on YouTube by clicking here. As always, thank you so much for stopping by and Happy Crafting!

Foxy Fall Pop-Up Card!

 Hello Crafty Friends and welcome! I have another pop-up card for you. This time, I used an old stamp set I had from My Favorite Things call...