Monday, July 22, 2024

Celebrate 70 with Honey Bee Stamps Camp Trailer Card!

 Hello Crafty Friends and welcome! First I want to apologize for not posting a single card this past week. My phone hasn't been working right and then I have been dealing with a pulled muscle in my right arm (and I'm right handed!) so it's been a rough week! But I'm back with a fun card for you today. This was a special order card that my mom wanted for my Aunt's 70th Birthday! Her and my uncle do a lot of camping so my first thought was a trailer card!


For this card, I started with a 5x7 card base, using a heavy weight black cardstock. I then cut a rectangle just slightly smaller than my 5x7 card base (4.875 x 6.875) using smooth white cardstock. I created a cloud background using MFT - Mini Clouds stencil and Simon Says Stamps Pawsitively Saturated Ink in Seafoam. I then die cut a forest background from the same smooth white cardstock using Karen Burniston's Long Nature Edges die. I colored in the grass using Simon Says Stamps Pawsitively Saturated Ink in Sprout and Fairway. Then I colored in the trees using Copic markers. 

I glued the background to the sky using Lineco Neutral pH adhesive in my fine tip bottle. I then die cut the trailer using Honey Bee Stamps Camp Trailer die and all the pieces using scrap cardstock. I used the heart stamp in Honey Bee Stamps Wild and Free stamp set to add some detail to the blue strip on my trailer. I colored in the door and frames as well as the awning using Copic markers. 

I added the banner from Honey Bee Stamps Farm Fresh Market Cart Add-On, coloring that with Copic markers and adding some Stickles Glitter Gel in Diamond to add some sparkle!

I wanted to add some chairs on my card and decided to use Spellbinders June Large Die of the Month set called Summertime Vacay. This set gives you two deck chairs (or beach chairs) which was perfect for my trailer!

Lastly, I added lots of plants and flowers using Honey Bee Stamps Market Cart and the add-ons for the Market Cart. I added the balloons using Honey Bee Stamps Balloon Numbers using smooth white cardstock and coloring them in with Copic markers. Then I added Glossy Accents to the balloons to add dimension. I also added a sentiment using Honey Bee Stamps Wild and Free stamp set with black cardstock, VersaMark ink and white embossing powder. 

This card went over really well and I am so proud at how nice it turned out. Thank you so much for stopping by today and Happy Crafting!

Supplies: For your shopping convenience, all products are linked below and in bolded text in post. Compensated affiliate links are used where possible with no extra cost to you. This helps me to continue to share all the projects I include on my blog. Please note I only use and share products I love. Thank you Crafty Friends!


Honey Bee Stamps - Honey Cuts - Steel Craft Dies - Camp Trailer CardHoney Bee Stamps - Honey Cuts - Steel Craft Dies - Balloon NumbersHoney Bee Stamps - Summer Stems Collection - Honey Cuts - Steel Craft Dies - Market Cart BuilderHoney Bee Stamps - Simply Spring Collection - Honey Cuts - Steel Craft Dies - Farmer's Market Cart Add-OnHoney Bee Stamps - Modern Spring Collection - Honey Cuts - Steel Craft Dies - Farm Fresh Market Cart Add-OnLawn Fawn - 8.5 x 11 Cardstock - Black Licorice - 10 PackScrapbook.com - Cardstock - 8.5 x 11 - Neenah Solar White - Ultra Thick - 25 PackRanger Ink - Stickles Glitter Glue - DiamondRanger Ink - Glossy Accents - Clear Dimensional Embellishment - 2 ouncesTsukineko - VersaMark Watermark Ink Stamp Pad - Large - ClearHero Arts - Embossing Powder - White

Sunday, July 14, 2024

A Veggie Happy Birthday Card!

Hello Crafty Friends and welcome! My card for you today was created for Lawn Fawn's Challenge 176 - Fun with Food. 


 For this card, I started with a slim line sized card base using Lawn Fawn's Ground Coffee cardstock. Then I cut a slightly smaller slim line rectangle from heavy weight smooth cardstock and began to stamp and mask my images. 

For the stamp sets, I used the following:

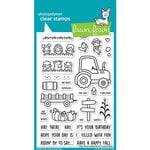
  • Hay There, Hayrides!
  • Veggie Happy 
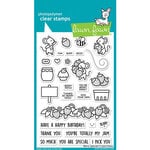
  • Coaster Critters
  • Berry Special
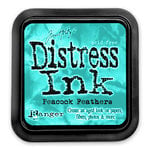
When I had everything stamped and masked, I added Simon Says Stamps Pawsitively Saturated Ink in Cappuccino and Mocha to create the ground. Then I used MFT - Mini Clouds Stencil and Distress Ink in Peacock Feathers for the cloud sky.

Once I had my background completed, I removed all the masking paper and colored in my images in using Copic markers. 

I added Glossy Accents to the tomatoes, wheelbarrows and the tracker. I also added Stickles glitter gel in Diamond to the bees wings. 

I just love making farm themed cards and the food theme was the perfect excuse to make this farmers market card! 

Thank you for stopping by today and Happy Crafting!

Supplies: For your shopping convenience, all products are linked below and in bolded text in post. Compensated affiliate links are used where possible with no extra cost to you. This helps me to continue to share all the projects I include on my blog. Please note I only use and share products I love. Thank you Crafty Friends!


Lawn Fawn - Clear Photopolymer Stamps - Hay There HayridesLawn Fawn - Clear Photopolymer Stamps - Veggie HappyLawn Fawn - Clear Photopolymer Stamps - Coaster CrittersLawn Fawn - Clear Photopolymer Stamps - Berry SpecialRanger Ink - Tim Holtz - Distress Ink Pads - Peacock FeathersRanger Ink - Glossy Accents - Clear Dimensional Embellishment - 2 ouncesRanger Ink - Stickles Glitter Glue - DiamondScrapbook.com - Cardstock - 8.5 x 11 - Neenah Solar White - Ultra Thick - 25 PackLawn Fawn - 8.5 x 11 Cardstock - Ground Coffee - 10 Pack

Thursday, July 11, 2024

Ahoy Matey! Pirate Loot Bag

 Hello Crafty Friends and welcome! Today I have a little something different for you. Instead of a card, I made a loot bag using MFT - Paper Bag Treat Box Die-namics and MFT - Party Like a Pirate stamp set. 


To start, I die cut two pieces using the paper bag treat box die, using a heavy weight smooth white cardstock. 

I then stamped my images using masking paper to cover areas so I could make a dimensional scene on each side of the bag. 


Once everything was masked, I created the beach/ocean background using Distress Oxide Ink in Salty Ocean, Chipped Sapphire and Distress Ink in Antique Linen. For the sky and clouds, I used Distress Ink in Peacock Feathers and MFT - Mini Clouds stencil. 

I then removed the masking paper, then colored the images in with Copic markers. How cool is this treat bag?! I just love how this bag could be used for any occasion and can really fit a lot of candy in it if you're making a candy bag!

Thank you so much for stopping by today and Happy Crafting!

Supplies: For your shopping convenience, all products are linked below and in bolded text in post. Compensated affiliate links are used where possible with no extra cost to you. This helps me to continue to share all the projects I include on my blog. Please note I only use and share products I love. Thank you Crafty Friends!


Ranger Ink - Tim Holtz - Distress Ink Pads - Peacock FeathersTim Holtz Distress Ink Pads - Antique LinenRanger Ink - Tim Holtz - Distress Oxides Ink Pads - Salty OceanRanger Ink - Tim Holtz - Distress Oxides Ink Pads - Chipped SapphireScrapbook.com - Cardstock - 8.5 x 11 - Neenah Solar White - Ultra Thick - 25 Pack

Tuesday, July 9, 2024

Weekly Blind Challenge - Karen Burniston's Woven Basket Box Card Pop-Up!

 Hello Crafty Friends and welcome! Every week, I try to do a "blind" card making challenge. What's that? Well, I close my eyes and randomly pick a Karen Burniston pop-up die. Then I also do the same with the animal/character dies as well. I can add any other dies I want but the two dies I pick have to be used. My picks this week were the Woven Basket Box Card Pop-Up and the Winter Animals


At first, I thought about doing a winter card, but it's so hot here in southern Ontario, Canada that I decided to do a forest themed basket. 

I started by die cutting the basket pieces from a kraft cardstock and a patterned paper from Echo Park called Let's Go Camping. I glued everything together using Lineco Neutral pH adhesive in my fine tip bottle to create my basket. Karen Burniston has wonderful assembly videos and you can see the video for the Woven Basket by clicking here. I die cut the grass pieces (which come with the Woven Basket die set) using a green cardstock I had in my scrap. I die cut three grass pieces and then glued them into my basket.

I then started to create the trees for my basket. I used the new trees in the Tree Add-On die set that just came out. This is an add-on die set for the Fancy Label Accordion die set. I also used the Spruce trees from the Evergreen Pivot Panel die set. I die cut the trees from two different green cardstocks and then used Distress Oxide Ink in Mowed Lawn and Rustic Wilderness to give the trees some dimension.

I then began to color my bears and hedgehogs! I die cut these from smooth white cardstock (heavy weight 110lb) and colored them in with Copic markers. 

Once I had all my pieces together, I began adding everything to my basket. I die cut two small ovals using the extra pieces that come with the Lorna Label die set, one in red and one in white cardstock. I used the new Birthday/Belated stamp set from Karen Burnsiton to stamp a Happy Birthday sentiment for the front of my basket. I glued the white oval on to the back for a place to sign the basket. 

I was pleasantly surprised how well this came together! Have a go at my Weekly Blind Challenge! It's fun and it gets your creative juices flowing when you're in a stump! For a full video on how I made this card, see the YouTube video below. I have all kinds of card making videos to watch, so be sure to subscribe and like my video. I appreciate it! Happy Crafting!


Supplies: For your shopping convenience, all products are linked below and in bolded text in post. Compensated affiliate links are used where possible with no extra cost to you. This helps me to continue to share all the projects I include on my blog. Please note I only use and share products I love. Thank you Crafty Friends!


Ranger Ink - Tim Holtz - Distress Oxides Ink Pads - Mowed LawnRanger Ink - Tim Holtz - Distress Oxide Ink Pads - Rustic WildernessScrapbook.com - Cardstock - 8.5 x 11 - Neenah Solar White - Ultra Thick - 25 Pack

Monday, July 8, 2024

Tickled Pink - Spellbinders Large Die of the Month Flamingo Card!

Hello Crafty Friends and welcome! I recently signed back up for the Large Die of the month club with Spellbinders. For the month of May, the large die was this fantastic Flamingo die set called Grand Tropical Flamingos!. This die set comes with two flamingos, lots of tropical looking leaves and plants and flowers! 


 For this card, I started with an A2 sized card base, using a heavy weight black cardstock. Then I die cut a rectangle from a light blue cardstock and ran it through an old Anna Griffin embossing folder. 

I die cut all the pieces from the Flamingo die set using a heavy weight (110lb) smooth white cardstock. I colored all the images in using Copic markers. 

I positioned all my die cuts on to my card background, then I used a piece of press and seal plastic wrap to keep everything together so I could glue it in the exact position I wanted them. This is a great technique I learned from Jennifer McGuire. She had a YouTube video showing how to do this and let me tell you! It's a great idea!!!

Once I had everything glued down, I added Stickles glitter gel to the petals of my flower and Glossy Accents to the beaks of my flamingos. 

I stamped the sentiment using Avery Elle's Tickled Pink stamp set. I stamped this using VersaMark ink on to black cardstock and then embossed it with white embossing powder. 

I just love these two flamingos!!! They are so pretty. They are made even better with all the foliage that comes with them! Thank you so much for stopping by today and Happy Crafting!

Supplies: For your shopping convenience, all products are linked below and in bolded text in post. Compensated affiliate links are used where possible with no extra cost to you. This helps me to continue to share all the projects I include on my blog. Please note I only use and share products I love. Thank you Crafty Friends!


Lawn Fawn - 8.5 x 11 Cardstock - Black Licorice - 10 PackScrapbook.com - Cardstock - 8.5 x 11 - Neenah Solar White - Ultra Thick - 25 PackRanger Ink - Stickles Glitter Glue - DiamondRanger Ink - Glossy Accents - Clear Dimensional Embellishment - 2 ounces

Wednesday, July 3, 2024

Build a Barn Birthday Card!

Hello Crafty Friends and welcome! Do you ever buy a die or stamp and then forget you have it? Lol, that is exactly what I did with Lawn Fawn's Build a Barn die set. So as I was flipping through my dies and seen it, I knew that was what I was going to use to make my card for you today. 


For this card, I started with an A2 sized card base using a black heavy weight cardstock. Then I die cut a rectangle just slightly smaller than my card base from smooth white cardstock and MFT - A2 Stitched Rectangle STAX dies in the largest size. 

I used Simon Says Stamps Pawsitively Saturated Ink in Seafoam and Surf to create the cloud background. I used MFT - Mini Clouds stencil for this. 

I die cut a rectangle the same size as my background using a bright green cardstock and then using MFT - Slimline Grassy Hills die, created a grass background. 

I die cut the pieces for my barn and glued them all together. Then I added wood panels using a white pencil crayon and a white Jelly Pen. I also die cut the fence using Lawn Fawn's Farm Fence Border. 

I stamped my little barn animals using Lawn Fawn's Simply Celebrate More Critters. I stamped the speech bubble border and used stamps from the Simply Celebrate More Critters and All the Speech Bubbles stamp sets. 

Lastly, I stamped the sentiment on the top using Lawn Fawn's Hay There, Hayrides! stamp set. 

I added some details to the grass using my YG25 Copic marker (Celadon Green). 

I just love the little critters in this stamp set! Thank you so much for stopping by today and Happy Crafting!!

Supplies: For your shopping convenience, all products are linked below and in bolded text in post. Compensated affiliate links are used where possible with no extra cost to you. This helps me to continue to share all the projects I include on my blog. Please note I only use and share products I love. Thank you Crafty Friends!


Lawn Fawn - Lawn Cuts - Dies - Build-A-BarnLawn Fawn - Clear Photopolymer Stamps - All The Speech BubblesLawn Fawn - Clear Photopolymer Stamps - Hay There HayridesLawn Fawn - Clear Photopolymer Stamps - Simply Celebrate More Critters

Lawn Fawn - Lawn Cuts - Dies - Simply Celebrate More CrittersLawn Fawn - Lawn Cuts - Dies - Little Farm Fence BorderLawn Fawn - 8.5 x 11 Cardstock - Black Licorice - 10 PackScrapbook.com - Cardstock - 8.5 x 11 - Neenah Solar White - Ultra Thick - 25 Pack

Tuesday, July 2, 2024

Karen Burniston Designer Challenge - July 2024 - Set Sail!!

 Hello Crafty Friends and welcome! It's Designer Challenge time and our theme for July 2024 is Set Sail! We were challenged to use the new Boat Pop-Up and its add-ons to create a card of any theme. For my card, I created a lighthouse scene!


For this card, I started with a 5.5 x 5.5 sized card base using a dark blue cardstock. I then cut two squares just slightly smaller (5 3/8 x 5 3/8) from a wavey blue patterned paper.

I started by making the light house. For this, I used the Topper Tags in the smallest size for the base of the light house. Then I added a small rectangle using the smallest rectangle in the Rectangles and Labels - Crosshatch die set. I added a railing using the railing from the Pirate Ship Add-On. For the window/light area, I die cut the smallest square in the Square - Crosshatch die set and trimmed it down, then drew on the windows. For the top of the light house, it's the top of the topper tag I used for the bottom just trimmed smaller and then I added a small square piece. The tiny ball on the top is from the die that to you slip the oar into in the Boat Pop-Up. For the door and window in black, I used the Mushroom Tiny House Add-On and the Church/School Tiny House Add-On.

I die cut most of this from smooth white cardstock then colored it in with Copic markers. I used a size 10 white Gelly Pen to add some shine lines to my light house. 

Once I had my light house complete, I made a small bam box using the Small Scenes Bam Box Pop-Up and black cardstock. I glued this to the back of the light house and set it aside. 

I then started working my my sail boat. I used patterned paper I had for the boat and floor. Then I die the sails and all the accessories for the sail boat from white cardstock or scrap cardstock I had in my stash. I colored the sails in with Copic markers. 


I took two pieces of scrap grey cardstock I had on hand and tore it to make rock areas for the inside of my card. One, I glued into the top left hand corner. The other, I stamped a sentiment using the new Sail Away sentiment stamp with VersaMark Ink and white embossing powder. Then I glued that piece into the bottom right corner of my card. 

I added my boat and my light house, making sure that it didn't go over the edge of my card. Lastly, I die cut four fish from the Camping Charms and colored them in with Copic markers. Once I glued them into the card, I added Glossy Accents to them for extra dimension.

For the front of the card, I just created a fun paper square area using different kinds of sailing paper. 

Then I stamped a sentiment on the front square using the Sail Away stamp set. 

I really love the new Sail Boat Pop-Up! You can make any kind of boat you want and the add-ons are amazing!!!

Thank you so much for stopping by today. If you would like to see how to make the light house, let me know by commenting below and I will make a YouTube video. Happy Crafting!!


Supplies: For your shopping convenience, all products are linked below and in bolded text in post. Compensated affiliate links are used where possible with no extra cost to you. This helps me to continue to share all the projects I include on my blog. Please note I only use and share products I love. Thank you Crafty Friends!


Ranger Ink - Glossy Accents - Clear Dimensional Embellishment - 2 ouncesTsukineko - VersaMark Watermark Ink Stamp Pad - Large - Clear

Monday, July 1, 2024

Karen Burniston June 2024 New Release - Blog Hop Day!

Hi Crafty Friends,

Welcome to our Karen Burniston Products - KB Riley LLC June 2024 Release Blog Hop. The Design Team have come together with Karen today for a fun blog hop to celebrate the release of 12 new dies and 5 new stamp sets. Sneak peeks of the new release started last week, and the dies are available to order NOW!


This release includes:
  • 2 new Pop-up Die Sets
  • 2 new Pop-up Add-ons Die Sets
  • 2 new Lorna Add-ons Die Sets
  • 1 new Fancy Label Add-on Die Set
  • 1 new Fancy Label Frame Die Set
  • 2 new Border Die Sets
  • 1 new Sentiment Shadow Die Set
  • 1 new Charm Set Die Set
  • 5 new Clear Sentiment Stamp Sets
Dies are available to order now on the website.
GIVEAWAY:
To celebrate the release Karen Burniston and each of the Karen Burniston - KB Riley LLC Design Team members will be giving away a $25 Gift Certificate to some lucky person who comments on our blog posts, so make sure you join the hop and comment on everyone's blog post. Winners will be randomly chosen from ALL of the blog hop comments received on our blog posts by Monday, 8th July 2024. Lots of chances to win some goodies, so just leave a comment on this post or any other blog hop posts to enter! Don't forget to leave some way for us to contact you, in case you are a lucky winner!
For my Blog Hop Card, I created a Pirate themed card!!!

For this card, I needed to create a custom sized background, since I wanted to add two different pop-up areas. The dimensions of this card are 5x7 in the centre, then each side panel is 3 1/8 x 5. I added a 1/2inch tab on each side to add it to the centre panel. 
Once I had my card base created, I began to create the background. Using smooth white cardstock, I created the beach and water areas. I used Distress Oxide Ink in Tumbled Glass, Mermaid Lagoon and Chipped Sapphire. Then for the beach I used Distress Ink in Vintage Photo and Antique Linen. I added splatters of Distress Spray to create the beach details. 
For the Pirate Hut, I used the Tiny House Pop-Up to create the base. With a pencil, I drew wood panels, then colored them in with Copic markers. I used pencil crayons to add more detail to the wood panels, such as dirt, and green like the cabin was mouldy. 
I added a thatched roof from the Beach Bar Tiny House Add-On using a dark brown cardstock. I also used the door and wood pieces from the Haunted Tiny House Add-On to make it look like an abandoned Pirate Hut. 
Lastly, I added the skull and bones from the new Pirate Borders and Pirate Ship Add-On. I then created the back piece with the palm trees and treasure chest. I used the Small Scenes Bam Box Pop-Up to die cut the beach hill. Then used the palm trees from the Palm Tree Pop-Up and the Beach Bar Tiny House Pop-Up. I cut them from smooth white cardstock and colored them in using Copic markers. Then I die cut the treasure chest from the Pirate Borders, adding some of the jewellery. Then I glued it to the back of the house, making sure that it would close and that it would stay in the card.
For the pirate ship, I wanted it to look like the Jolly Roger, so I used a dark brown ship base and added a red trim. I added gold cardstock for the port holes, adding black on top of each port hole. 
Then I created the different pirate flags, using some scrap cardstock I have in my stash. 
I added some detail to the boat using a pencil crayon, so it would look like wood paneling. 
I added some waves to the bottom of the boat, die cutting it from a light blue cardstock. 

I added some dolphins from the Sail Away Borders, then used the crab and turtle from the Sea Animals to add some characters to my card. 
I stamped the two sentiments on to the card using the new Pirate Sentiments stamp set. Lastly, I added a place to sign the card, using the extra labels that come with the Lorna Label die set. 

For the front of the card, I added more Pirate Borders, along with the sentiment "Yo Ho Ho" using the Alphabet dies and gold and black cardstock. 
Thank you so much for joining in on our Blog Hop! Be sure to keep going by visiting the next blog in our hop using the list below. Be sure to leave a comment with your name and email address. The names of the winners will be picked and listed the following week. Happy Crafting!!

Jennifer Webster - you are here!

Trick or Treat Candy Bucket Card

 Hello Crafty Friends and welcome! My card today features some amazing dies from Sassy Club Stamps. Do you remember those buckets you use to...